Triskaidekaphilia
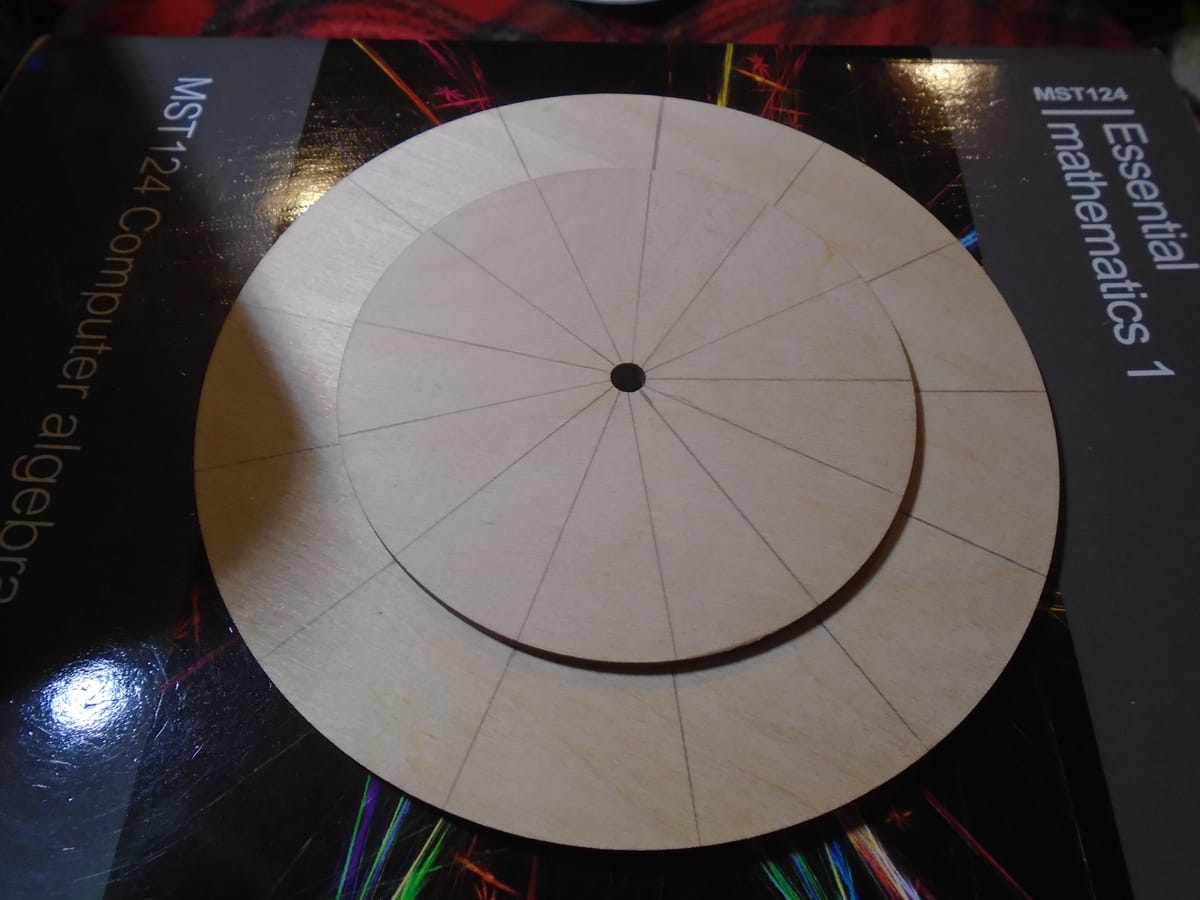
You recall Mr Wooster's code wheel from an earlier post? While I was very happy with the principle of the thing, it really wasn't as elegant as I'd have liked. It was, after all, only cardboard, fettled up with a bit of lightweight air-drying clay to give it a proper edge. And so I had it in mind for a long time to make a better version. I can't recall exactly where I picked up the two plywood discs you see in the feature photo, but I do know that I bought them with this specific purpose in mind.
But there were a lot of things to do - there are always a lot of things to do - and dividing circles into thirteenths wasn't high on my priority list. The first time I did it, it was a combination of fairly precise maths and brute force. If you know the radius of the circle you're working with, then it is a straightforward but nonetheless rather tedious matter to calculate the exact length of one of the sides of a 13-gon inscribed in it (or, if you prefer, a tridecagon, but once you get past ten I think just using a number is easier). Having calculated that length, you draw a line as close to it as you can manage, set your compass points to the ends, and then step it out along the circumference of your circle. It won't be quite accurate, because it never is; you'll end up with the last side either too short or too long. Adjust slightly in the appropriate direction. Rinse and repeat. You will probably need to draw several circles.
Well, that works well enough for the purpose, but it's neither elegant nor fun. So, when I found those discs again (for some reason they were in the kitchen; it is truly amazing what ends up in my kitchen), I wondered if there might be a better way to do it; and it turns out that there is. In fact, there are several, but I rejected the first construction technique because I have no idea what "neusis" is and I didn't really have time to find out. (I may later.) The second one looked a little bit too rough and ready; but with the third method I knew I'd struck gold. It's still an approximate method - there is no precise method for constructing a 13-gon using a straight edge and compasses - but it is a very good approximation indeed. It's accurate to something like 15 decimal places... at least, it is if you do it on a computer; I wasn't going to get that level of accuracy doing it by hand, but I was pretty certain that, if I was very careful, I could at least get a much better approximation than the maths-and-muddle method I'd used before.
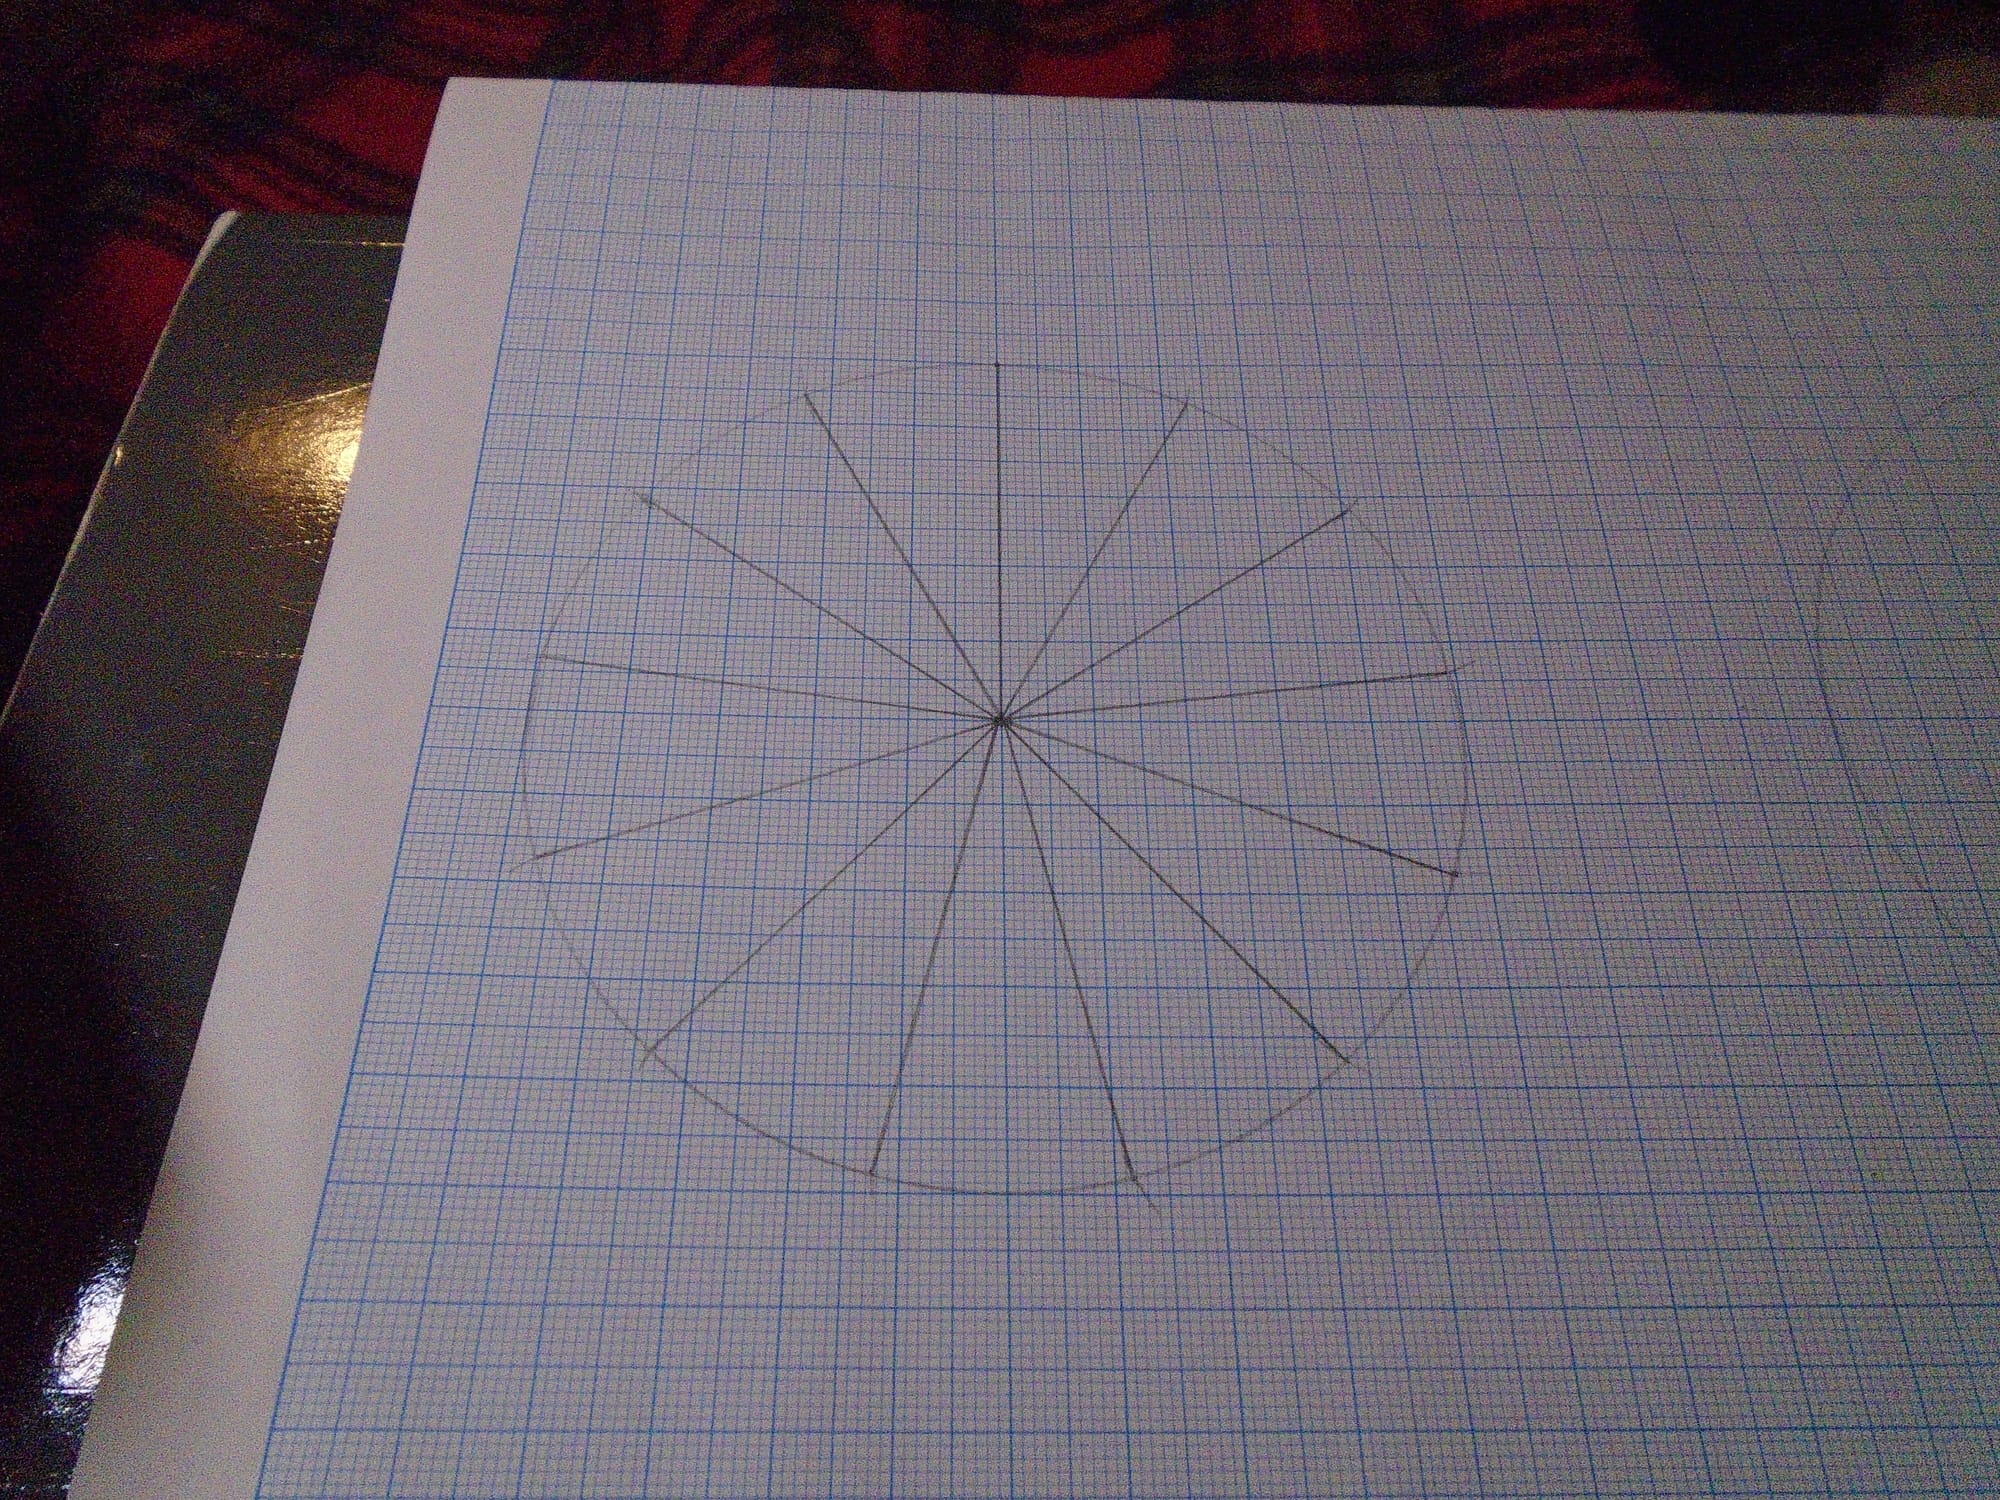
And, besides, I could cheat a little by using graph paper, like this:
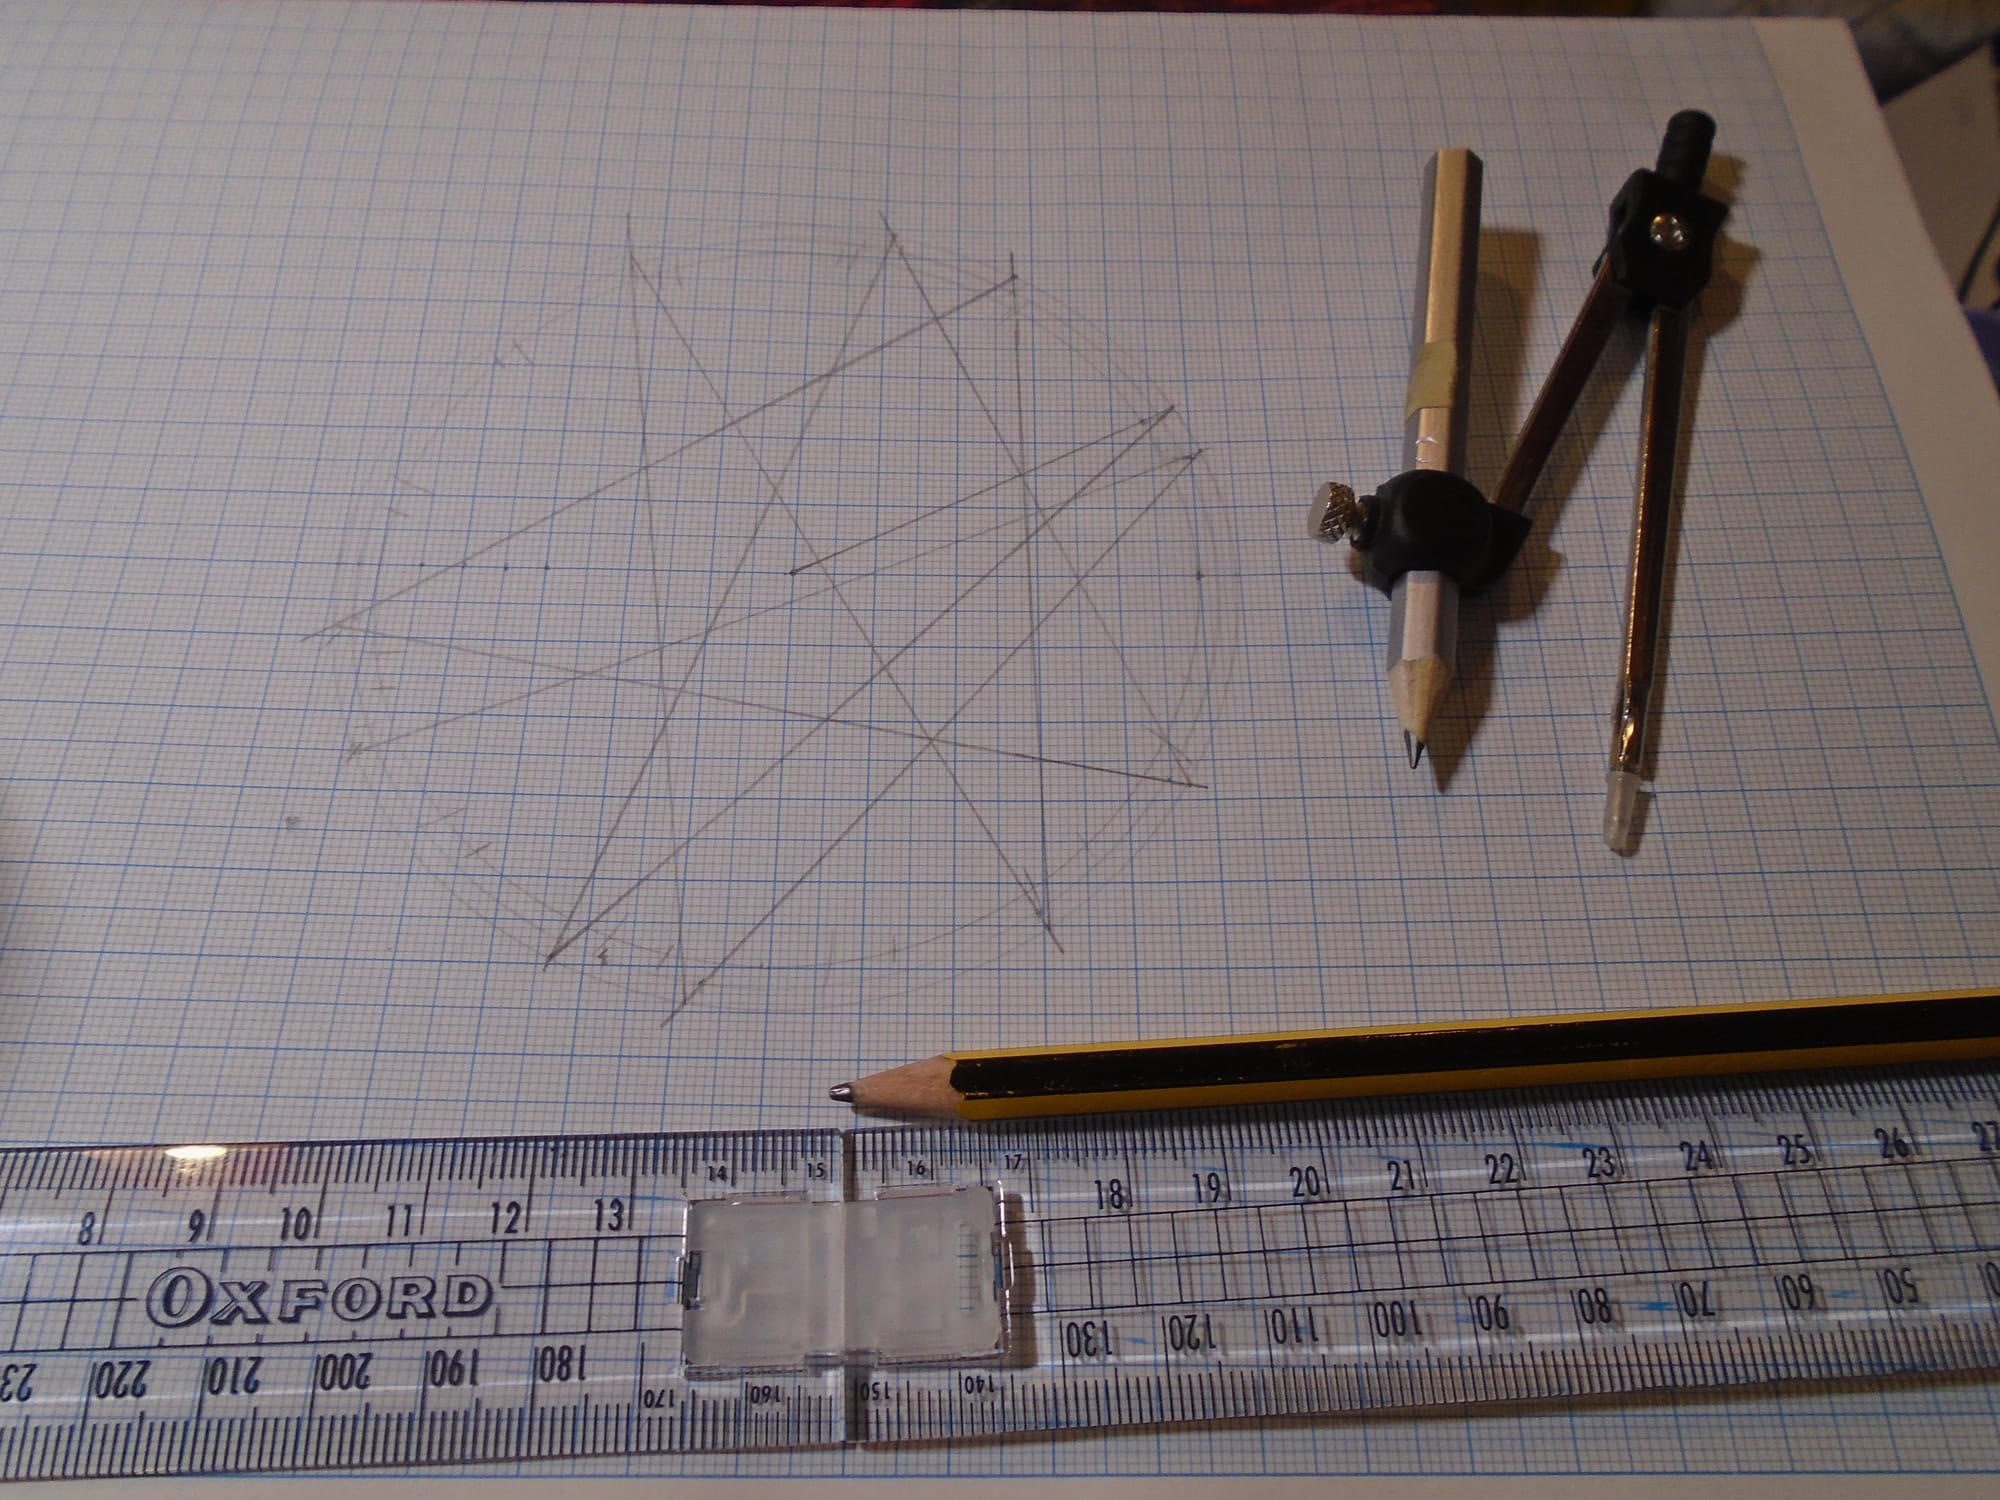
The reason for using graph paper is that all those little points in a horizontal line on the left-hand side of the figure are used for marking off the distances of the other points, so it really pays to get the distances between them as accurate as you can. The graph paper already has that accuracy built in. In the Wikipedia animation, all the points are labelled for clarity, but I haven't done that because the labels are inclined to get in the way and clutter up the figure (there are lots of them). I could easily work out which point was which from the position. I am actually quite amazed at how anyone worked this all out in the first place; it's one thing to devise a completely accurate method of drawing a figure, if one exists, but it's quite another to be able to devise an approximation that's this good. And it's not even as if it follows some obvious pattern. I am very impressed.
And then it came to the bit where I had my length and needed to mark it off round the circumference, and unbeknown to me the point of the compasses slipped a little, so my line was a tiny bit too long. The construction had actually worked superbly! So my first 13-gon had one short side, which was the point where I realised that the length I'd constructed was fine, but I just hadn't quite marked it off correctly. I did it again. Spot on, within the usual limits of accuracy when doing this kind of thing (I've honestly marked out hexagons that have ended up less accurate). So I transferred the length over to another circle the same size, for clarity, and got this:
And that was when I realised that I hadn't measured the smaller disc and it was, in fact, exactly 10 cm in diameter. Not a problem. I just extended the lines on the drawing above and positioned that wonderfully convenient centre hole above the centre of the drawing, so that it was easy to transfer the lines to the disc; then I used the smaller disc to make guide marks on the larger disc, and ruled all those up, using the drawing to help with the accuracy.
So now all I need to do is the painting, and then find something to fasten the two discs together in the centre. I'm pretty sure I have some paper fasteners somewhere, but I don't know if the heads on them are large enough to cope with the holes in the discs; if not, I do have beechwood dowelling, and something can certainly be done with that and, perhaps, a couple of large metal washers.
I'm keeping the drawing. There's a good reason for that. While one code wheel is useful if all you want to do is baffle posterity, you can't actually send coded messages unless you have another code wheel, which you bestow on the recipient of said messages. I mean, yes, absolutely, you can sign up for an e-mail account with Tuta and they'll do all the encryption for you, no code wheel required; but, sometimes, playing with codes the hard way is kind of fun.
Ah, Mr Wooster. Are you by any chance my alter ego?