Top-ology
Right now I'm in the middle of making my first Verdun woven T-shirt. There will be more to come; it's actually a nice pattern now I've tweaked it to suit.
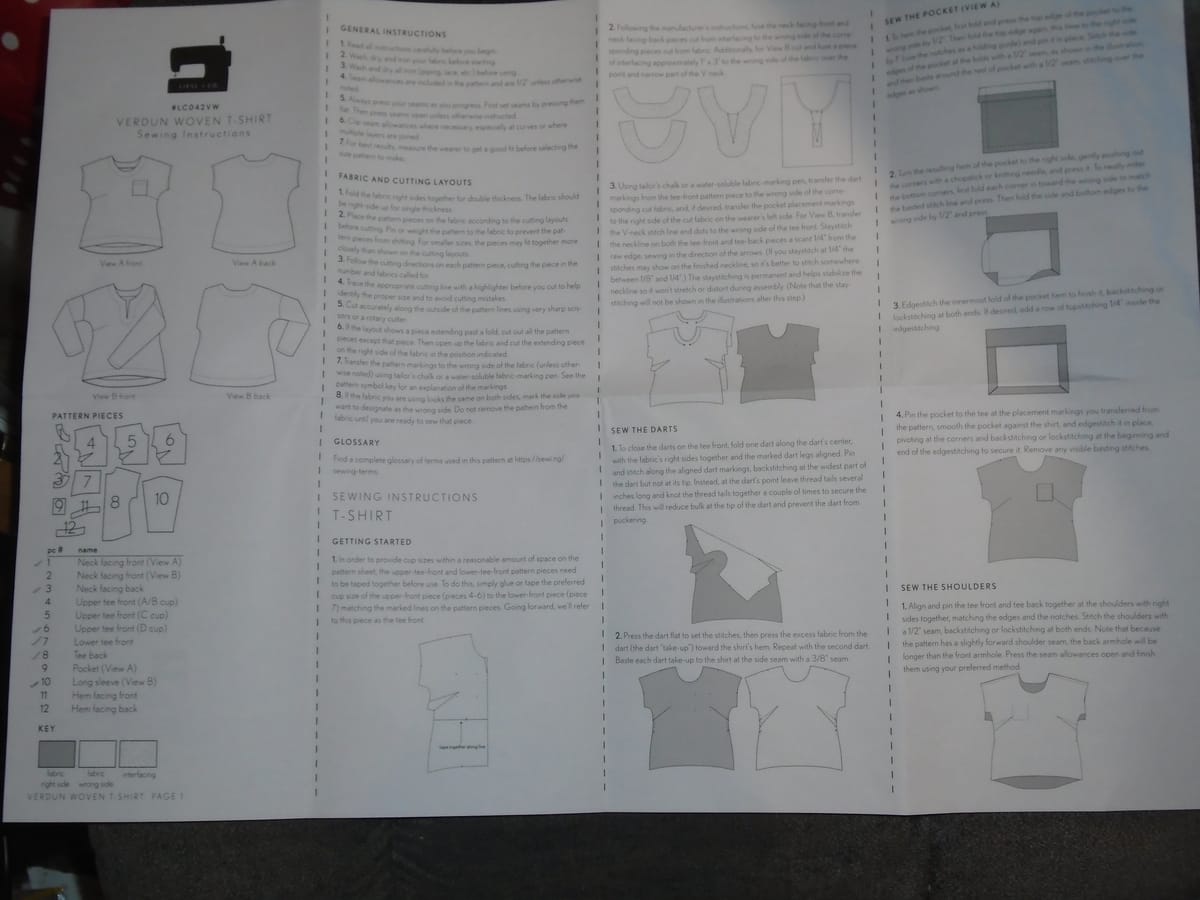
As I mentioned previously, it is American, and it is all in inches, which is a bit of a problem because I don't own any inches (other than a few on my little sewing gauge, but those aren't much use for body measurements); fortunately I do own a calculator, and I'm also pretty good at near-enough mental conversions on the fly. So I decided I was going to need the Large size in the D cup (my bra size is larger than that, but actually the cups on this pattern are pretty generous compared to those on bras, so I think you could get away with the D cup if you were anything up to about an F or maybe even G). And, having decided that, the first thing I had to do was get out the pattern pieces and muck about with them.
To save paper, they've done a very sensible thing: they have split the front piece in two just below the bust. There is a single lower piece, plus a choice of three upper pieces in cup sizes A/B, C, and D, and what you do is you pick the upper piece you need and then tape it to the lower piece. So I did that, and then the next thing I needed to do was alter the hemline. The top, as it stands, has a shaped hemline - it's longer at the back than the front - and I didn't want that. Mostly I want to wear it tucked into the matching skirt anyway, but it is just possible I might wear it untucked with trousers, and this may sound a bit strange but I'd actually be embarrassed to go around with a shaped hemline. I think it looks weird, and not in a good way. So I straightened it out in the simplest possible way, which was to take the length at the sides as being standard and just draw a straight line across between the ends of the two sides. That meant I had to tape a little extra pattern paper to the front. That wasn't a problem, as there's a reasonable amount spare.
Of all the independent patterns I've tried, this one is closest in general look and feel to a Big 4 pattern, but it is slightly better quality. The envelope is a bit more generously sized than you get with Big 4, so you don't have to wedge the pattern pieces back into it once you've cut them out, and it's made from better quality paper so you aren't going to get that thing where it tears at the top. The instructions are a broadsheet rather than the booklet you normally get with independent patterns, but it's a better broadsheet than the Big 4 will give you; it is, again, printed on decent paper, for a start. The instructions are clear and there's more text, so it would be very easy for a beginner to follow; they manage to get all this on a smaller broadsheet than the Big 4 use by dint of making the illustrations smaller without sacrificing any of the information.
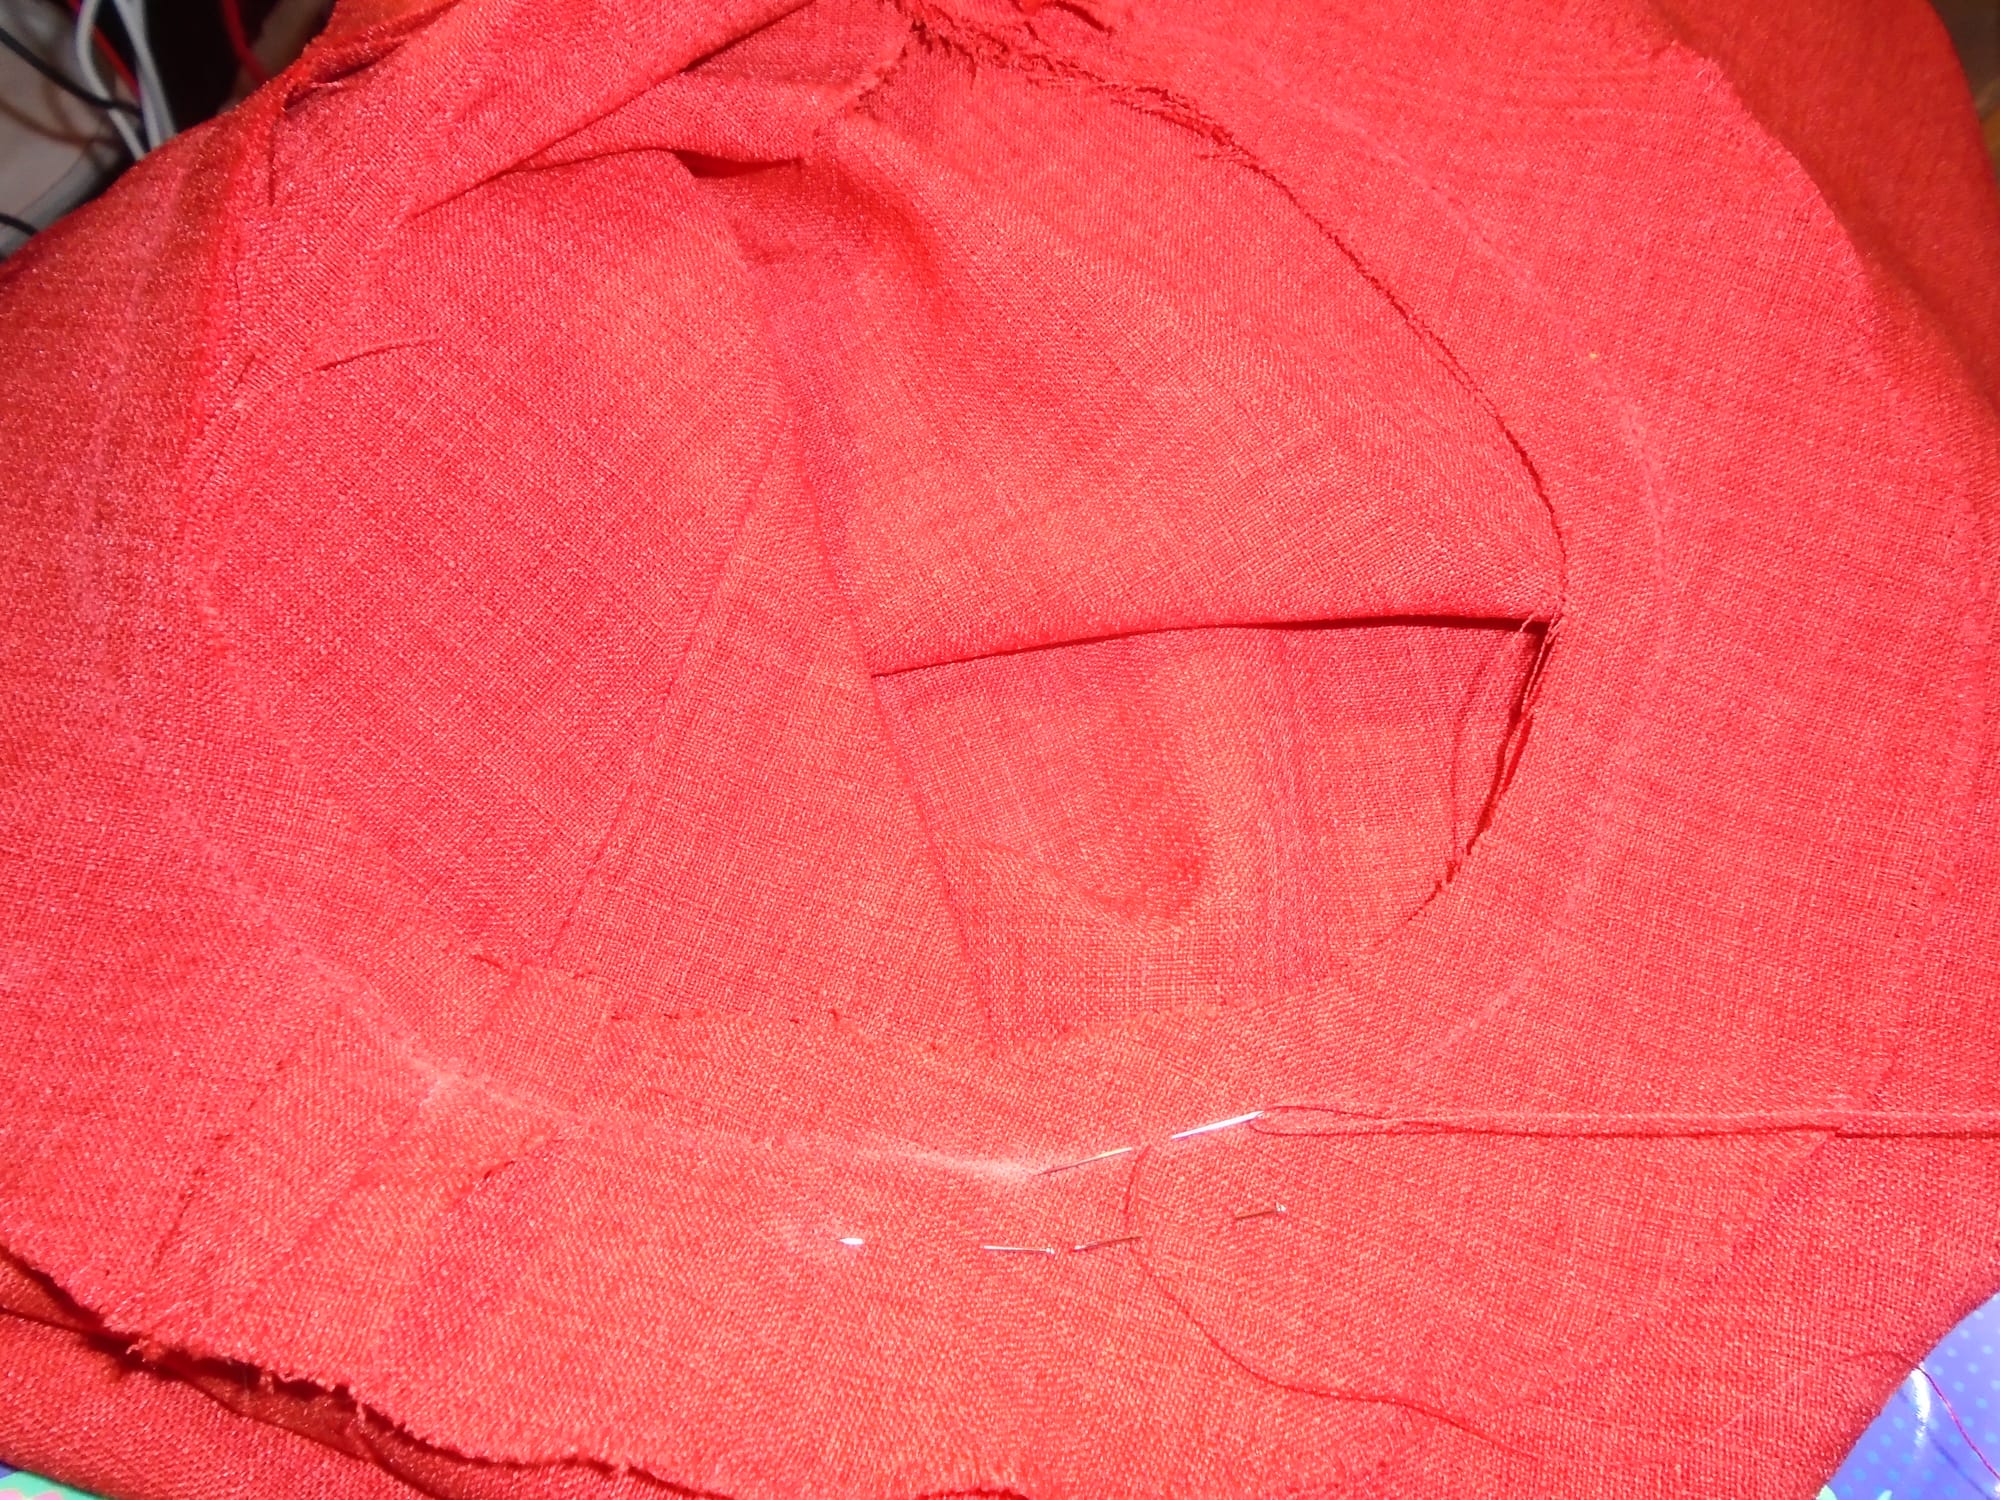
I am using a lovely flame red deadstock linen-look polyester fabric, from which I've already made the matching skirt (you know how much I like deadstock; in fact I also bought the emerald green, in the end, because I had to put in an emergency fabric order on Friday due to the fact that my white dupatta had got caught in the rear wheel of my scooter and ripped to shreds, so I needed a fast replacement to avoid getting sunburn. And I'd been dithering about getting the emerald green anyway, so I put some on the order to make it up to free postage.) This fabric sews like a dream, but both its greatest advantage and its greatest disadvantage are that it simply will not take a crease. Great if you can't iron things easily, but a bit of a nuisance when making up a garment. And it also frays like stink. On the skirt it didn't matter too much as I could just blanket-stitch the seam allowances together, but that would be noticeable on the top, so I am finishing the seams on that the tedious way - blanket-stitch and then catch down to the fabric like a hem. The results look amazing but it is very time-consuming.
Anyway. So on Sunday I wasn't feeling too great (bad night due to the heat, plus Sibyl doing things I'd rather she hadn't been doing), and so I had plenty of time in which to cut out this top. I did the usual thing - took it nice and slowly, in several short stints. And I was just cutting out the last piece when I thought... wait a moment. I'm cutting out the wrong size here.
In fact, no. I was cutting out the right size. My hands knew exactly what they were doing! It occurred to me a little later that my going-out bras were getting uncomfortable (the ones I wear in the house are still fine, but they're non-wired and tend to grow with me - same goes for my nighties, which are cup-sized and quite wonderful), so I had better re-measure. And, yes, I am suddenly larger than I thought I was. The size I thought I needed to cut out would have been wearable, just, but there would have been practically no ease around the bosom. Whoops. (So I had to have a little chat yesterday afternoon with Bravissimo to find out what size I am now; they had a fire in their warehouse and aren't able to fulfil online orders at the moment, and I can't easily get to one of their shops, but fortunately they think they should be able to re-open online orders early next month. Thankfully I can wait that long, since I do still have stuff that fits, even if it's had to stretch to do so.)
The making up is straightforward. You sew the front darts first, and that's extremely easy to do because they have a notch at the end of each stitching line, so it is really simple to line them up; I don't really like doing tailor tacks, and darts normally need several, but these needed only one at the dart point. I've never seen a pattern with a notch like that before, and now I'm wondering why on earth not, because it's such a sensible idea. Then you do the shoulder seams, and then the neck facing. The pattern tells you to serge/overlock the lower edge of that, so I am, of course, blanket-stitching it; on a thinner and less bouncy fabric I'd turn it under, as there is room to do that, but not with this stuff. The pattern has a line of topstitching around the lower edge of the facing, but I'll be catching it down like the seam allowances, as that doesn't show at all with this fabric. Again, for a different type of fabric I probably would topstitch. (And I was attending a webinar while I was sewing this on, so I didn't realise till it was too late that I'd sewn it on the wrong way; however, since there's no difference between the front and the back of the fabric, all I need to do is make shoulder pieces to cover the exposed shoulder seams and make it look like a feature rather than a bug fix.)
Once that's done, you sew the sleeves in place (if you're doing long sleeves, which I am) and then sew the side and sleeve seams together, like a shirt; I much prefer this kind of construction to setting in the sleeves after the side seams are sewn up. After that, it's just finishing. The original version has hemline facings, which obviously I don't need - I can just hem it.
So that's the Verdun: a simple top which I think is going to turn out to be just as versatile as my beloved Southbank Sweater. There may be a lot of them!