The joy of socks (part 2)
Yesterday lunchtime I got my friend to draw round my foot, and the adventure began in earnest.
She has a degree in engineering, so I was expecting precision; I didn't entirely get it. She got a pretty decent outline (except I noticed on the inside of the foot she sloped the pen inwards a little, but that doesn't matter, because you knit the sock to fit the widest part of your cardboard foot), but she rather mucked up the position of my ankle bone. I looked at the outline and said nothing, but when I got home I did the little mathematical check that is very helpfully given in the instructions. It's very simple and it's surprisingly accurate; you just take three measurements, add them together, and multiply by a small number (less than 1, that is to say). This will give you the distance from the back of the heel that the ankle bone line ought to be drawn. My friend was more than a centimetre out, and that does make quite a difference with socks.
So, once I'd got the correct ankle bone line in place, I cut the thing out and pulled up all my old sock-knitting PDFs. The first one I looked at, obviously, was the one for Judy's Magic Cast-On, because to start a pair of socks, you naturally have to cast on... right?
Right. Except I realised I'd forgotten what I had to do before that, which was to work out how many stitches I needed. Previously I was using the same number as my sister, because we have fairly similarly sized feet (except she has one foot a size larger than the other, and I'm somewhere in between the two). But I couldn't remember how many that was, and I wasn't going to ring my sister just to ask, because she was probably off sorting out Mum's medication or something of the kind.
I looked at some of the other PDFs. Let's see. Here's a sock pattern, clearly an indie... h'mm, also probably American, because it's in inches, and none of the inch measurements it gives actually applies to my feet. That's no help. Another sock pattern... oh, an odd number of stitches? Bizarre. (That was probably something to do with the technique it used for increasing, which wasn't the same as I was planning to use.)
And then I found Hypercycloid's Toe-Up Sock Recipe. That sounded more promising. Hypercycloid is another American, so she too works in inches, but because her formula involves doing a division it doesn't matter what units you use, just so long as you're consistent. So I measured the circumference of the widest part of my foot in cm, divided by 10 to get a 10-cm unit, and put the stocking stitch tension I'd already worked out into her formula (that being over 10 cm). That came out at precisely 44 stitches, which was very convenient, and she then gave another multiplier to get the number of stitches to cast on. Bingo! 16 (appropriately rounded, of course).
So I duly cast on 16 stitches using Judy's Magic Cast-On, then did the same for the other sock (because I'm doing both at once), and then blithely started increasing. I'd got to about 12 or 14 on each side when I began to get a little concerned. Hypercycloid said I needed 44 stitches altogether, or 22 on each side. But I measured the line on the foot template where the toe box was supposed to finish (just above the top of the little toe), and that was only about 8 cm. Fish Lips Kiss Heel lady (Patty-Joy White) says this is the zero-ease point; you have negative ease over most of the sock so you get a good fit and nothing's saggy, and you might possibly have a little bit of positive ease in the toe box depending on the exact shape of your foot and how the increases go, but I realised that with a tension of 22.22 stitches to 10 cm, 44 stitches at that point were going to be a bit loose. (You want zero ease on the template at the base of the toe box. Having said that, it's actually quite hard to determine if you're knitting magic-loop, as I am, because of the space between the needles, so you do need to allow a little more than you think because the sides will pull together.) I reckoned I'd probably want 40 or even maybe 36.
I got to 36, and this was clearly going to be far too small. At this point I started getting a little puzzled. The sock seemed a lot narrower than it ought to be, given the tension I'd worked out. So I remeasured.
The stocking stitch tension was now 29.26 to 10 cm. Clearly, knitting socks is a lot different from knitting a flat swatch. (It is, however, also a lot closer to what I'd have expected in the first place.)
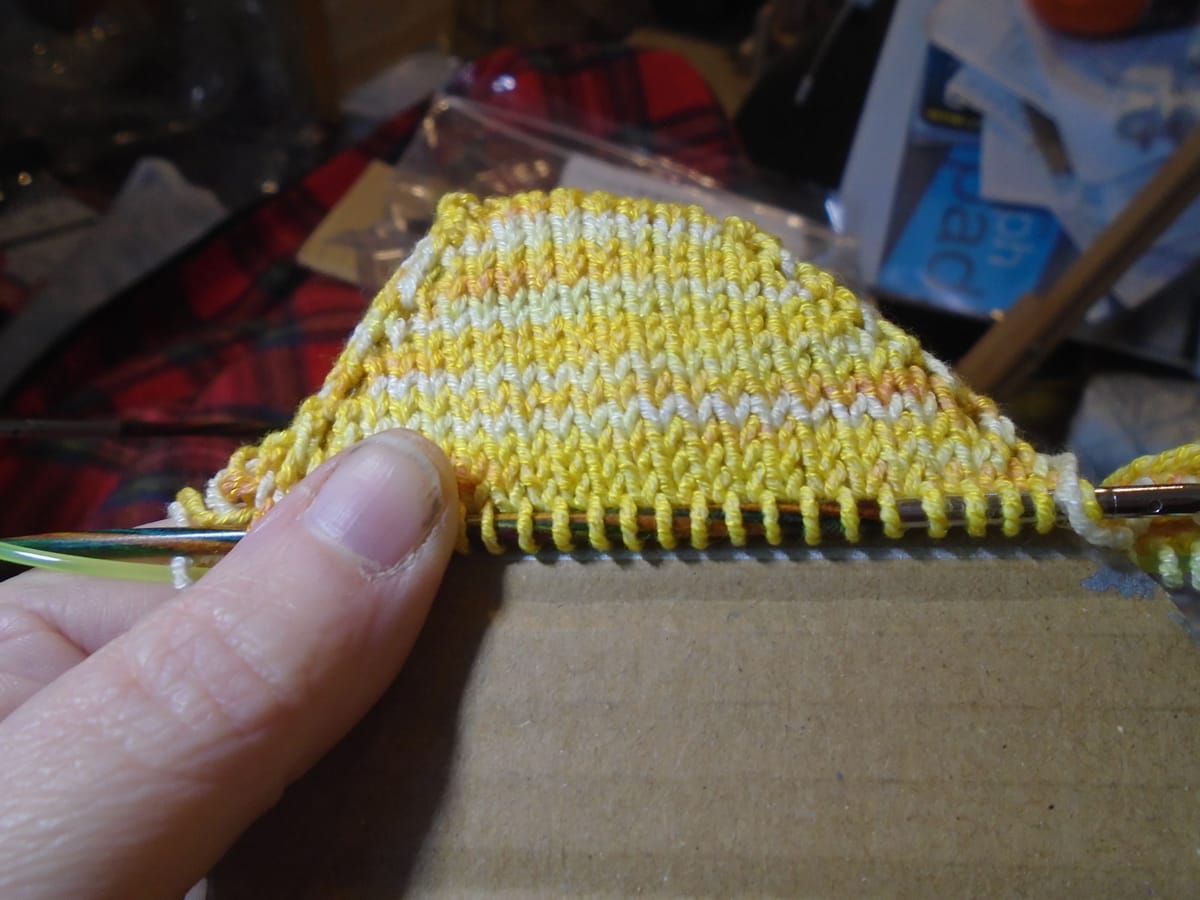
I took it up to 48; and, as you see from the photo, the toe box perfectly fits the area allocated to it on the template, a great deal more by good luck than good management. I shall have to do some increases on the top of the sock for the cables, and I think I'll also need to add a few on the bottom, because there's that inevitable gap between the needles at the sides, so it's going to pull in there and so I may need some extra stitches to allow for that. Still, I have tried the toe box on my actual foot and it seems to be all right - not too tight (there was never any danger that it might be too loose).
For the next pair, though, I think I'm going to cast on a few more stitches, so that the same number of increase rows will take me straight to 52 or even 56 and I shan't have to think about any further increases, other than those for the cables. That will also give me a bit of wiggle room in the toe box. This pair will be all right - perfectly wearable - but I deliberately picked the colour I was going to wear least often so that I could iron out all the initial design wrinkles.
I am going to assume that all the other stitches continue to work in the same ratio to stocking stitch as they did previously, which will mean that the cable panel with its surrounding rope cables will now be 5.7 cm wide, rather than 7.5 cm (which I think is going to look a lot better). These socks are going to take some maths... but I shall get there!