Off the Wall
Today I'm going to talk about something I made for Porthos; but before I do so, a quick aside about Athos. You've probably noticed that I've been telling you I made such a thing for Porthos, and such a thing for d'Artagnan, and been thinking... that's great, but what about Athos?
Yes, well, Athos would be the first person to tell you, quite cheerfully, that he's awkward. Possibly even [expletive deleted] awkward. And I'm not going to argue with that analysis. He's one of my very favourite people, but you cannot make him anything. He wears white shirts and black trousers that he gets from his favourite big-and-tall outfitter's, and he's fine with that, so he doesn't want anything sewing for him. He generally dislikes knitwear, and indeed for years didn't need it because he didn't feel the cold (he'd quite happily walk around in shirt sleeves in a hard frost); now he has so much wrong with him, he does a bit, so he occasionally has to wear a fleece, but he'd rather not. I suggested knitting him a hat, and he asked, "Can you make it waterproof?" And so on. Everything I think of that I might make for him, he's either already got a stack of or doesn't want. Blooming awkward cuss. 😄
But, anyway, Porthos is a fan of what is variously called A Song of Ice and Fire or Game of Thrones, depending on whether you're more into the books or the televised adaptation. (I'm definitely more into the books. You can skip all the sex.) So I decided I was going to make him Sam Tarly's dagger. And, short of actually learning how to knap obsidian - which I wasn't confident I was going to be able to do with dodgy wrists - that meant I had to do a bit of thinking.
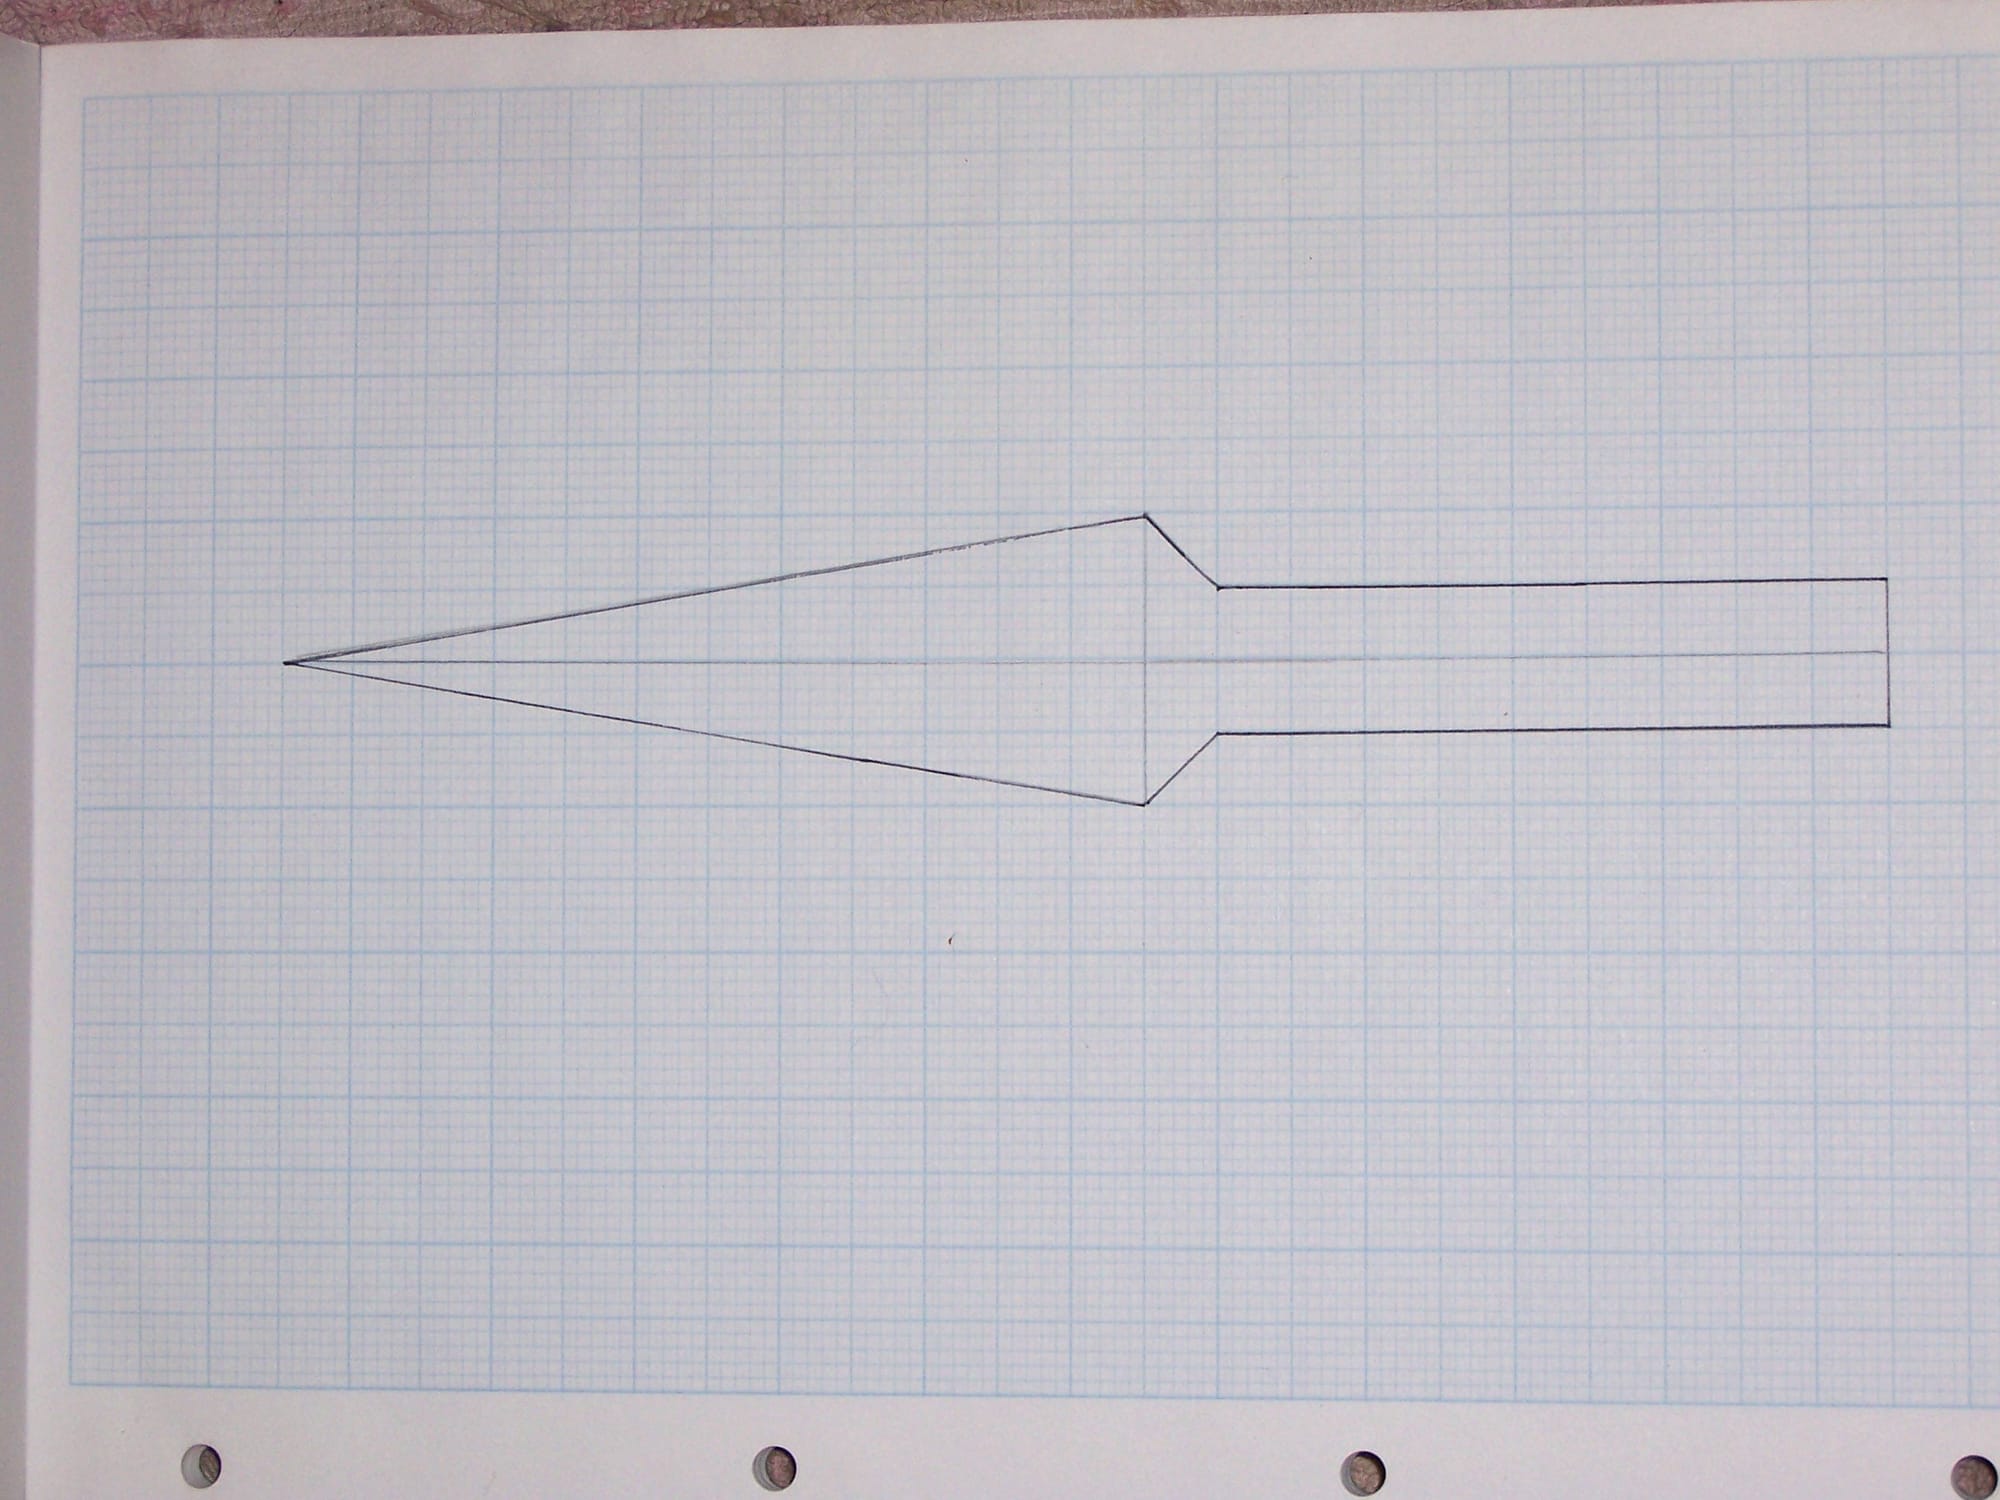
Graph paper is always a good place to start. I drew this, with the basic idea that it would simply be rotated about the long axis to make the shape. (I ought to add I've never seen the TV series, so I have not seen the prop. I made this up from imagination.)
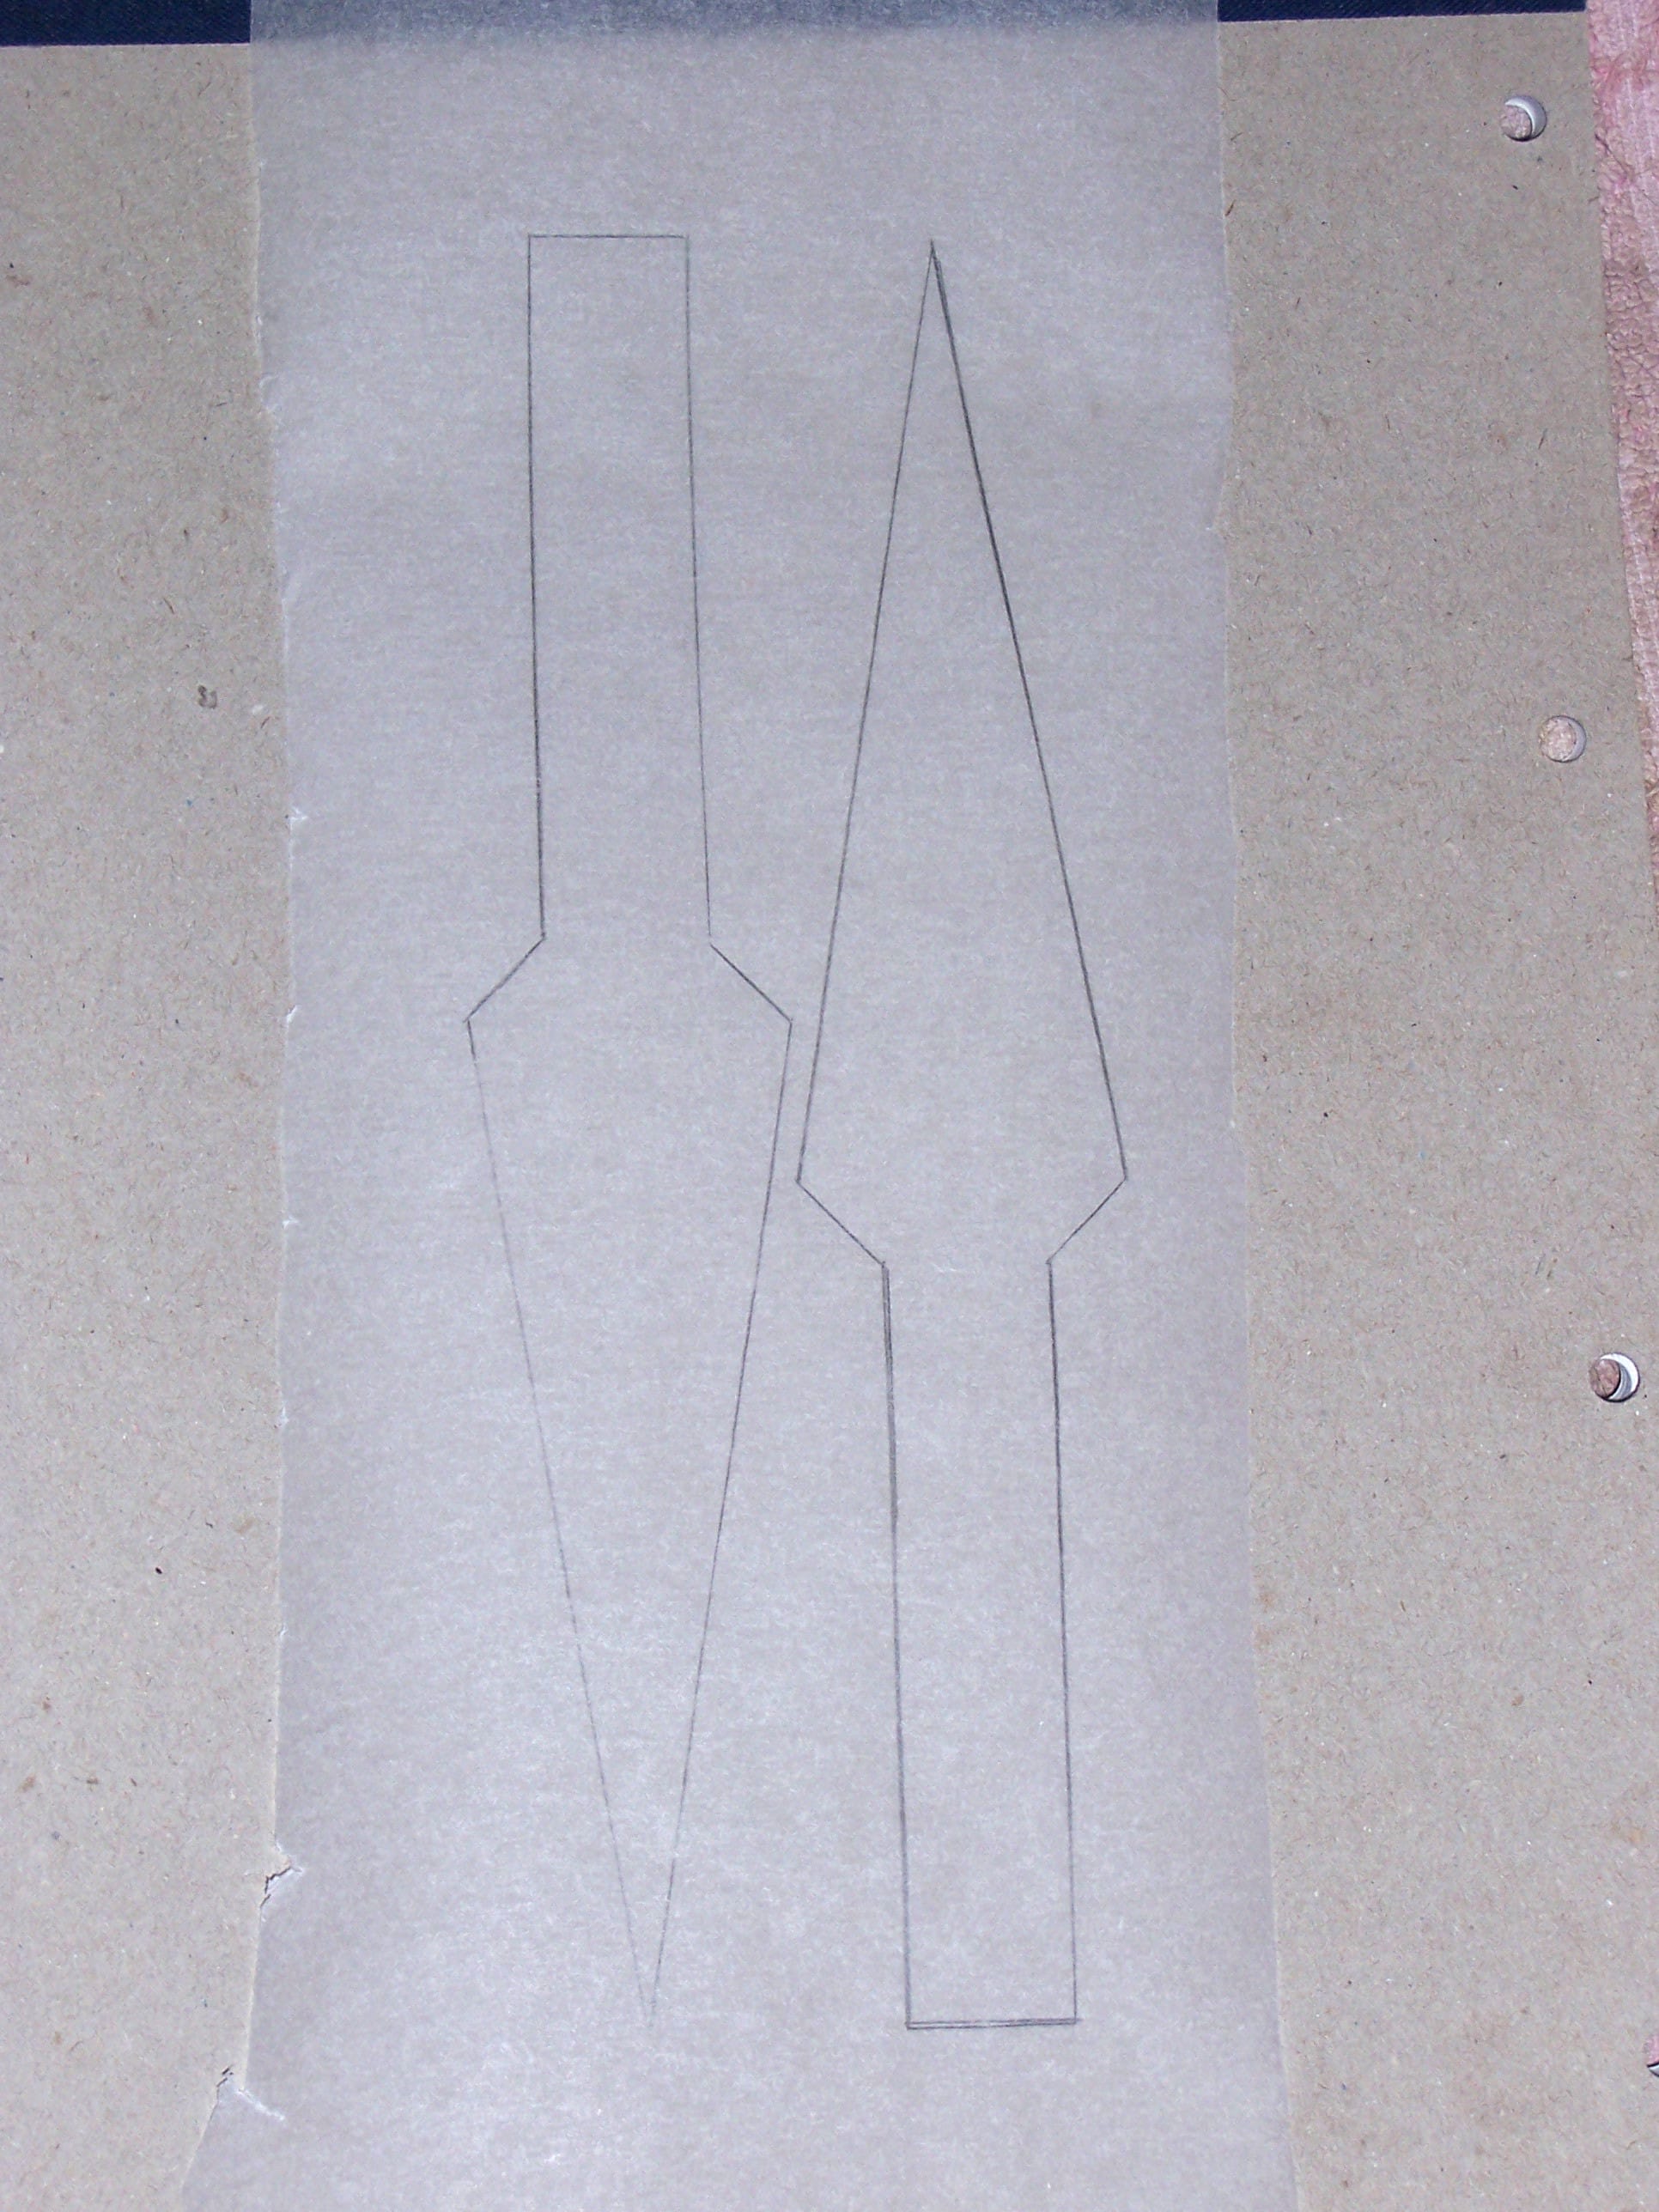
I decided I was going to make two daggers, just in case one of them went wrong; and if it didn't, then I'd have one for myself, so either way it was a win.

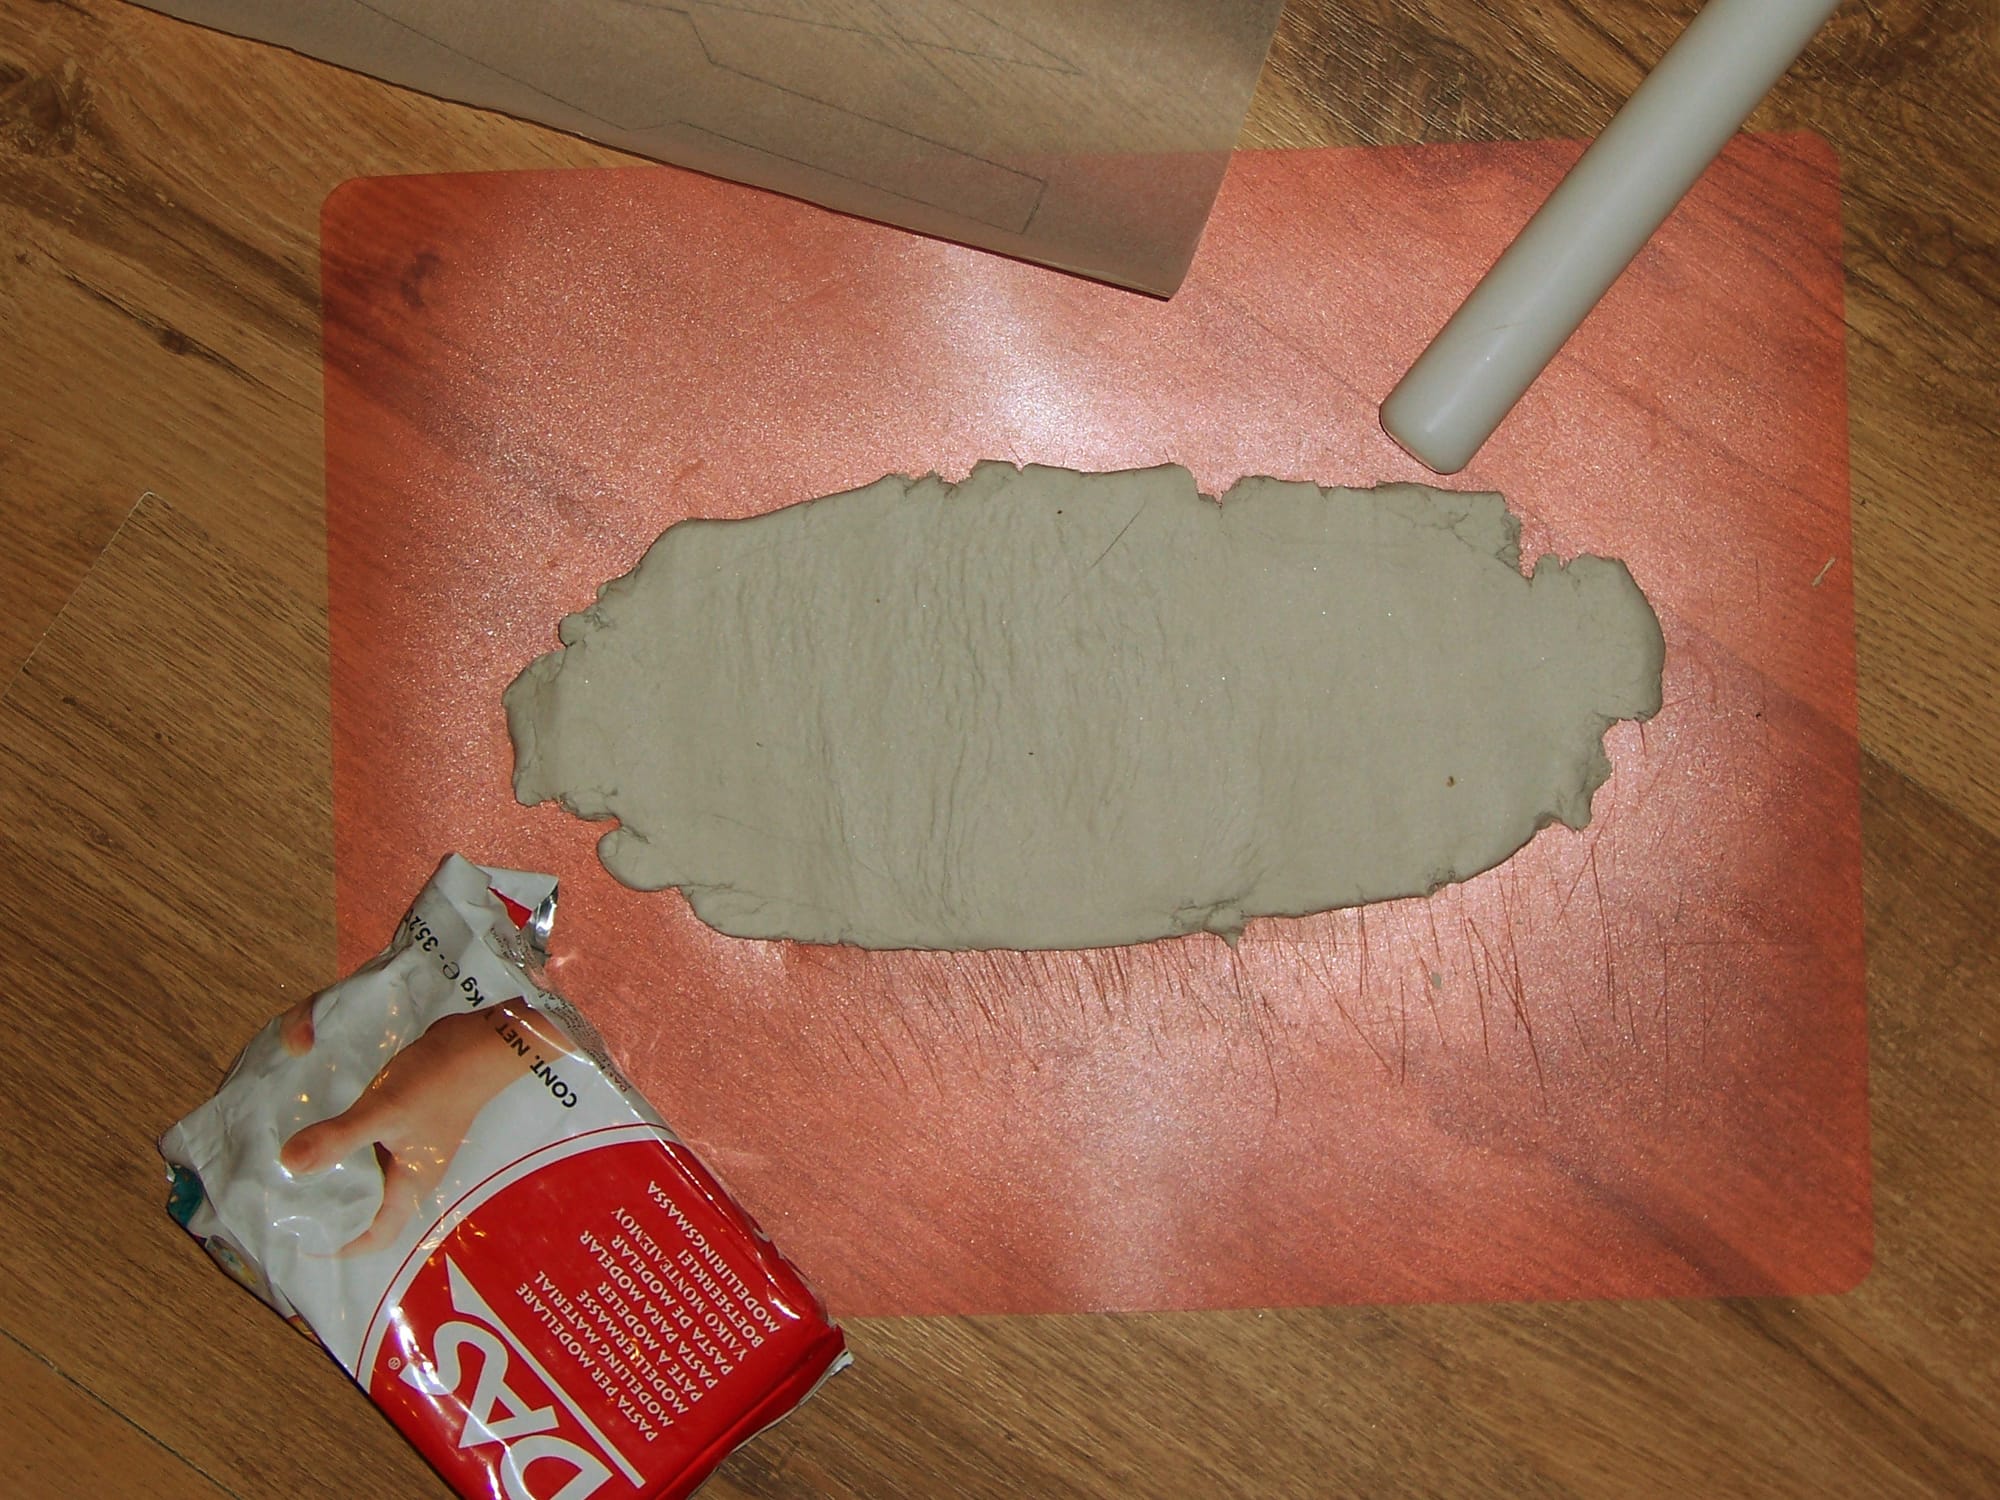
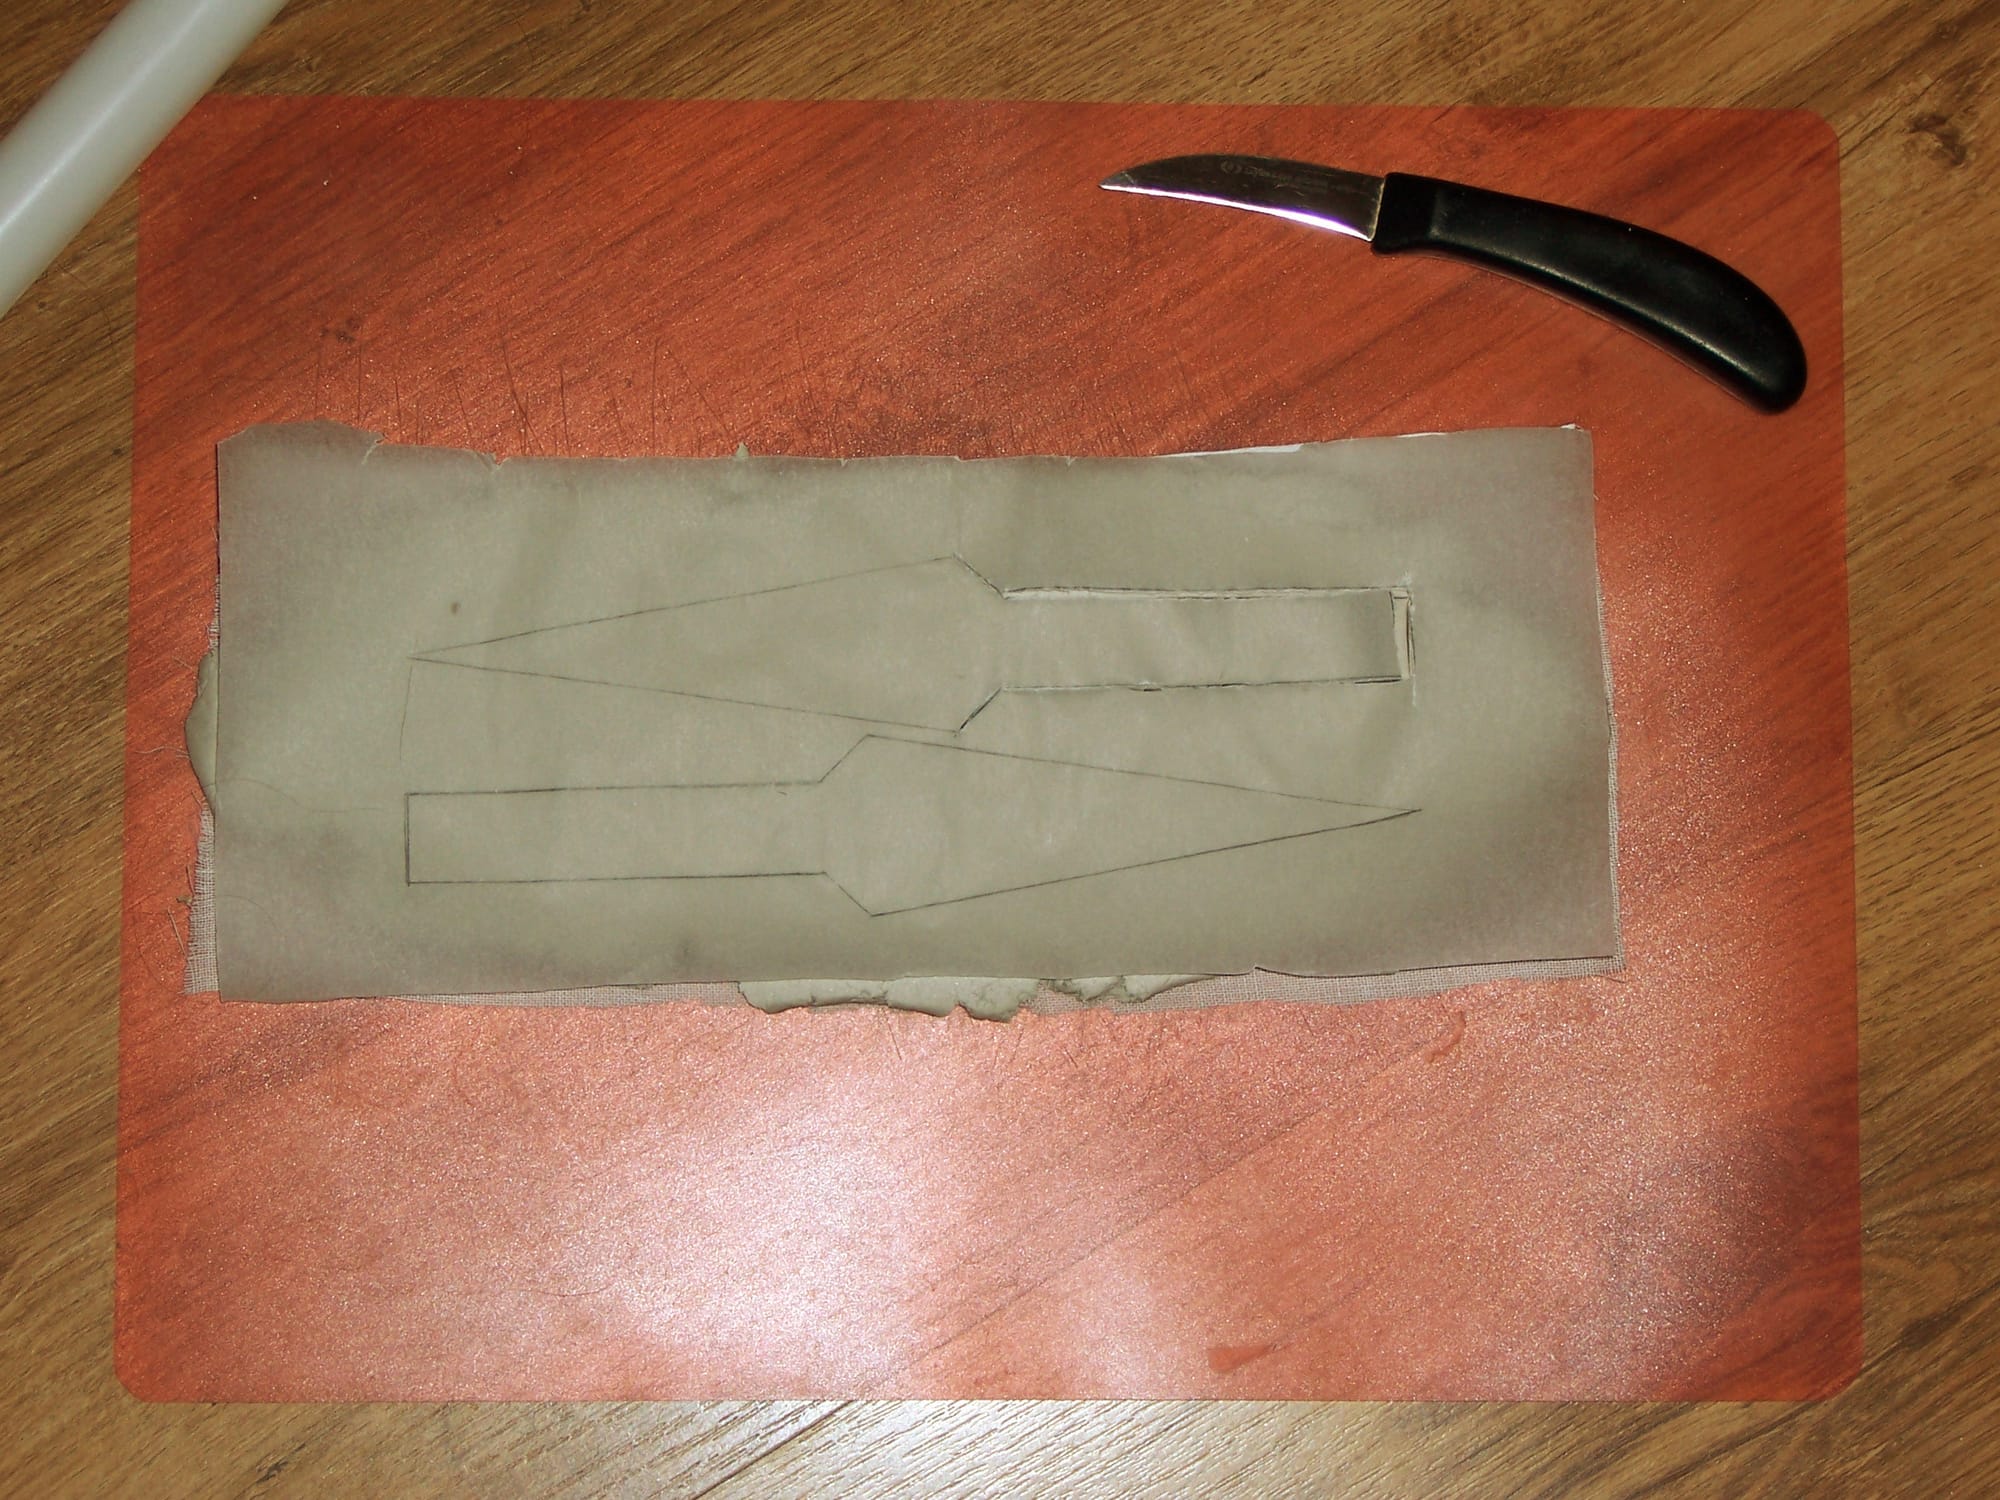
I planned to use clay for the base; but clay is quite brittle, so it would need to be reinforced somehow. Muslin is great for the purpose because the weave is loose enough that the clay can go through it, so it'll stick well; it's also easy to shape to the clay. However, one layer of muslin alone leaves weaknesses along the axes of the dagger, so to sort those out I cut another layer on the bias and sandwiched the two with a thin layer of clay, as you see below.
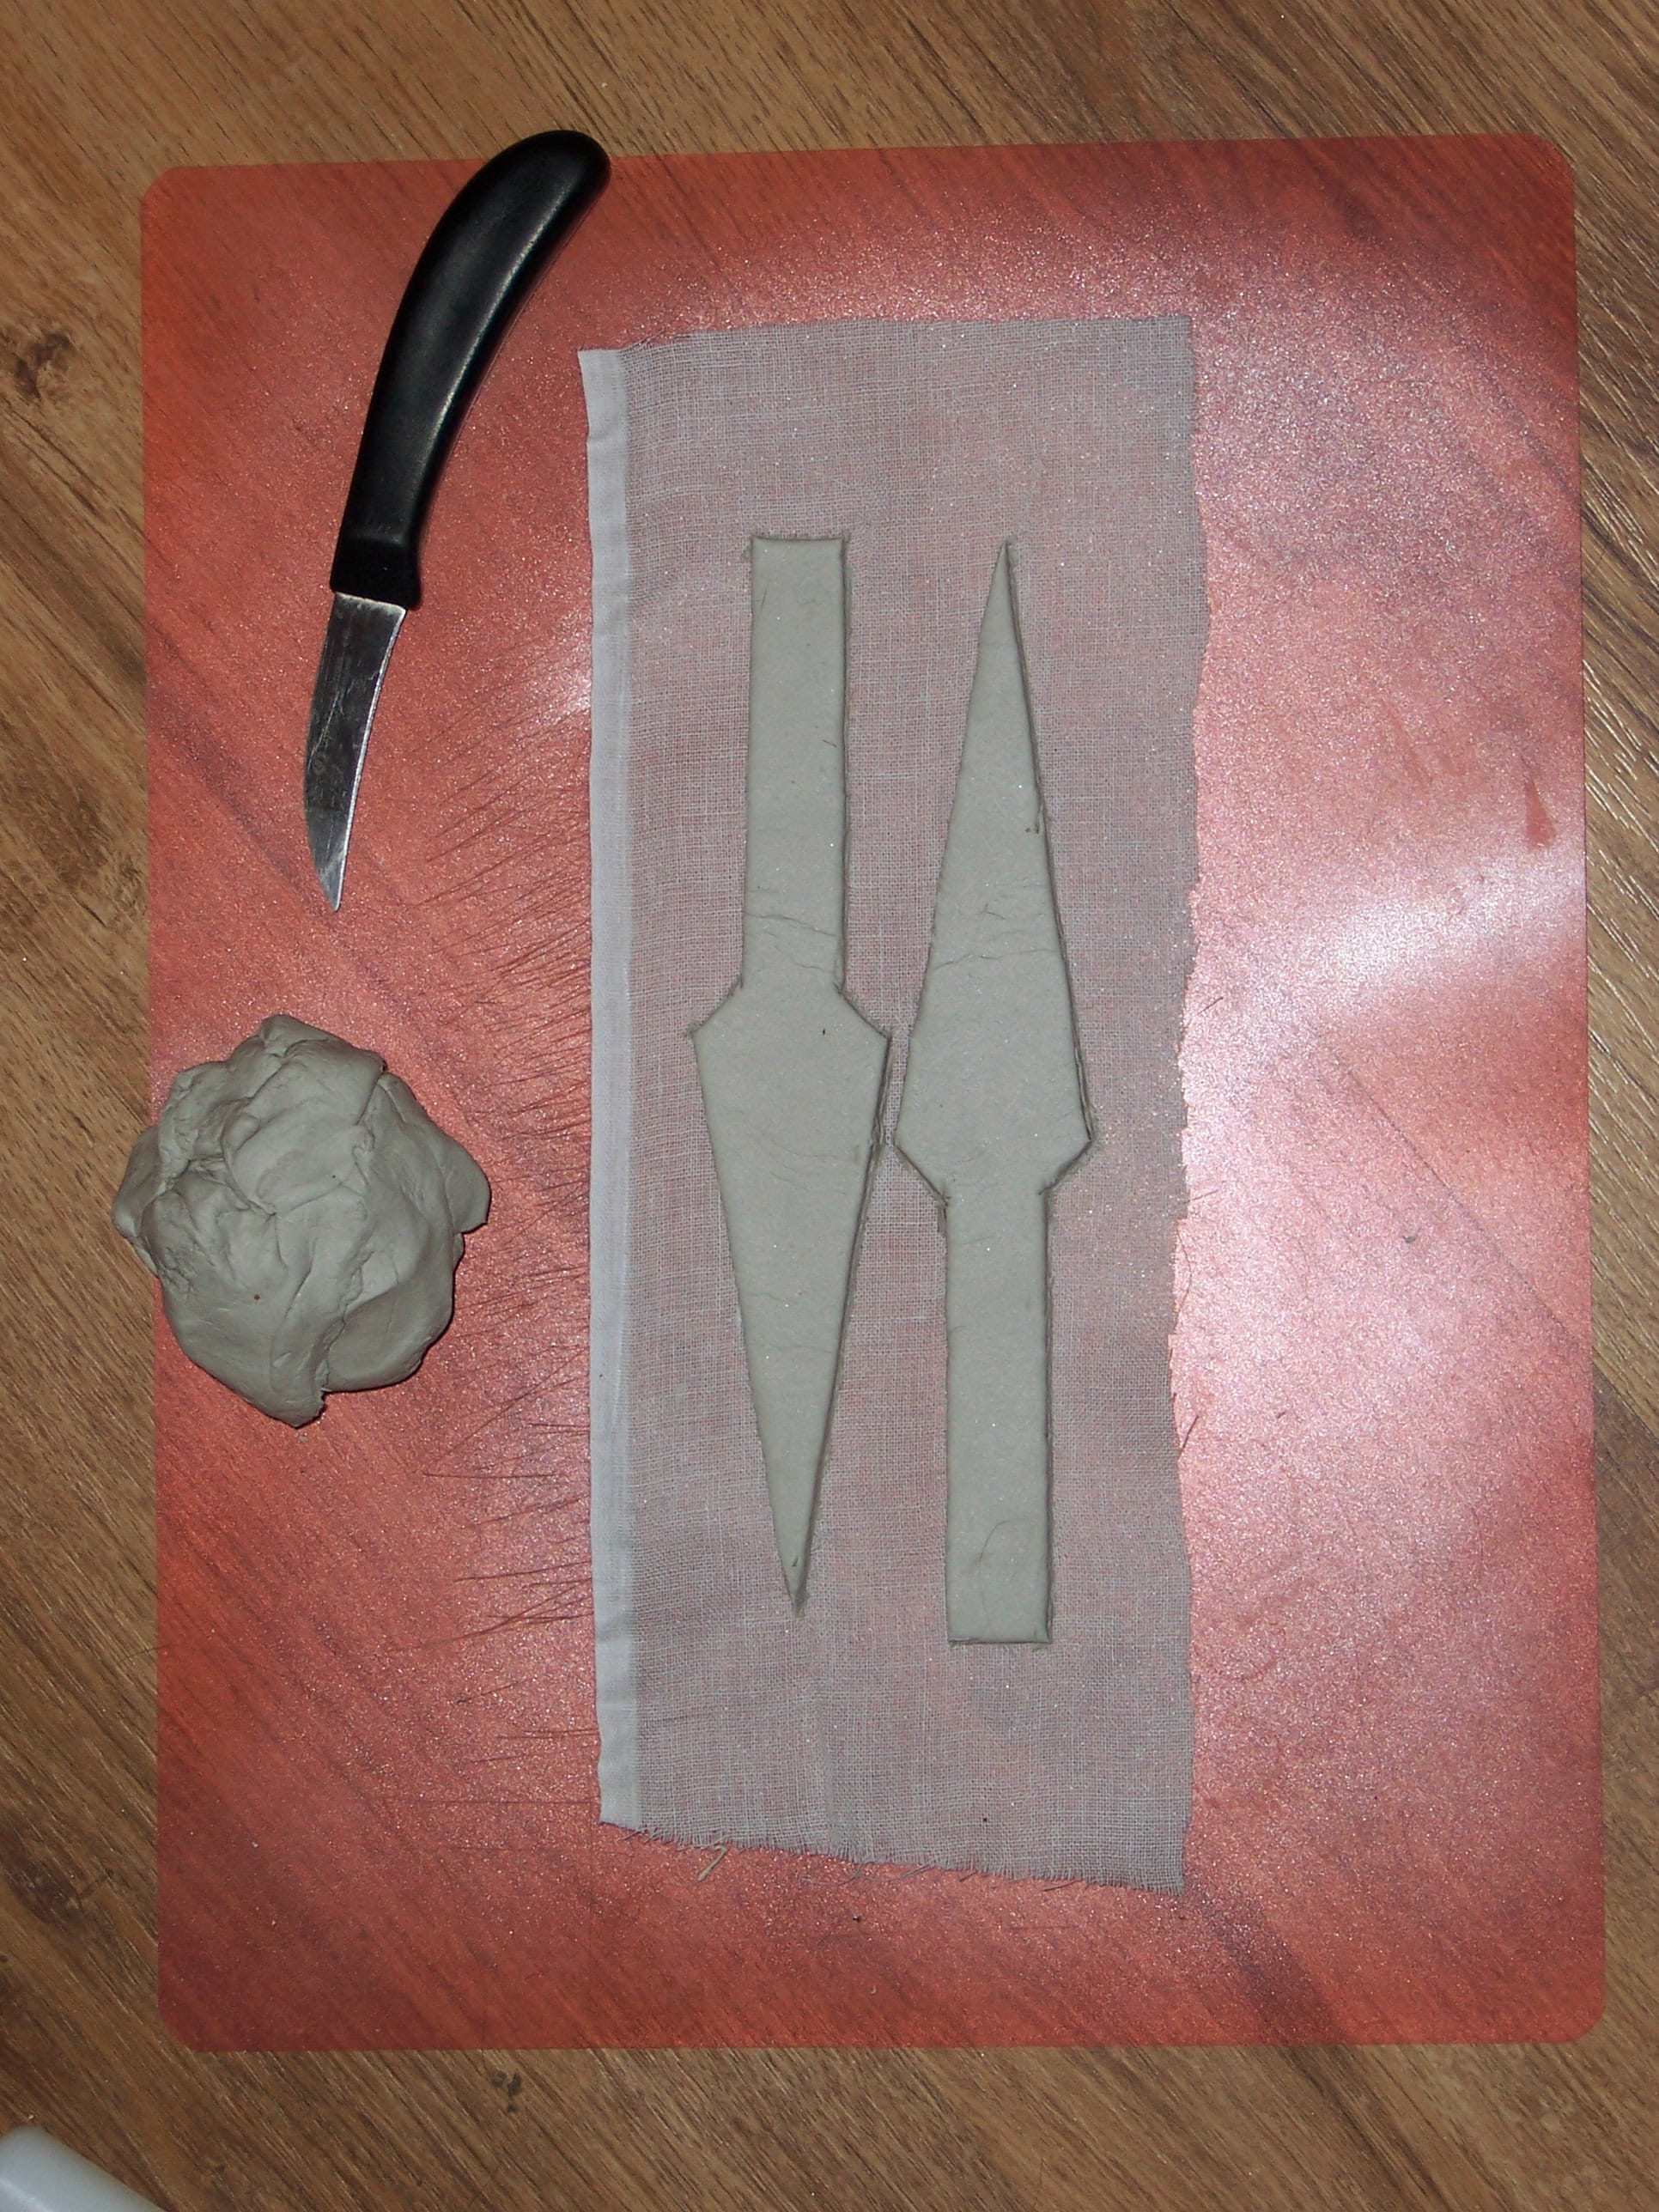
So now I had my armatures, which I could have just left to dry before continuing, which would have made things a lot easier; however, they were pretty thin. If I worked with them when they were dry, there was always the danger that they'd break while I was adding the extra clay. That meant I had to find a way of keeping them flat while also protecting the surface; so I did this.
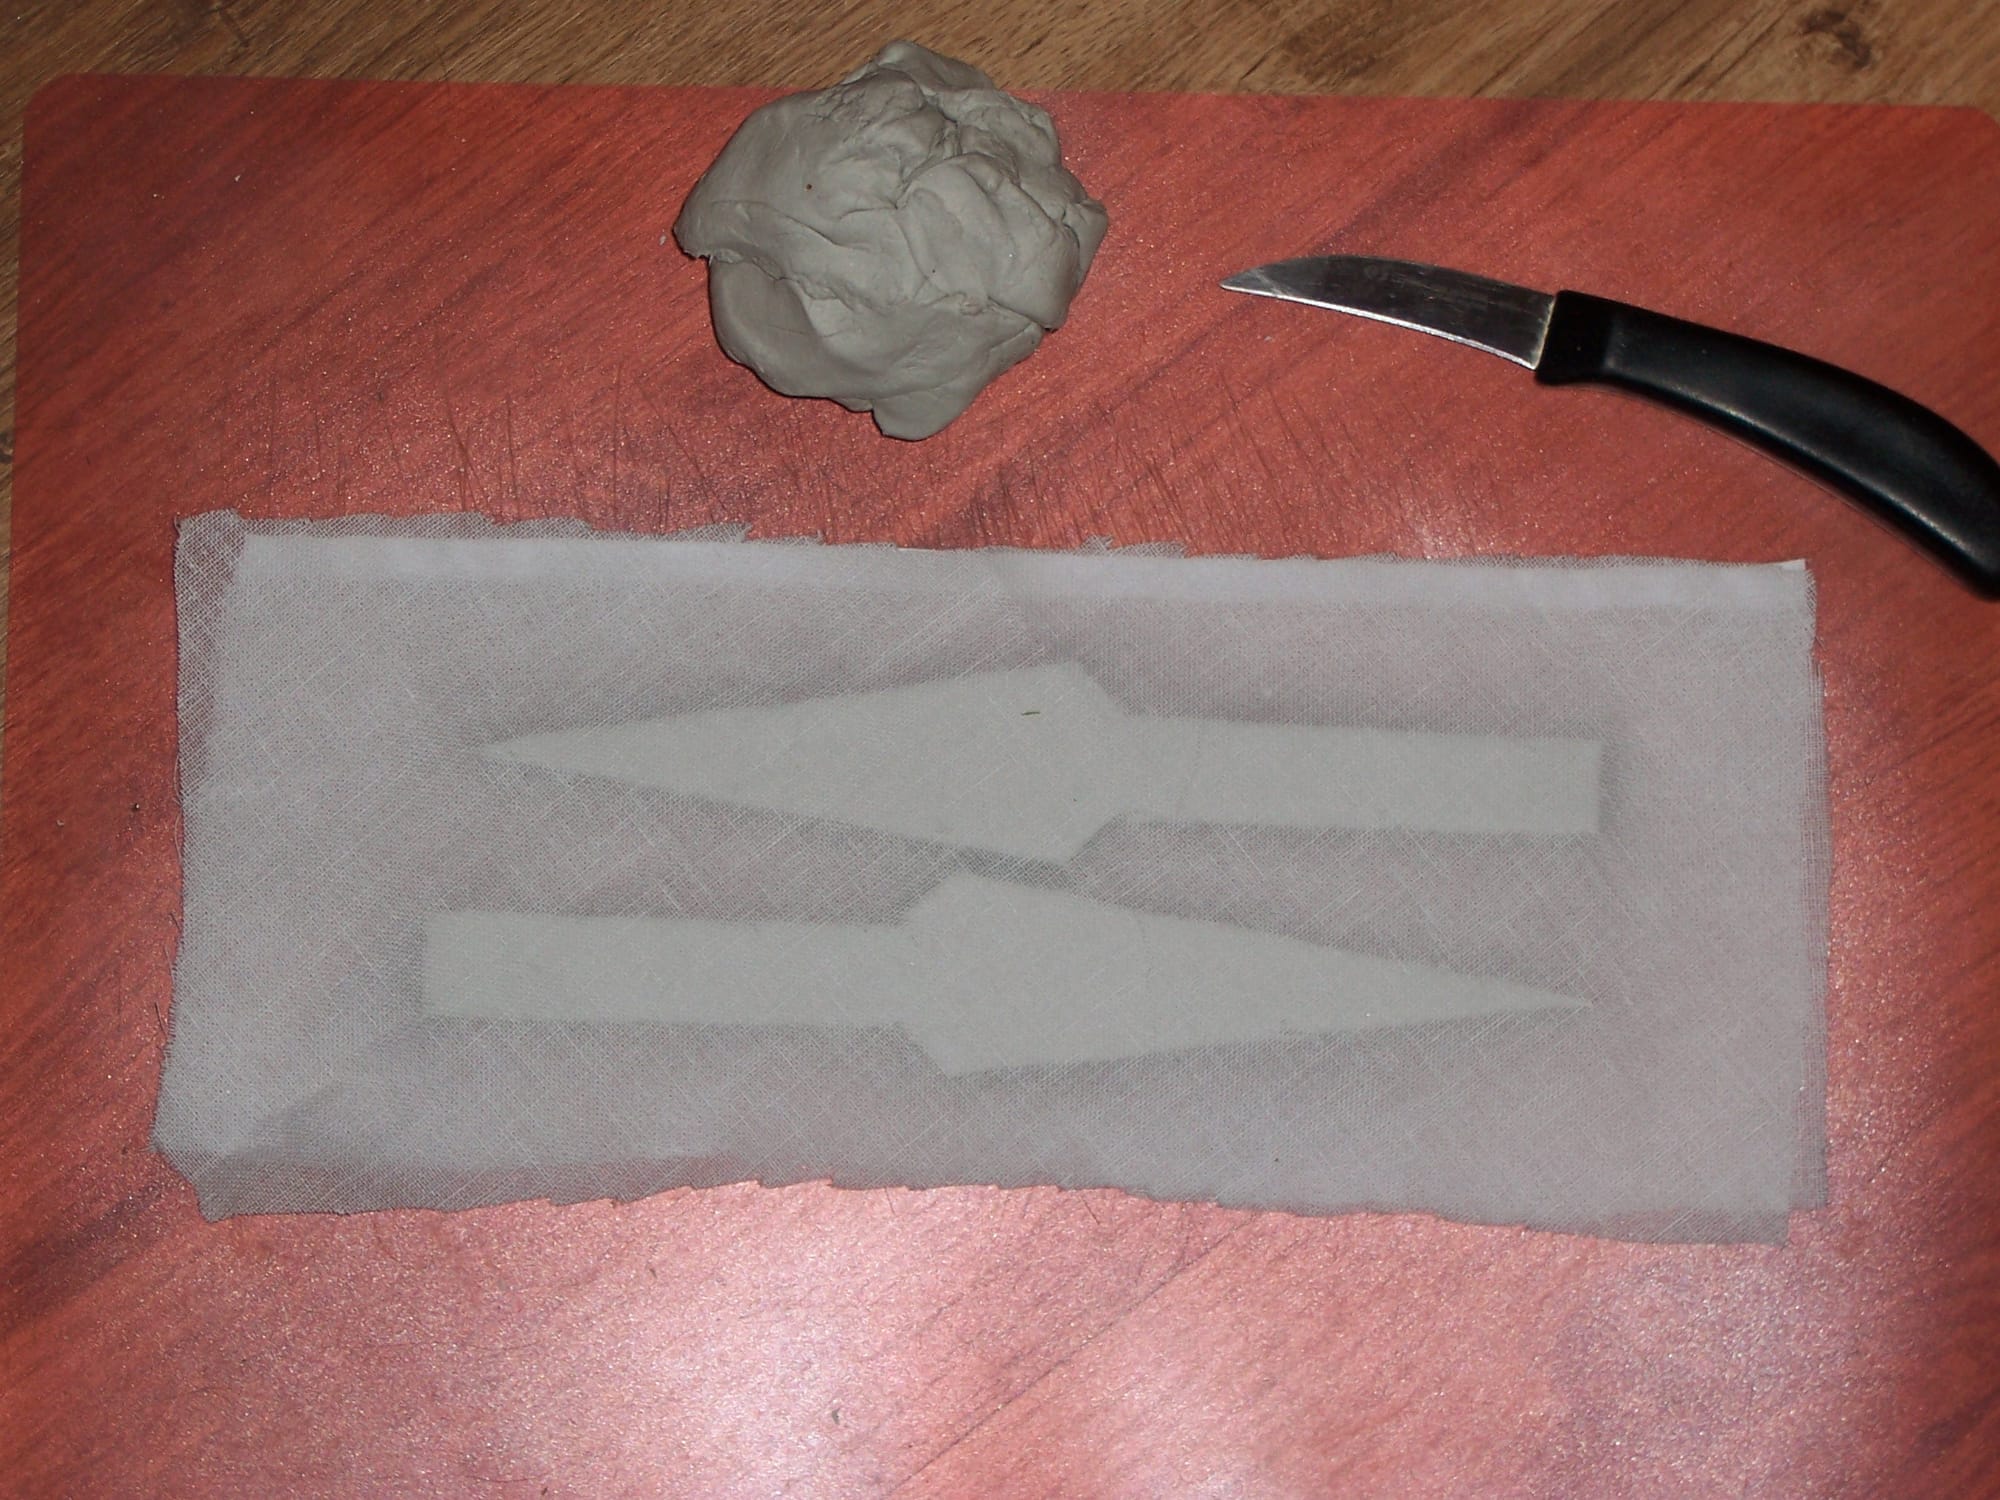
Take a piece of thick card, draw round the dagger armatures, cut holes to fit, cover the whole affair with cling film, and carefully lay the armatures in the holes. Now they can't break, flop, or bend out of shape, and your surface is protected from the extra clay.
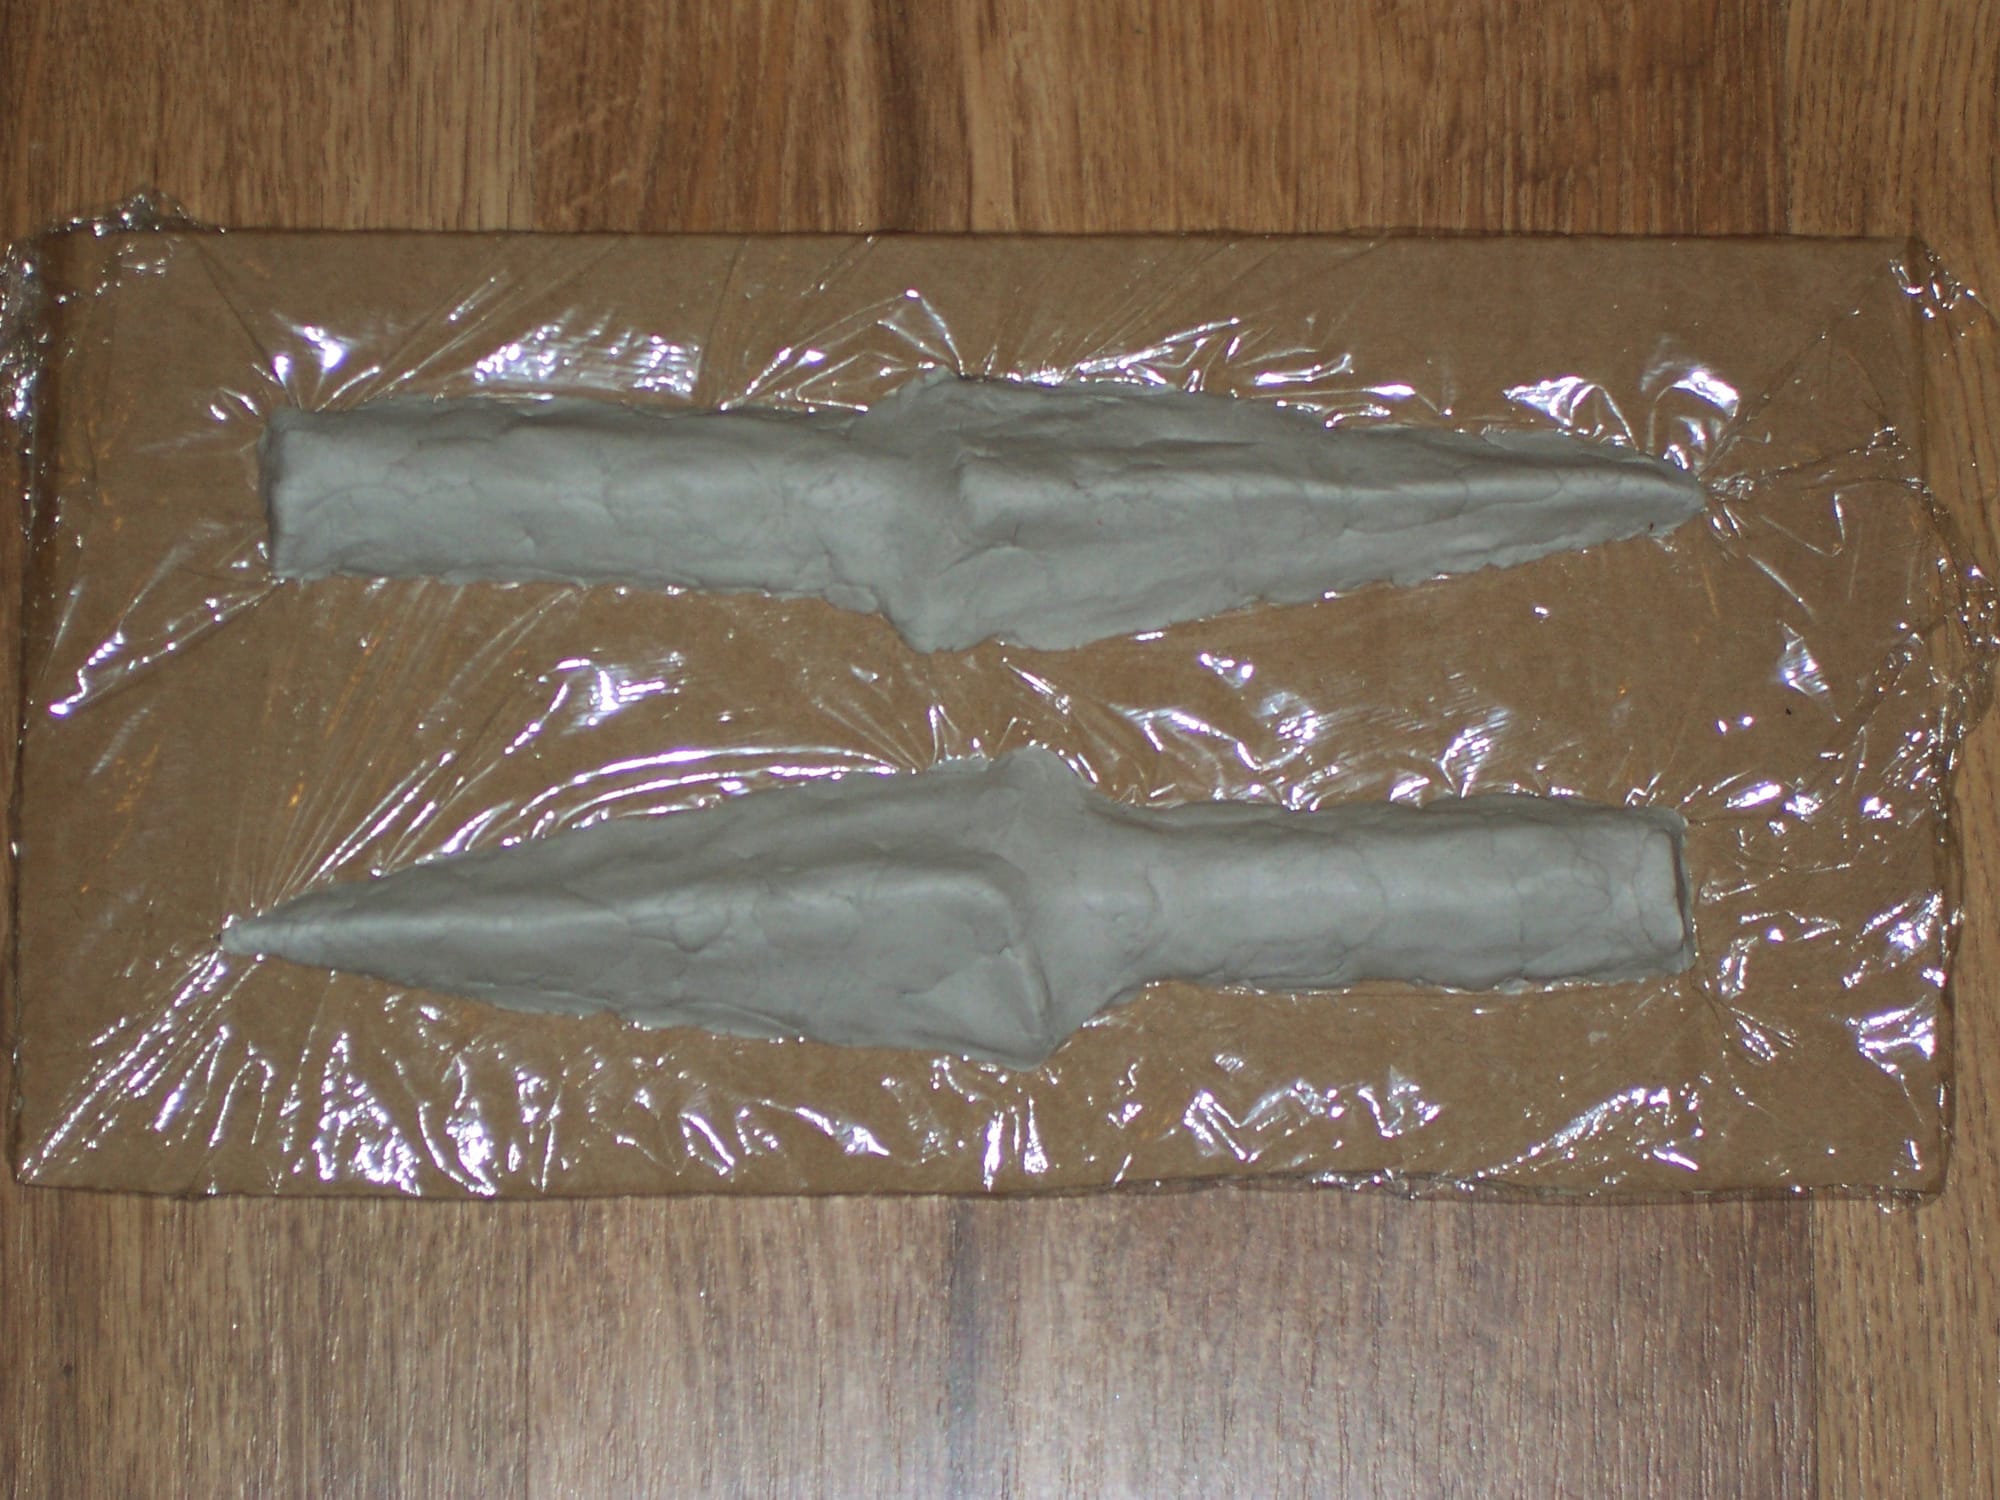
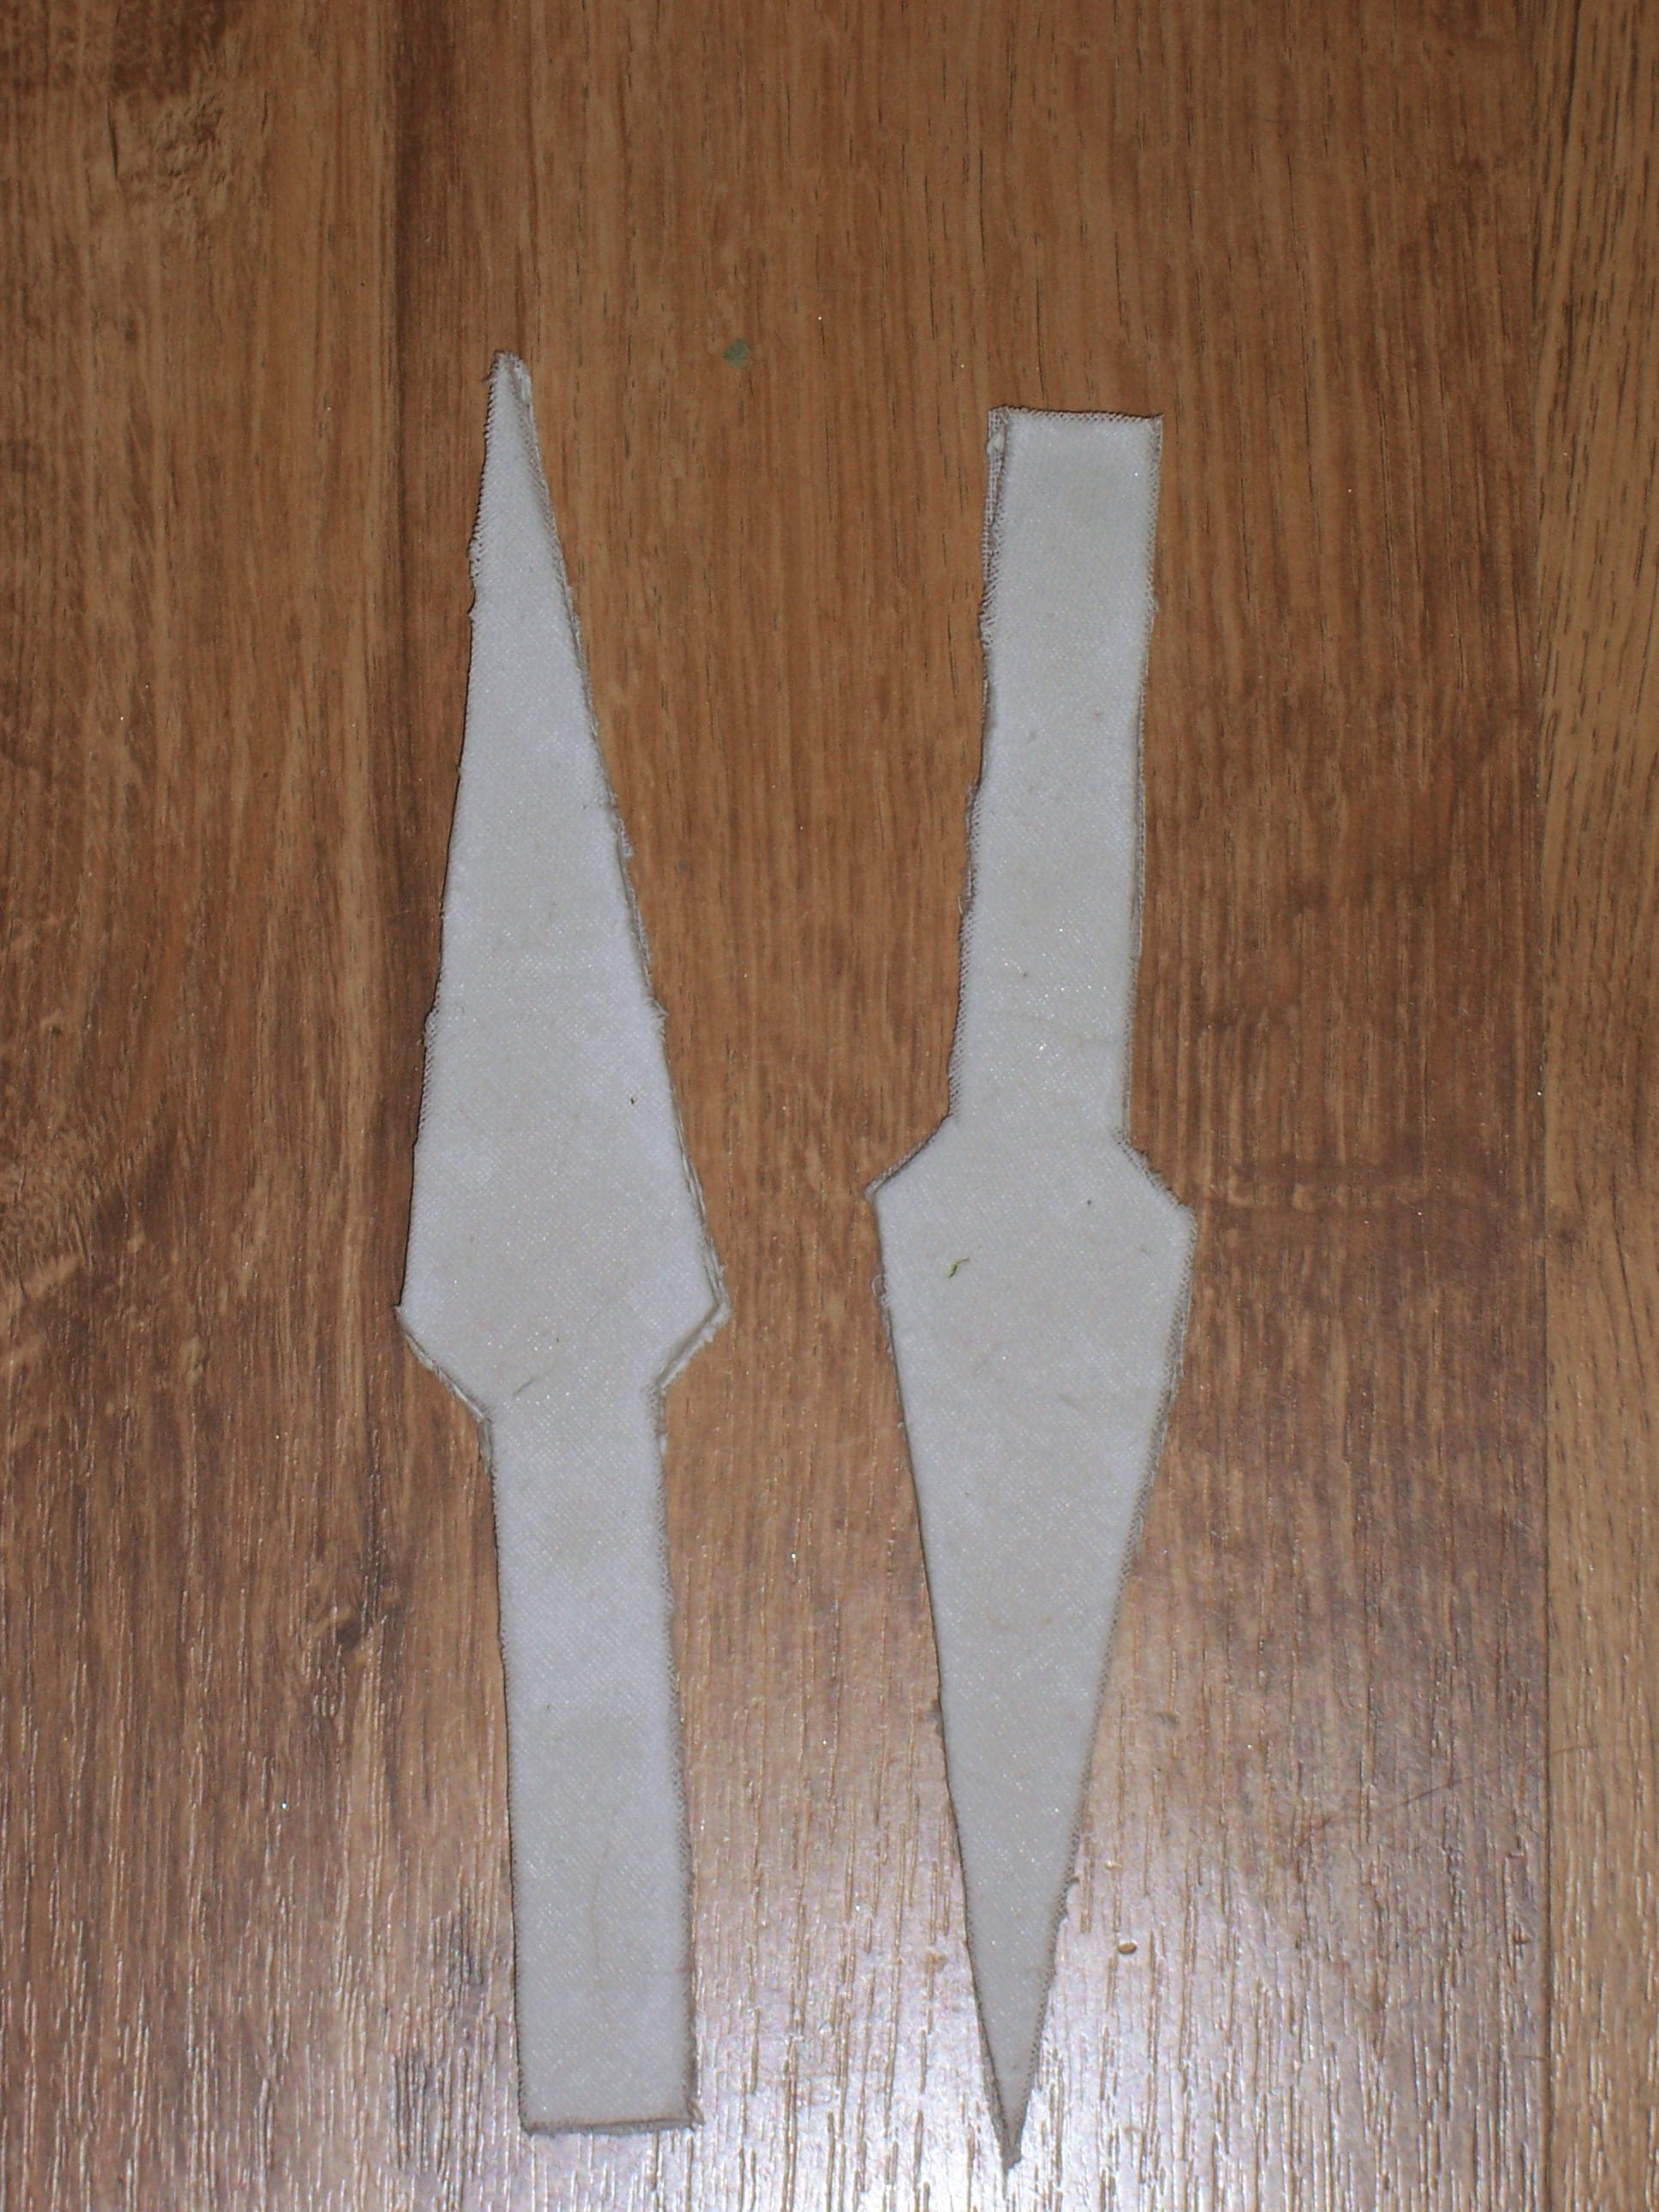
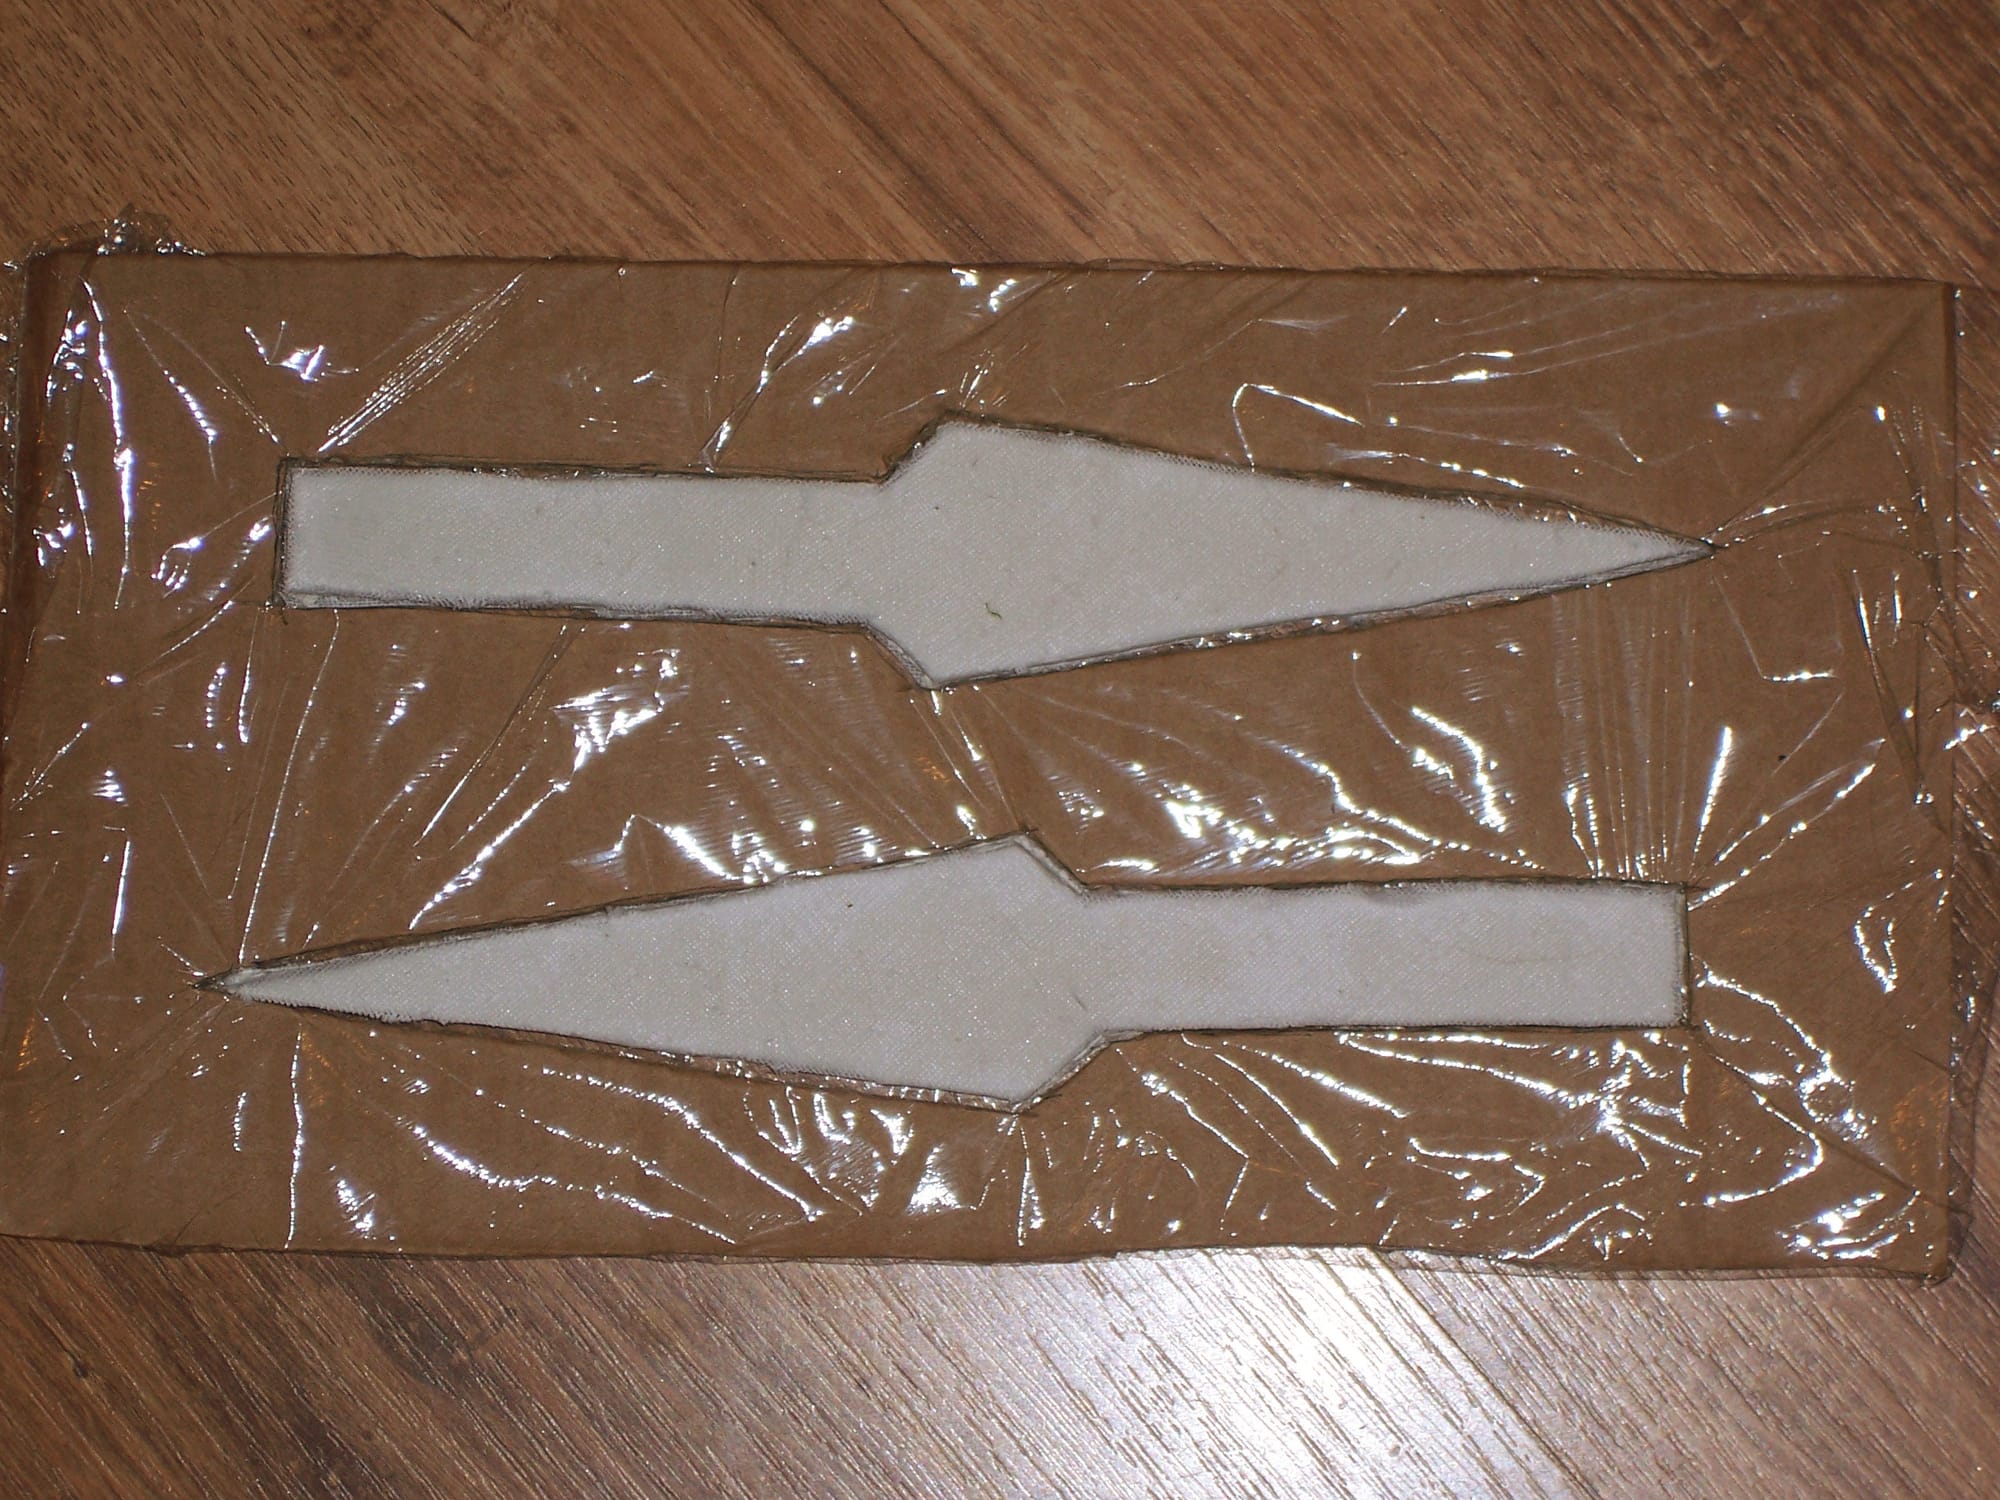
This time I could safely leave them to dry, because now they were thick enough that they wouldn't break easily. Once they were dry, I turned them over and did the same on the other side, then let them dry again. The results so far looked like this:
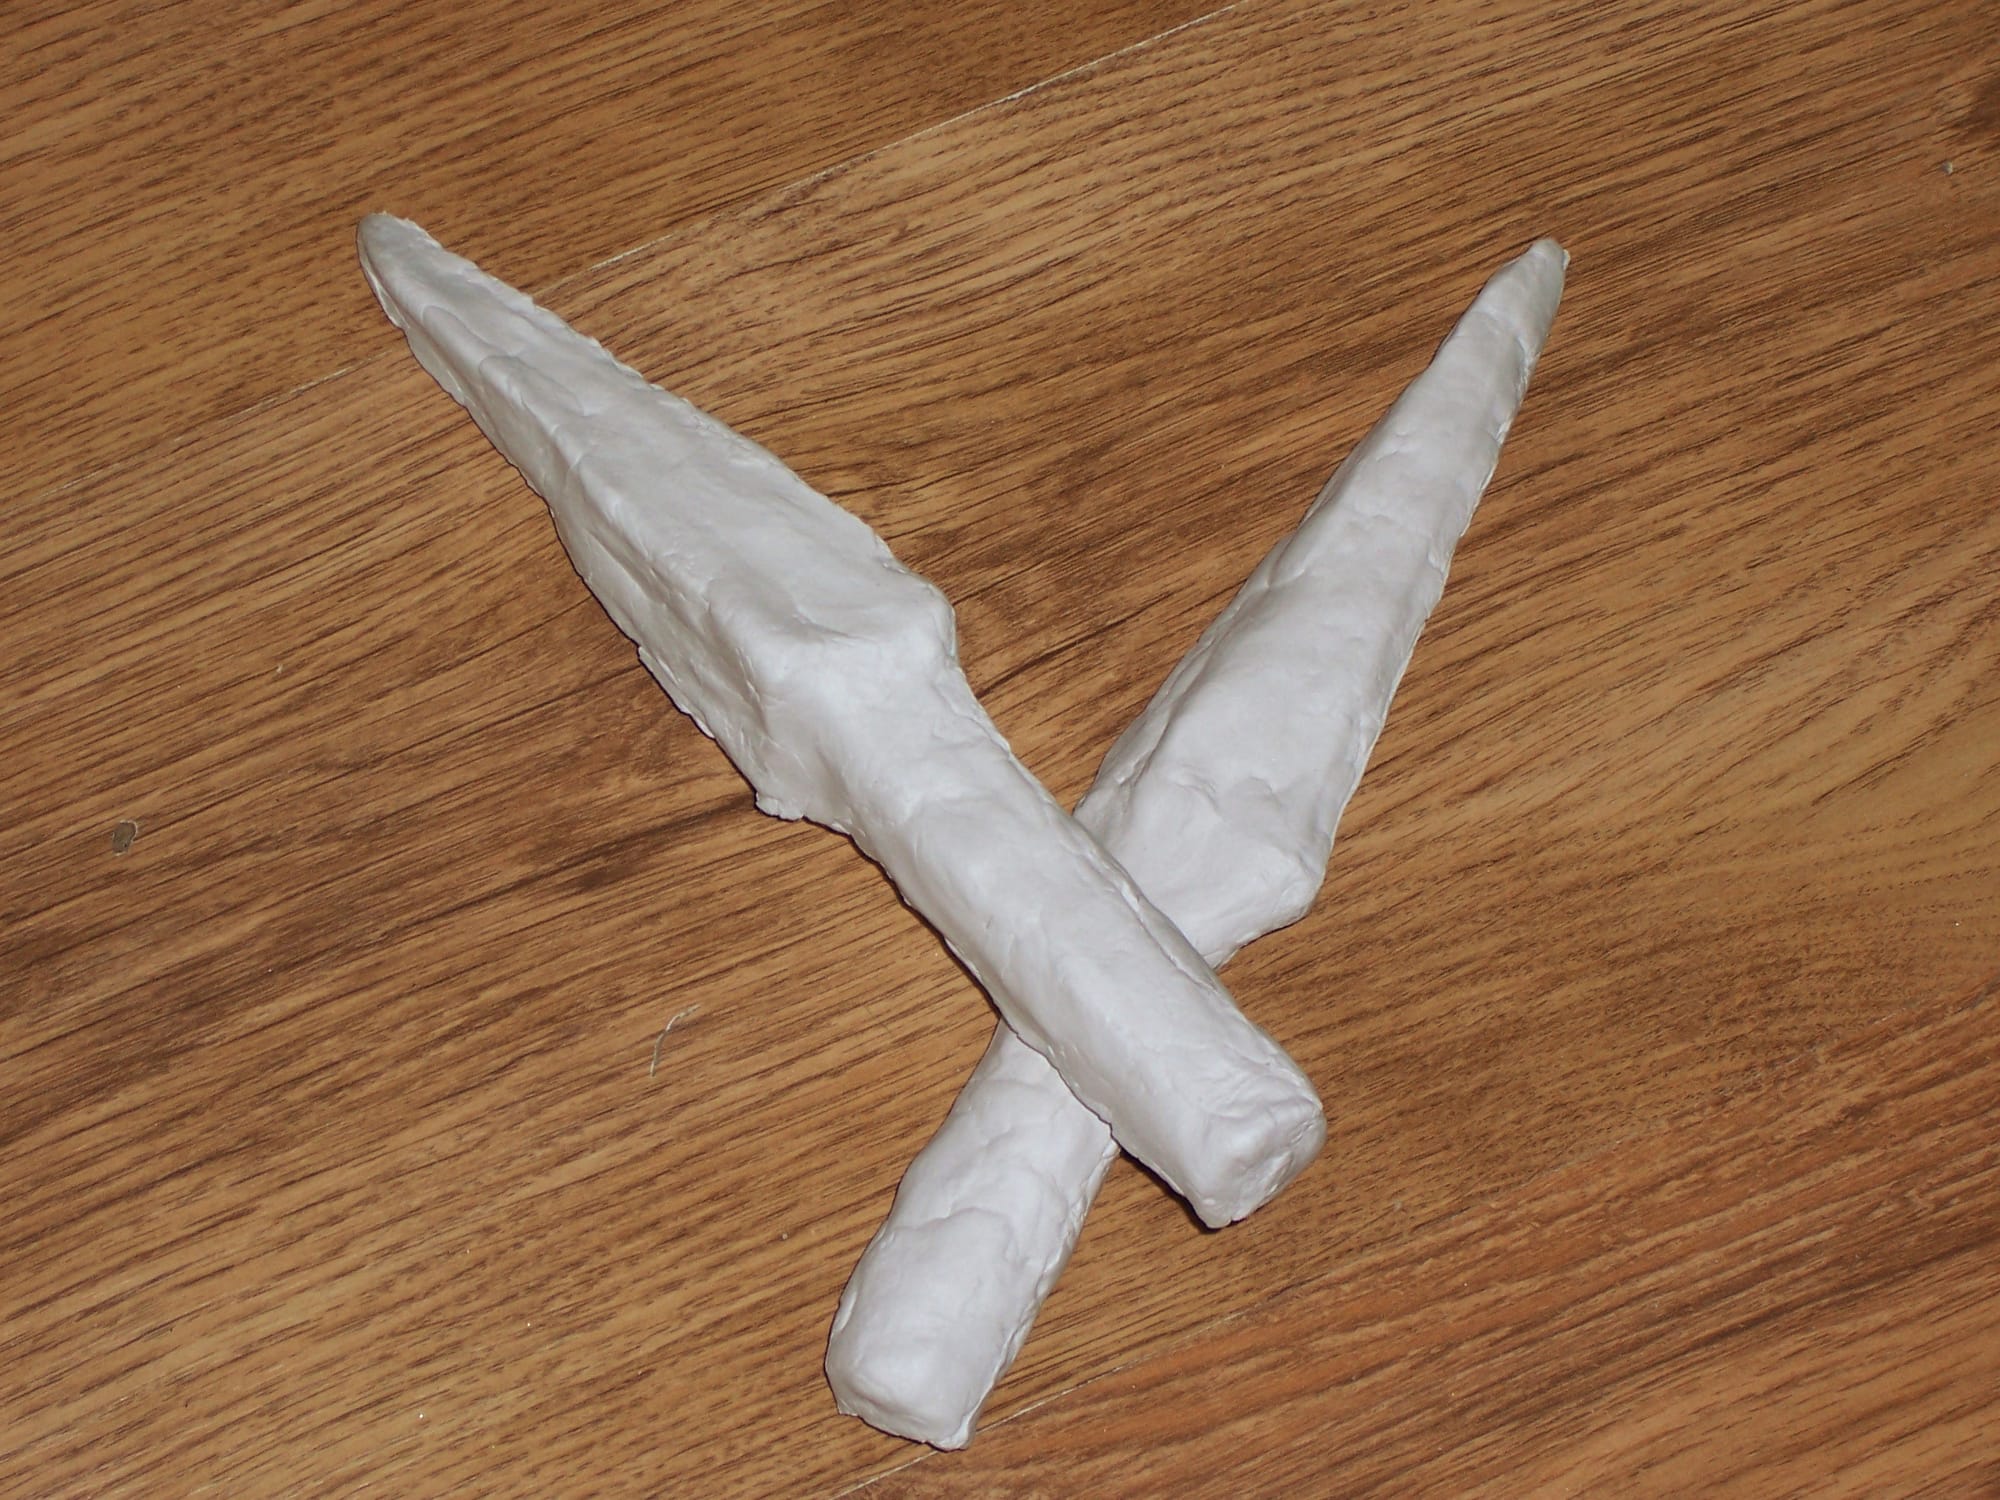
Now these, as you see, are still a bit wonky, but that's fine, because I was never planning to stop at clay. It's cheap, it's convenient, and it has the right sort of weight, but it does not smooth out or take fine detail very easily. So now we have the next step. I wrapped the clay centres in additional muslin first, as you can see on the left of the next picture.
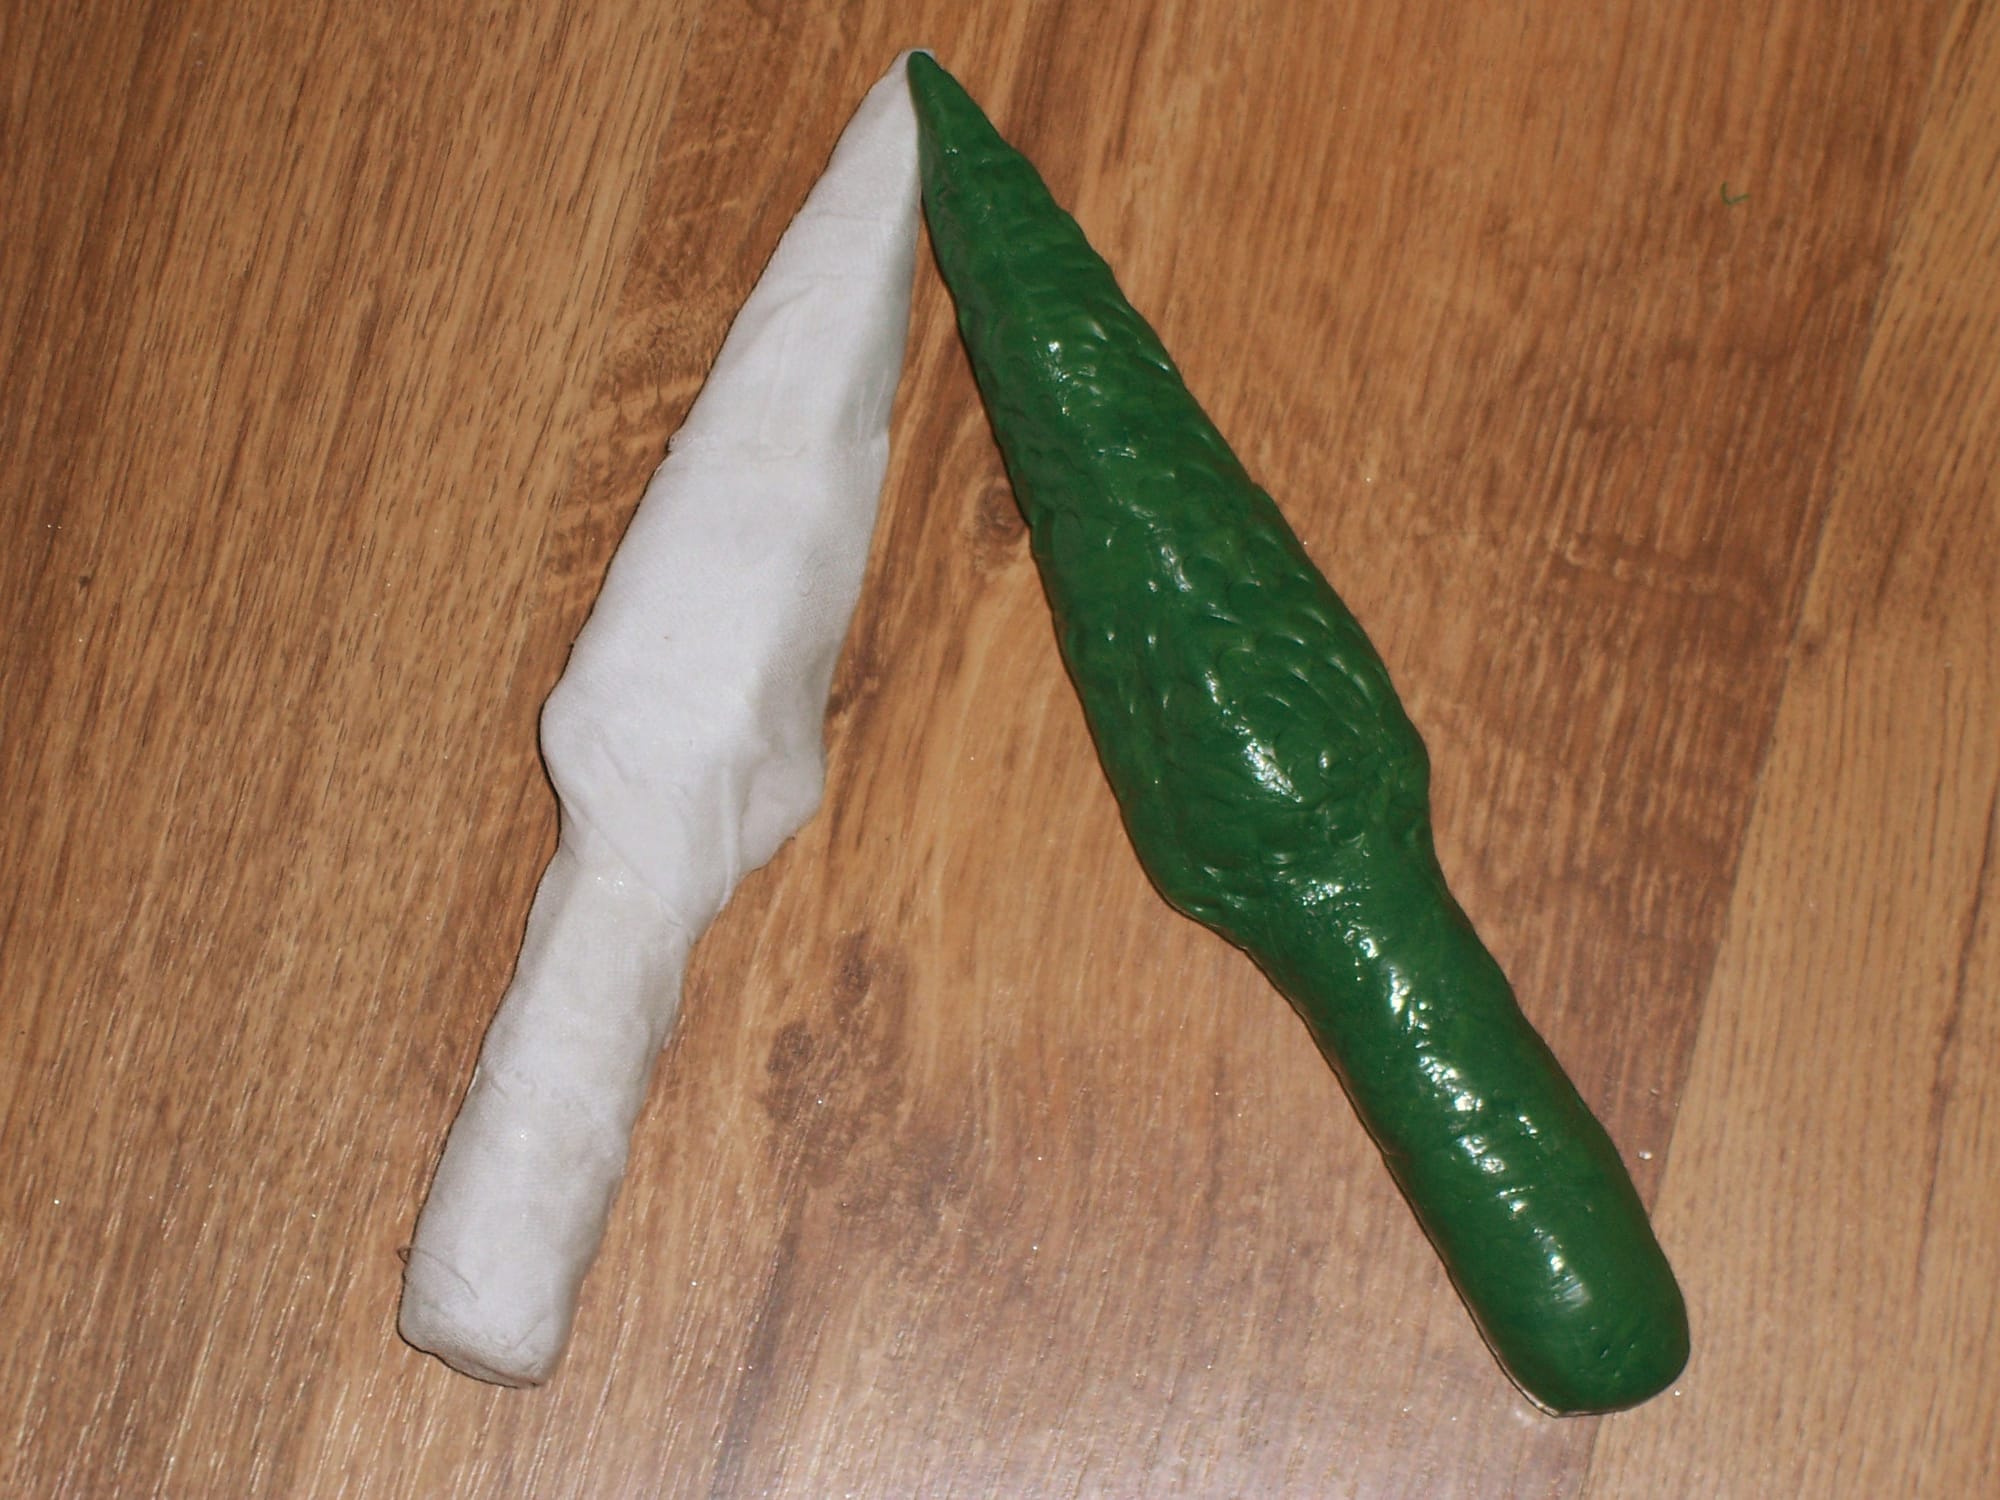
To get the detail - and indeed add further reinforcement - what you need to do is cover the clay centre with green putty. If you don't already know about green putty, it is amazing stuff. If you know anyone who paints miniatures, they'll tell you everything you ever wanted to know about it and a lot more besides, because it's what they use for making custom details. It comes in a pack in the form of a piece of yellow putty and a piece of blue putty; you knead them together (in fact, one of the best known brands is called "Kneadatite"), and you end up with this green stuff that stays soft and workable for a while, is amenable to ultra-fine work (you can even make things like banners for your Warhammer army), and sets about as hard as one of those polypropylene office chairs. Of course, it's not cheap. But if all you need it for is the outer layer, that's not too much of a problem.
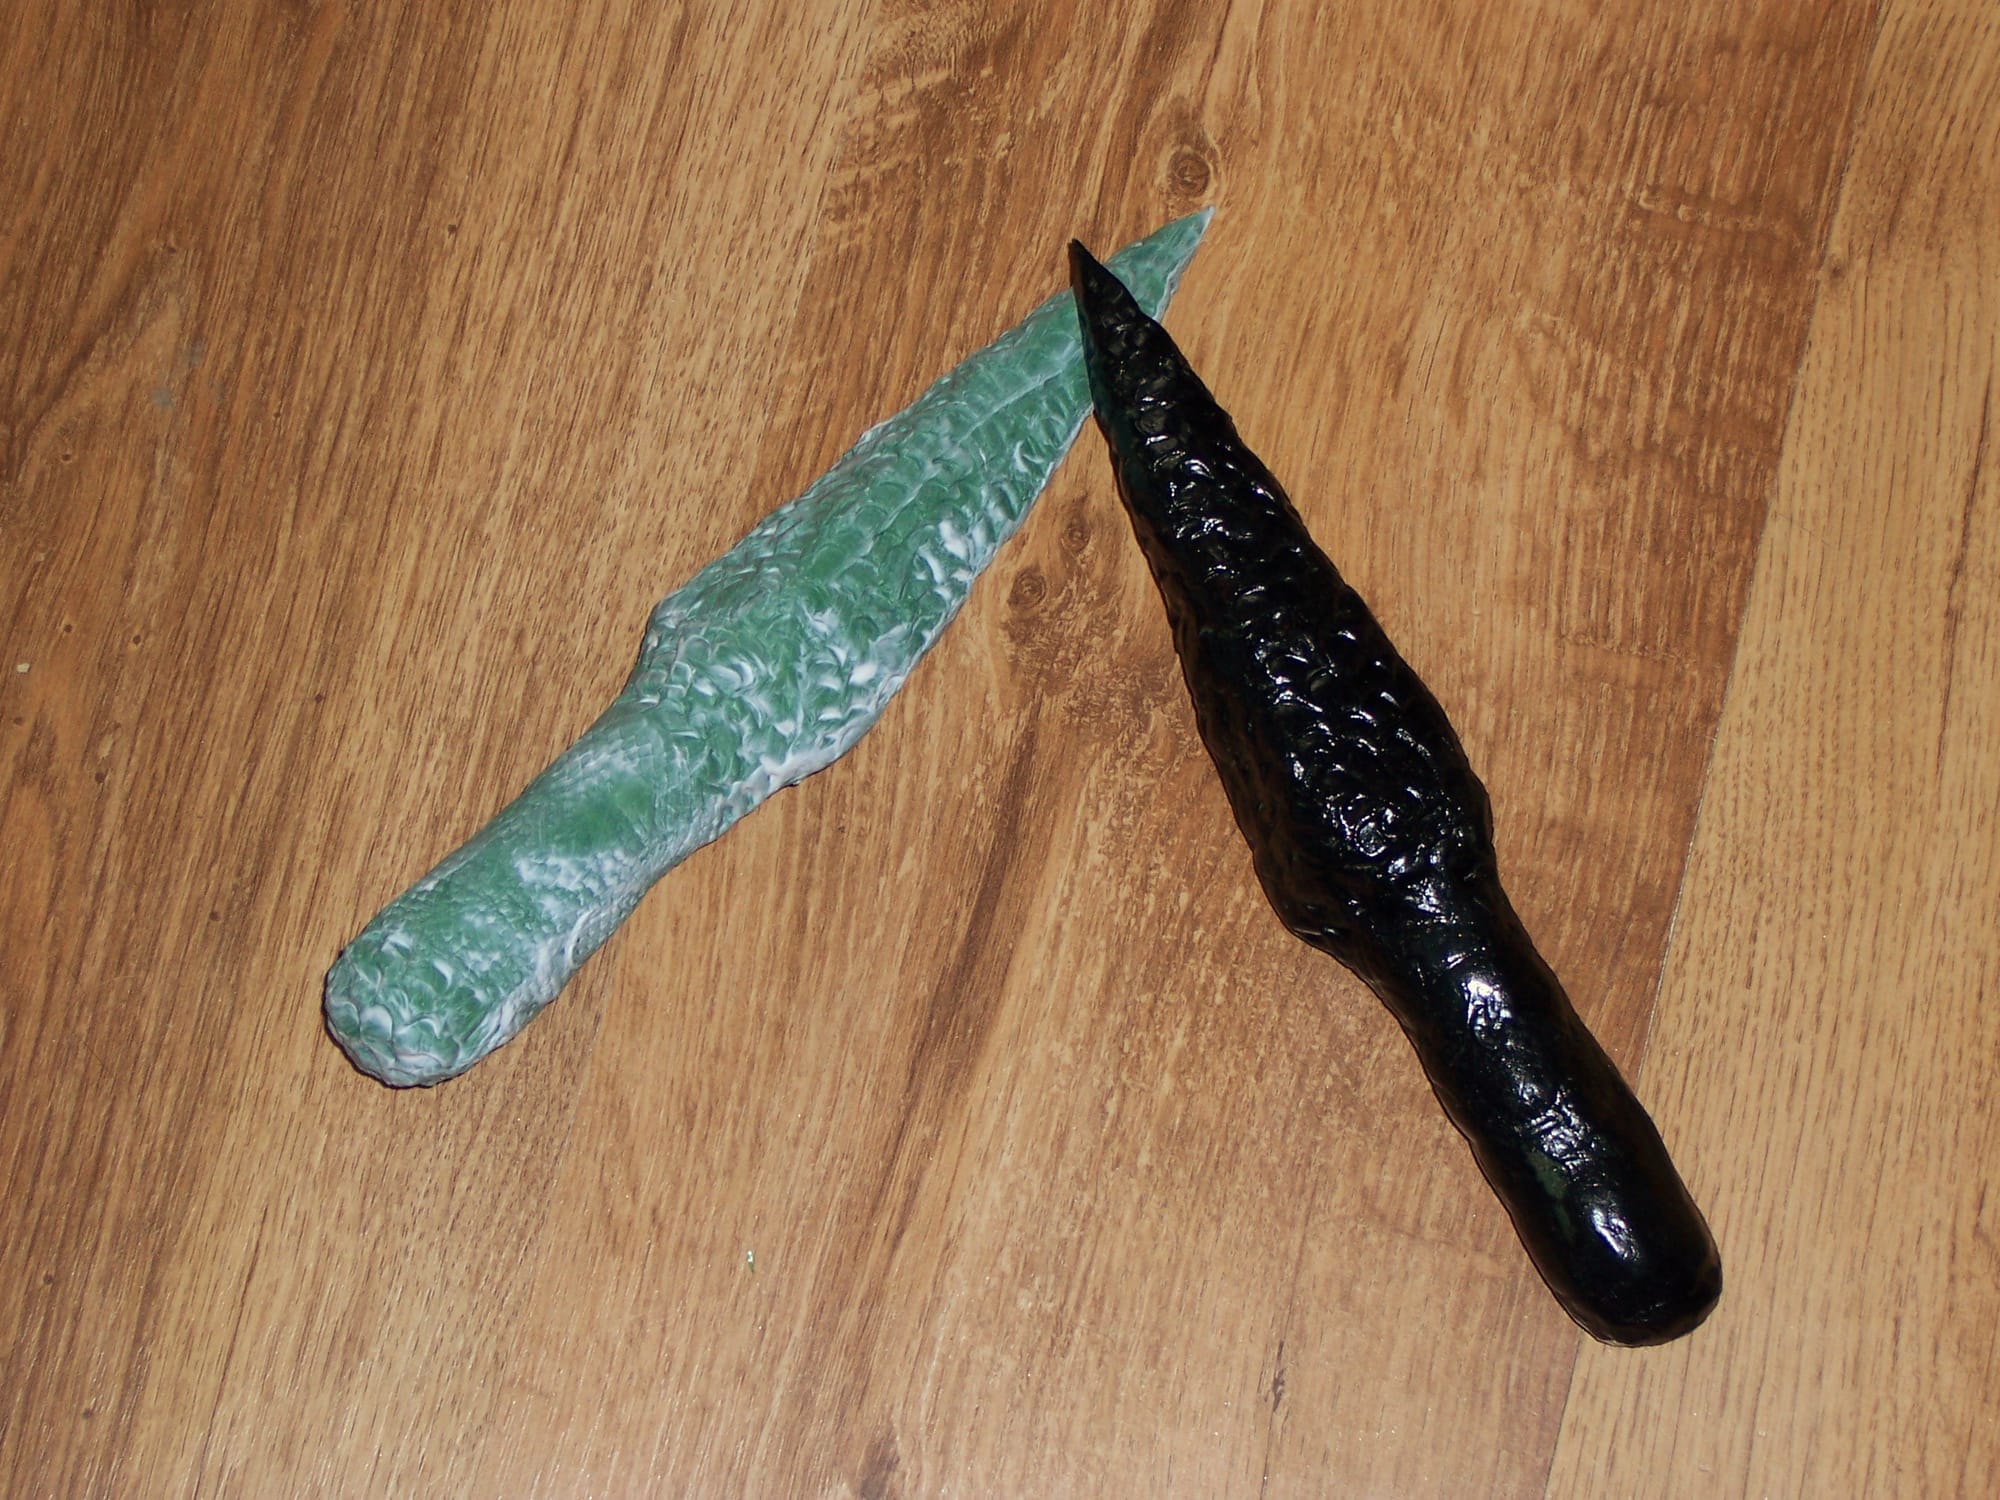
I can't remember now what I did the knapped effect with; it could even have been the end of a spoon. You'll notice I also textured the hilt somewhat, even though I was planning to wrap string round it to provide the grip. I didn't want that to slide off. The paint is ordinary black acrylic paint (I'm very fond of acrylic paints) plus the shiniest varnish I could find. I've seen obsidian. It's kind of glassy. Matt acrylic is not going to cut it.
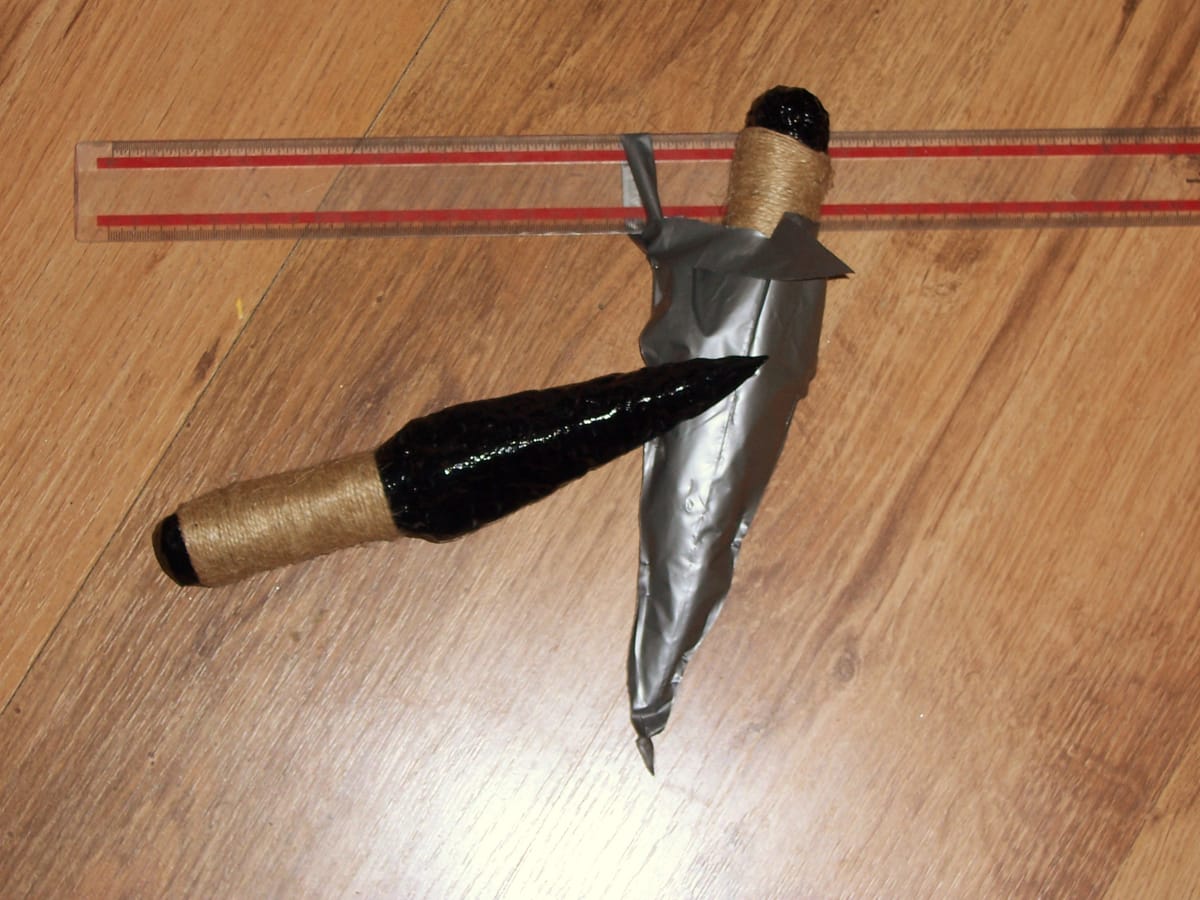
You can see the finished dagger in the feature photo at the top, but I also made a sheath, because it would not have been complete without it. It was convenient to mock one up from part of a plastic bag, just to make sure I had the measurements right; the finished article looked like this.
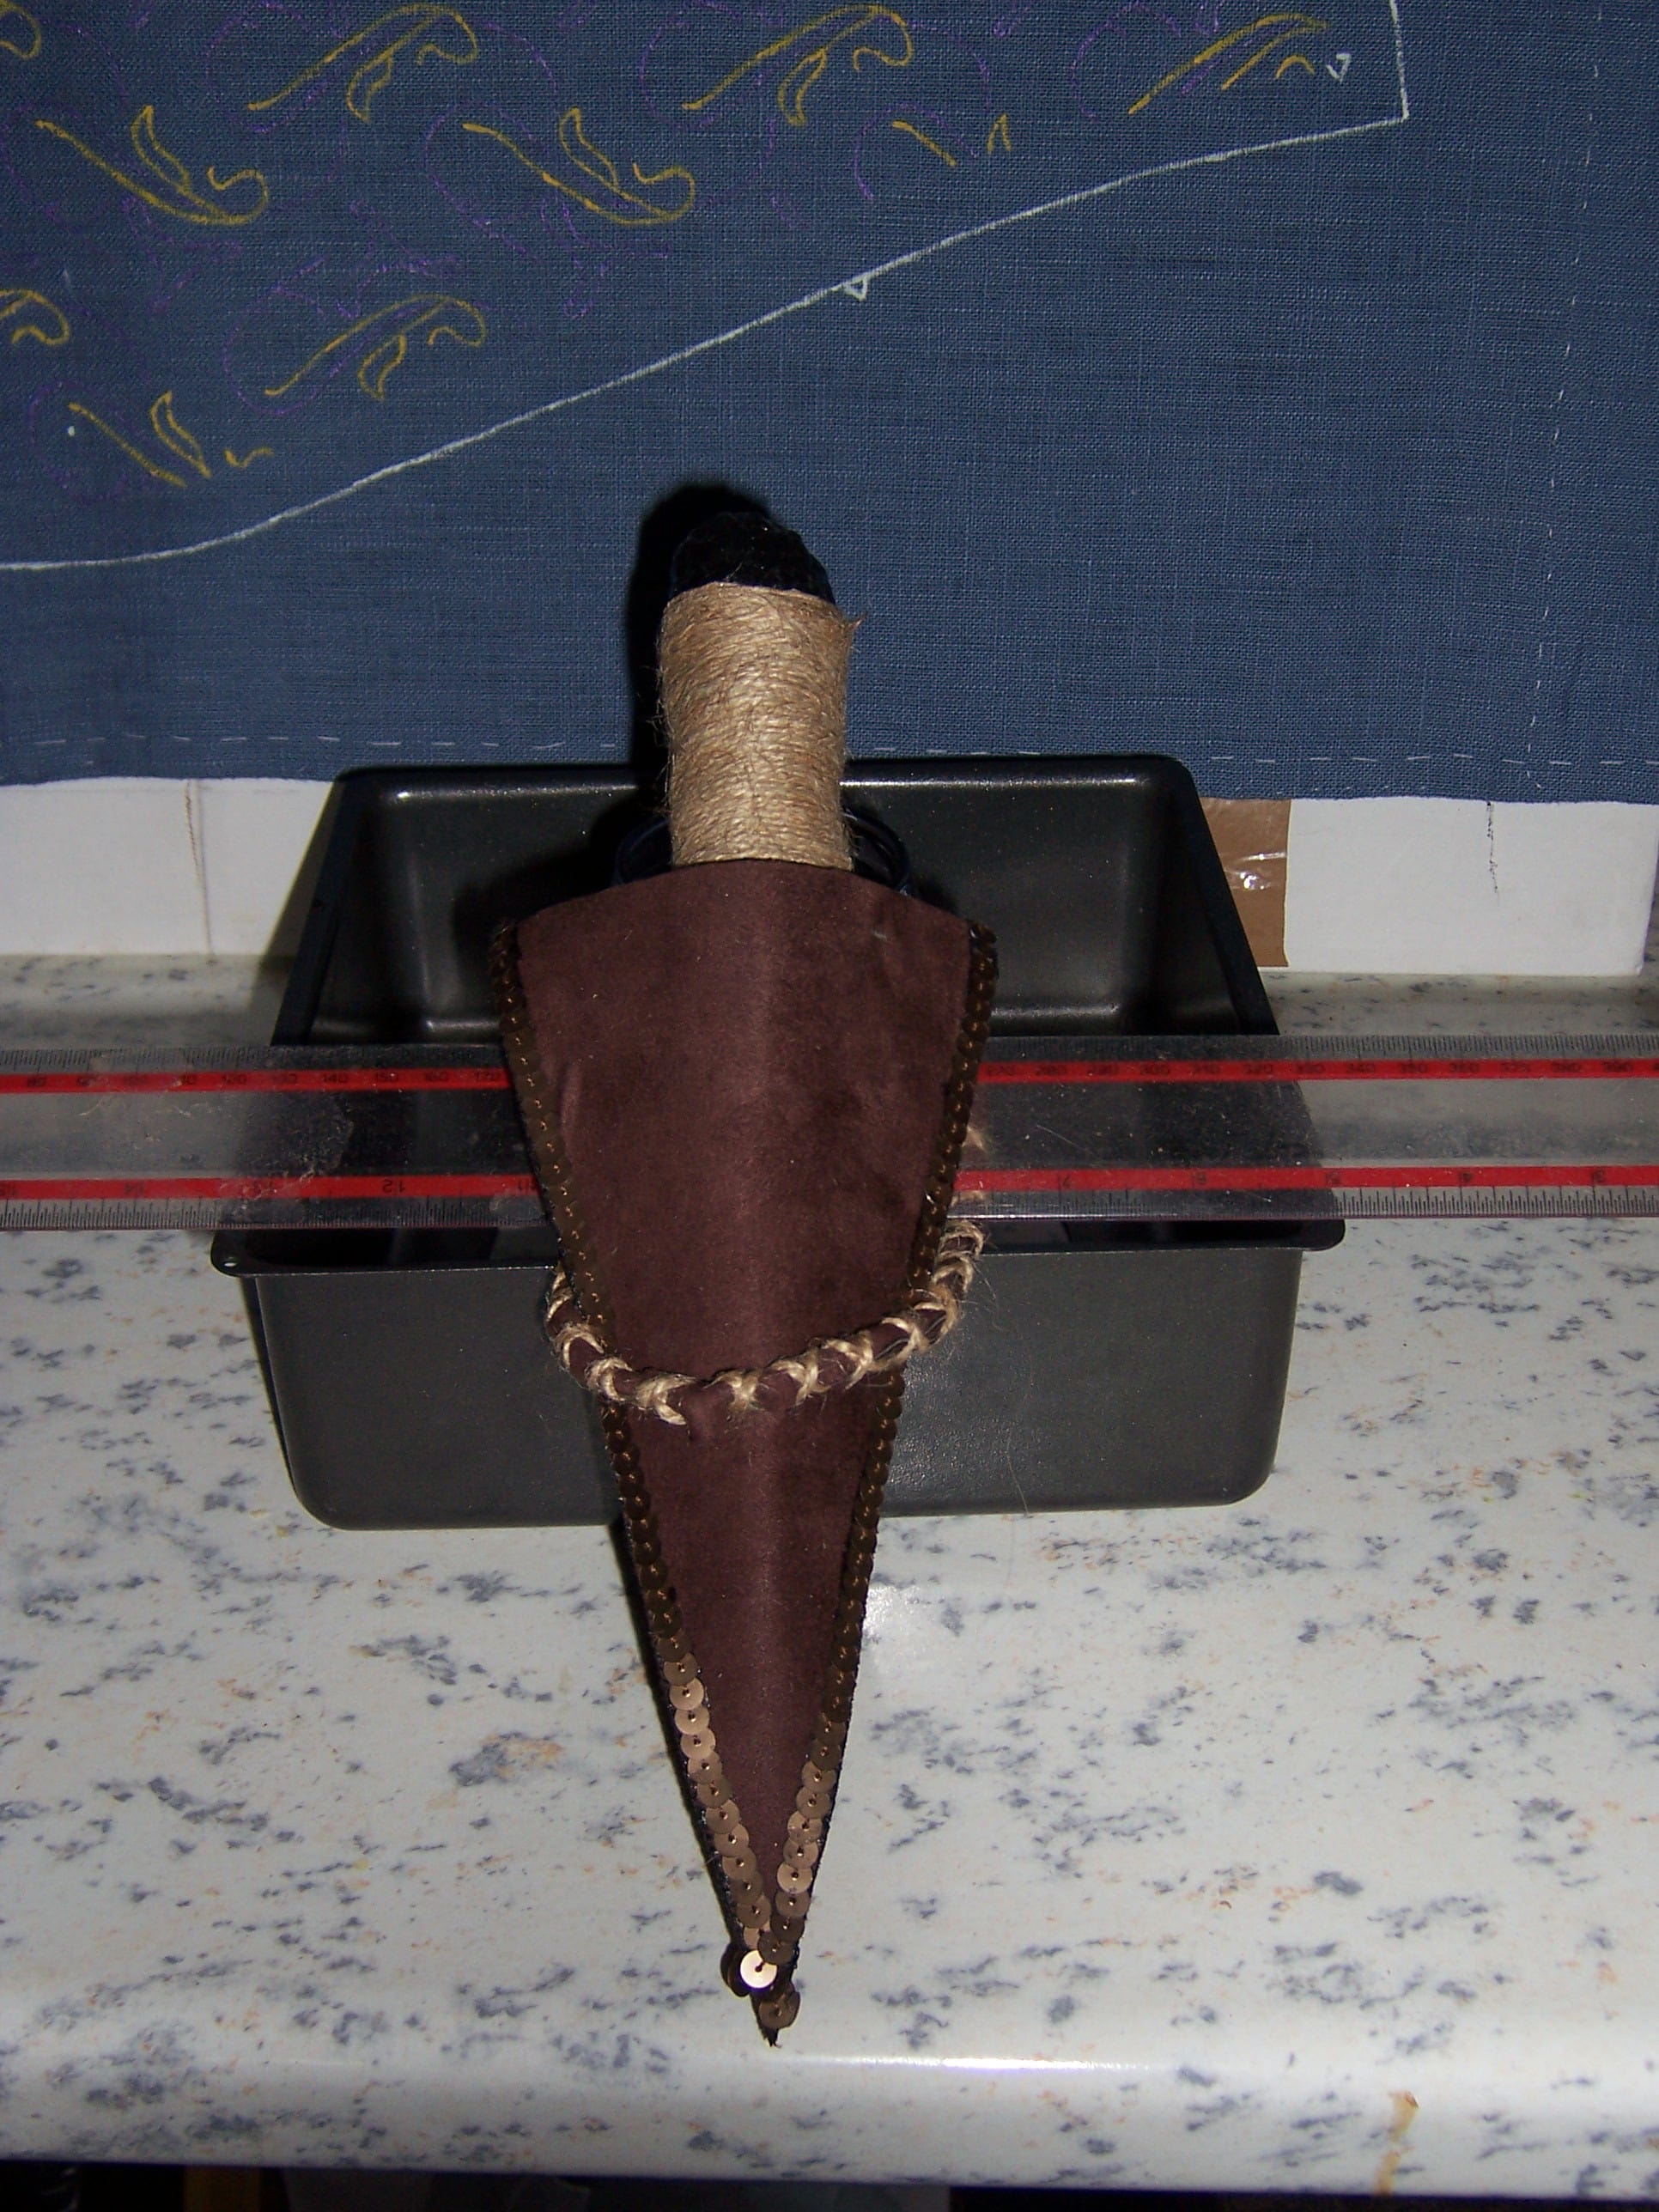
And there's even an unexpected bonus in this photo! I didn't think any part of the original embroidered waistcoat had survived even in a photograph, but look - there it is in the background. (I actually pounced that design onto the fabric. It worked very well but I am not doing that again; there's just too high a risk that you're going to smudge it in the process, and that's quite stressful.) Don't ask me what it's doing in the kitchen; I haven't a clue. It was a long time ago.
Anyway, there you have it. Sam Tarly's dagger, and enough information that you can make your own, should you so wish. Excellent against... you know, it's so long since I've read the books that I forget what now!