Net gain
The other day, one of our church staff contacted me for a health and safety assessment for my netting class. And I had to laugh, because I actually had just managed to injure myself doing netting. Not seriously, and it isn't anything the class is going to be doing, so I was able to get back to her and assure her that anyone who was old enough to learn netting (which requires a certain basic level of dexterity and ability to concentrate) was also going to be old enough not to swallow the string or poke someone in the eye with a netting needle. (And also that none of the equipment used is actually sharp, even though those things are called needles.)
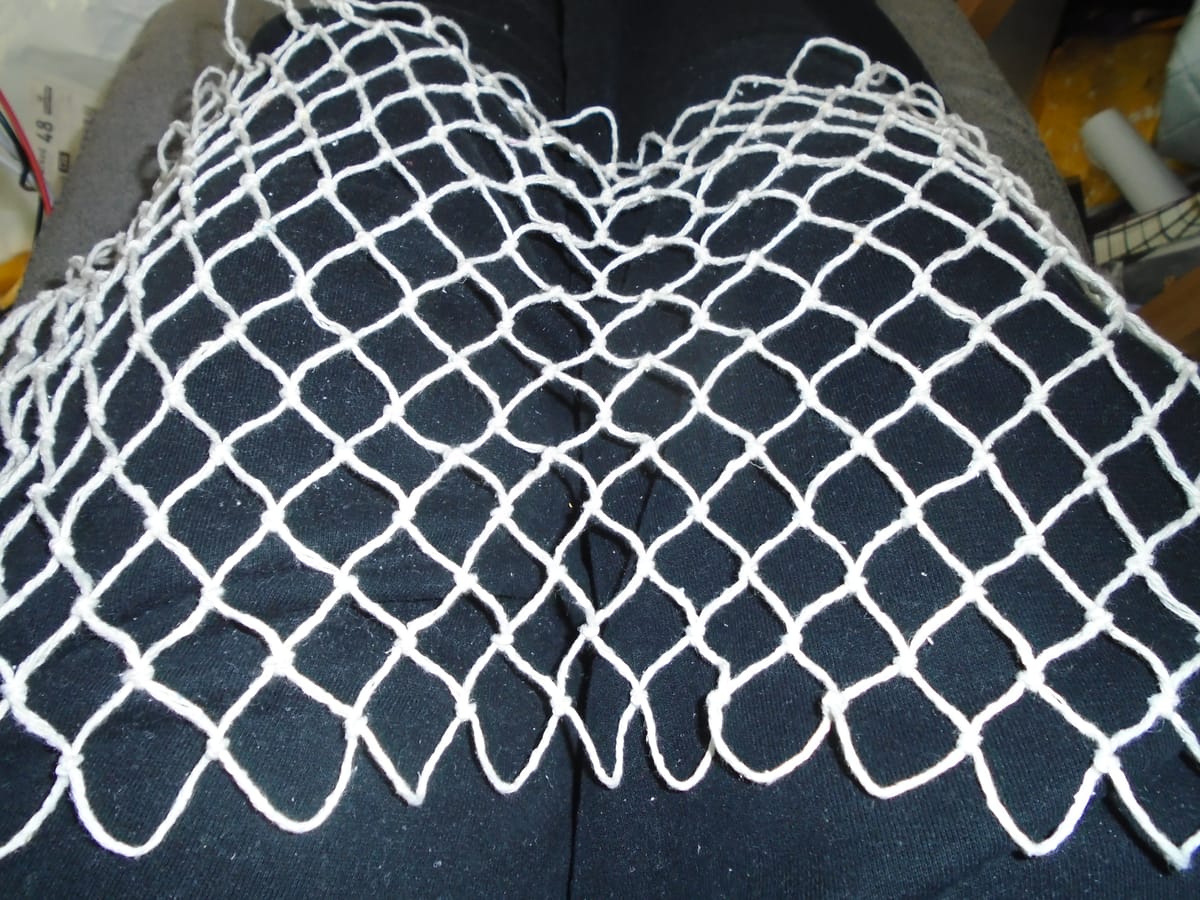
In fact, I injured myself making the sample, and this photo should give you some idea how I did it:
Bloomin' headropes. We hates them, precious. The thing is, the book tells you to fasten them between two chair backs, and then either go round to the other side of the headrope to do alternate rows or, if you have the trick of it, net from right to left. I don't have two suitable chair backs, so what I do is I fasten my headrope round my regular netting frame. This has the great advantage that you can turn it round easily to work alternate rows... and the great disadvantage that it is extremely unwieldy, especially when you're starting your netting off. I knotted up the muscle over my right shoulder blade on Saturday night. Our pastor's wife very kindly had at it the following morning, which helped it a bit, but it still isn't right after nearly a week. The class, however, will not be using headropes. I'll certainly mention them, and in that context I shall also point out that using them on a frame is something that should be done with caution; but they don't need to go into the health and safety assessment.
The other problem with a headrope, which is not a health and safety issue, is that it is very easy to forget to do your second half hitch. When you're starting a piece of netting on a headrope, rather than doing the usual netting knots (which won't come out - that is the whole point of netting knots), you do two half hitches. It really doesn't matter whether you do them both the same way round (clove hitch) or opposite ways round (lark's head knot); I tend to like the latter for this purpose, but either will temporarily hold your meshes in place equally well. With this particular sample I managed to forget the second half hitch on two consecutive meshes, probably because I was busy trying to massage my own shoulder blade (not an easy job even if, like me, you are fairly bendy). So I had what you might call some fun and games on the next row, trying to keep the meshes even. I'm actually quite amazed at how well that worked.
Now this thing is just a sample, for two purposes: primarily it's so that the lady who's organising the whole craft thing can put it up on a display showing people what they're potentially signing up for, but secondly I also wanted to assess the string. And this string, considering it was the cheapest I could find on eBay, is actually amazing. It's perfect for beginners. It's soft, so it's very nice to work with; it has a perfectly even thickness (unlike my jute twine, which varies quite a lot and therefore makes very characterful string bags, but a beginner is going to have trouble making nice even meshes with it); it's thick enough that mistakes can be taken out fairly easily, but not so thick it's awkward to work with; and frankly Mr Stark Raving Bonkers or whatever it is he calls his shop (don't laugh - it really is something like that) deserves some kind of award for services to netting. Even though he probably wasn't setting out to do that.
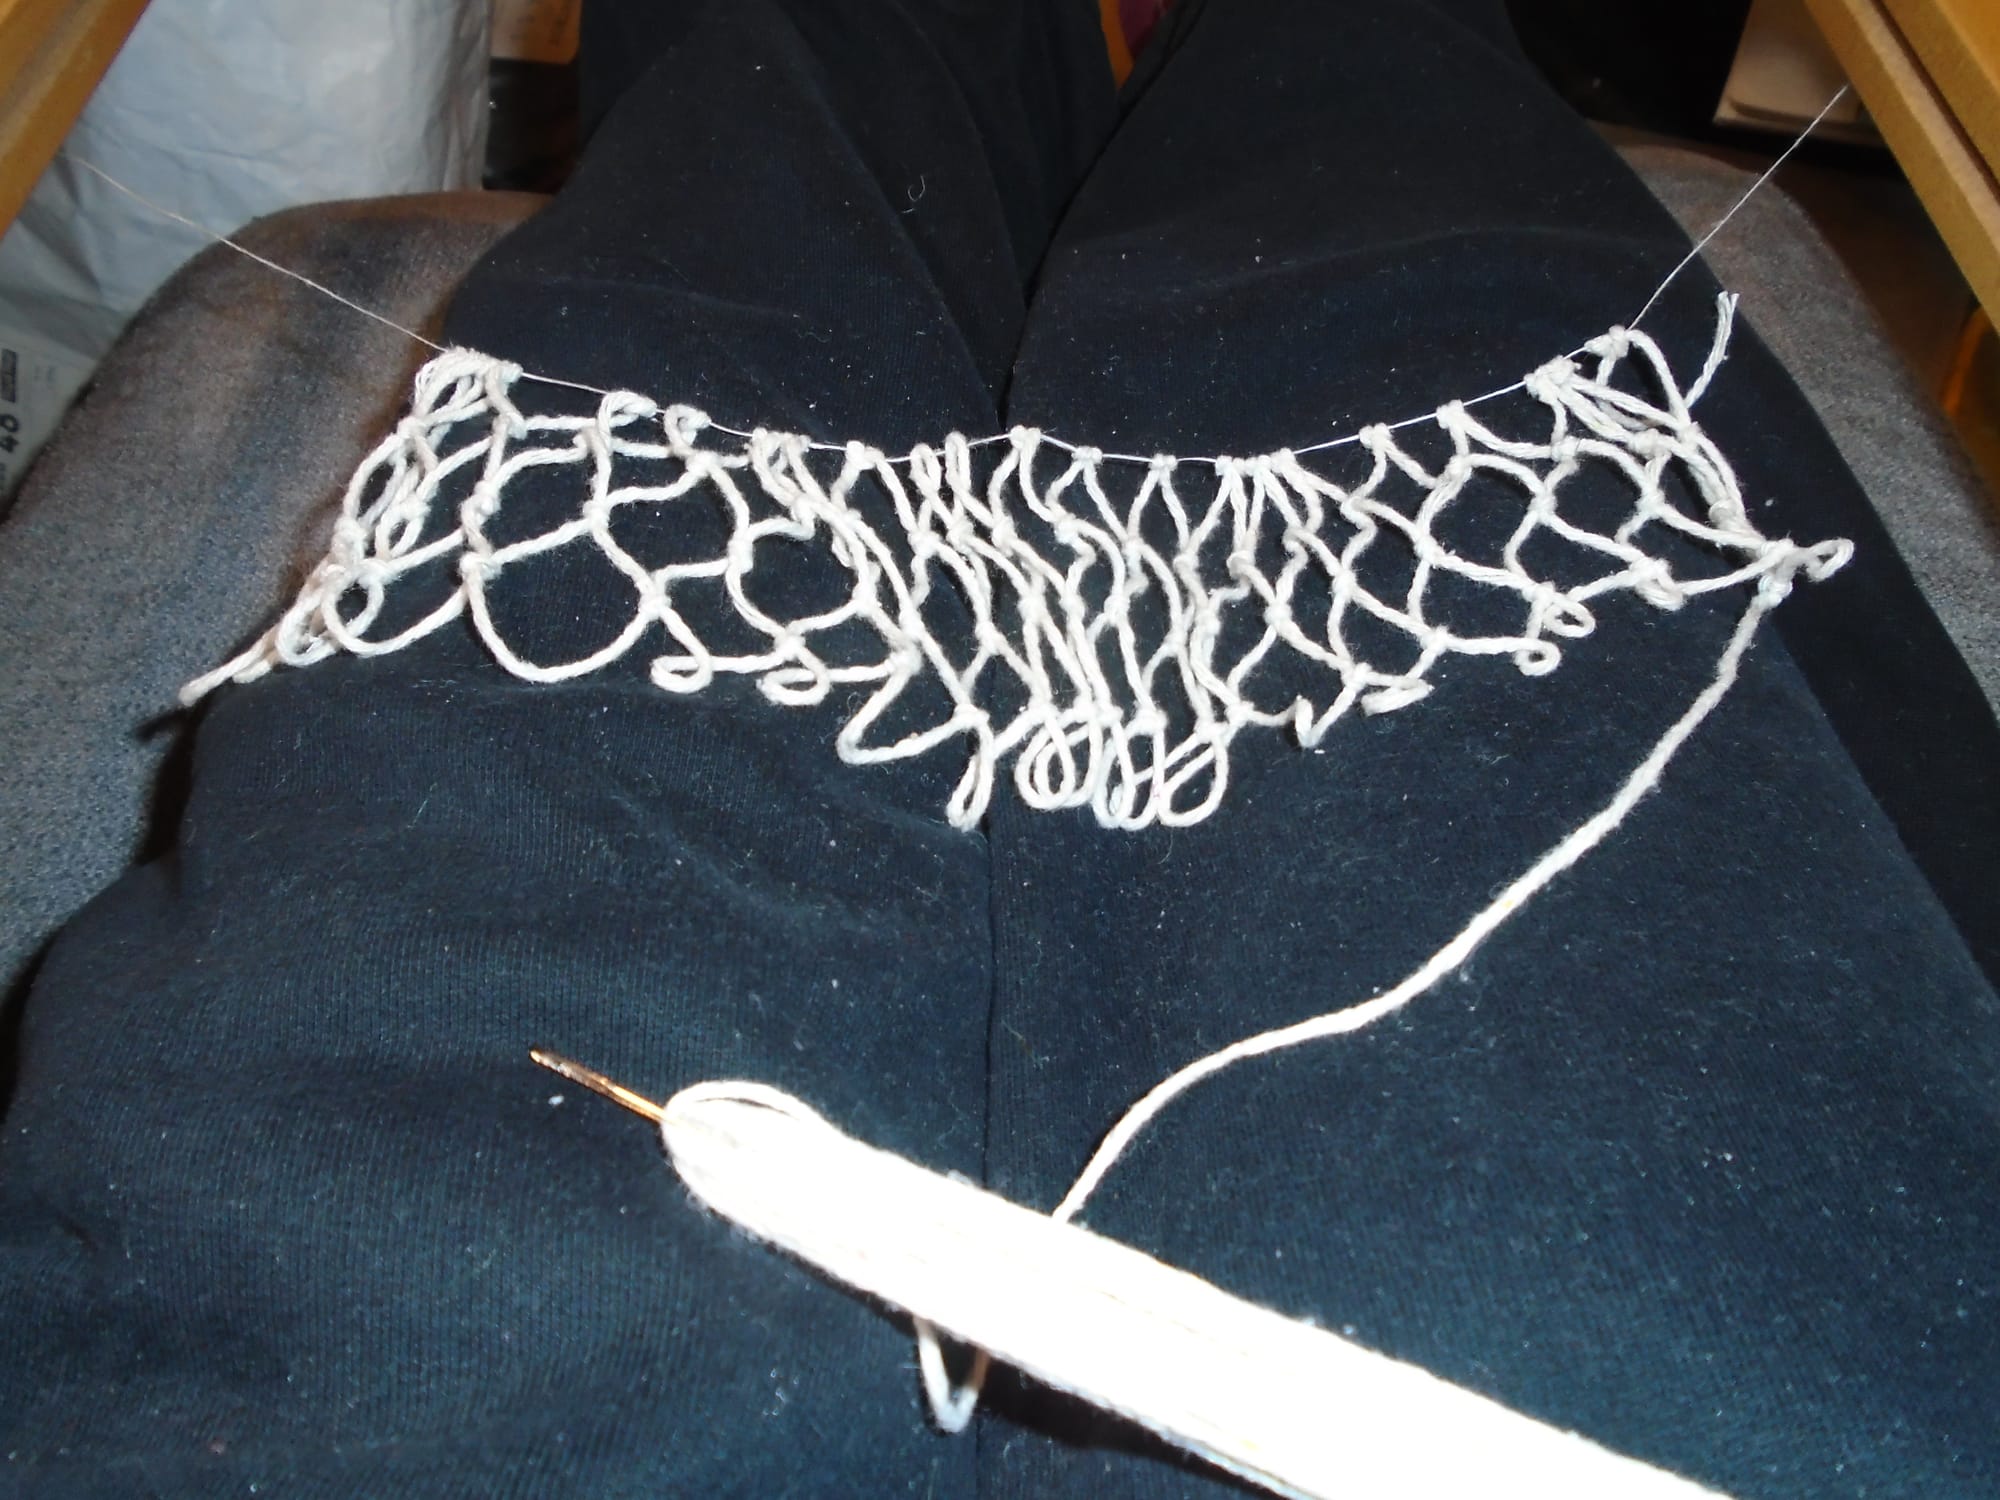
As for the other piece of netting, the square-mesh piece that turned out to be one mesh bigger than I intended it to be, I've now adapted one of Vinciolo's designs for it and it now looks like this:
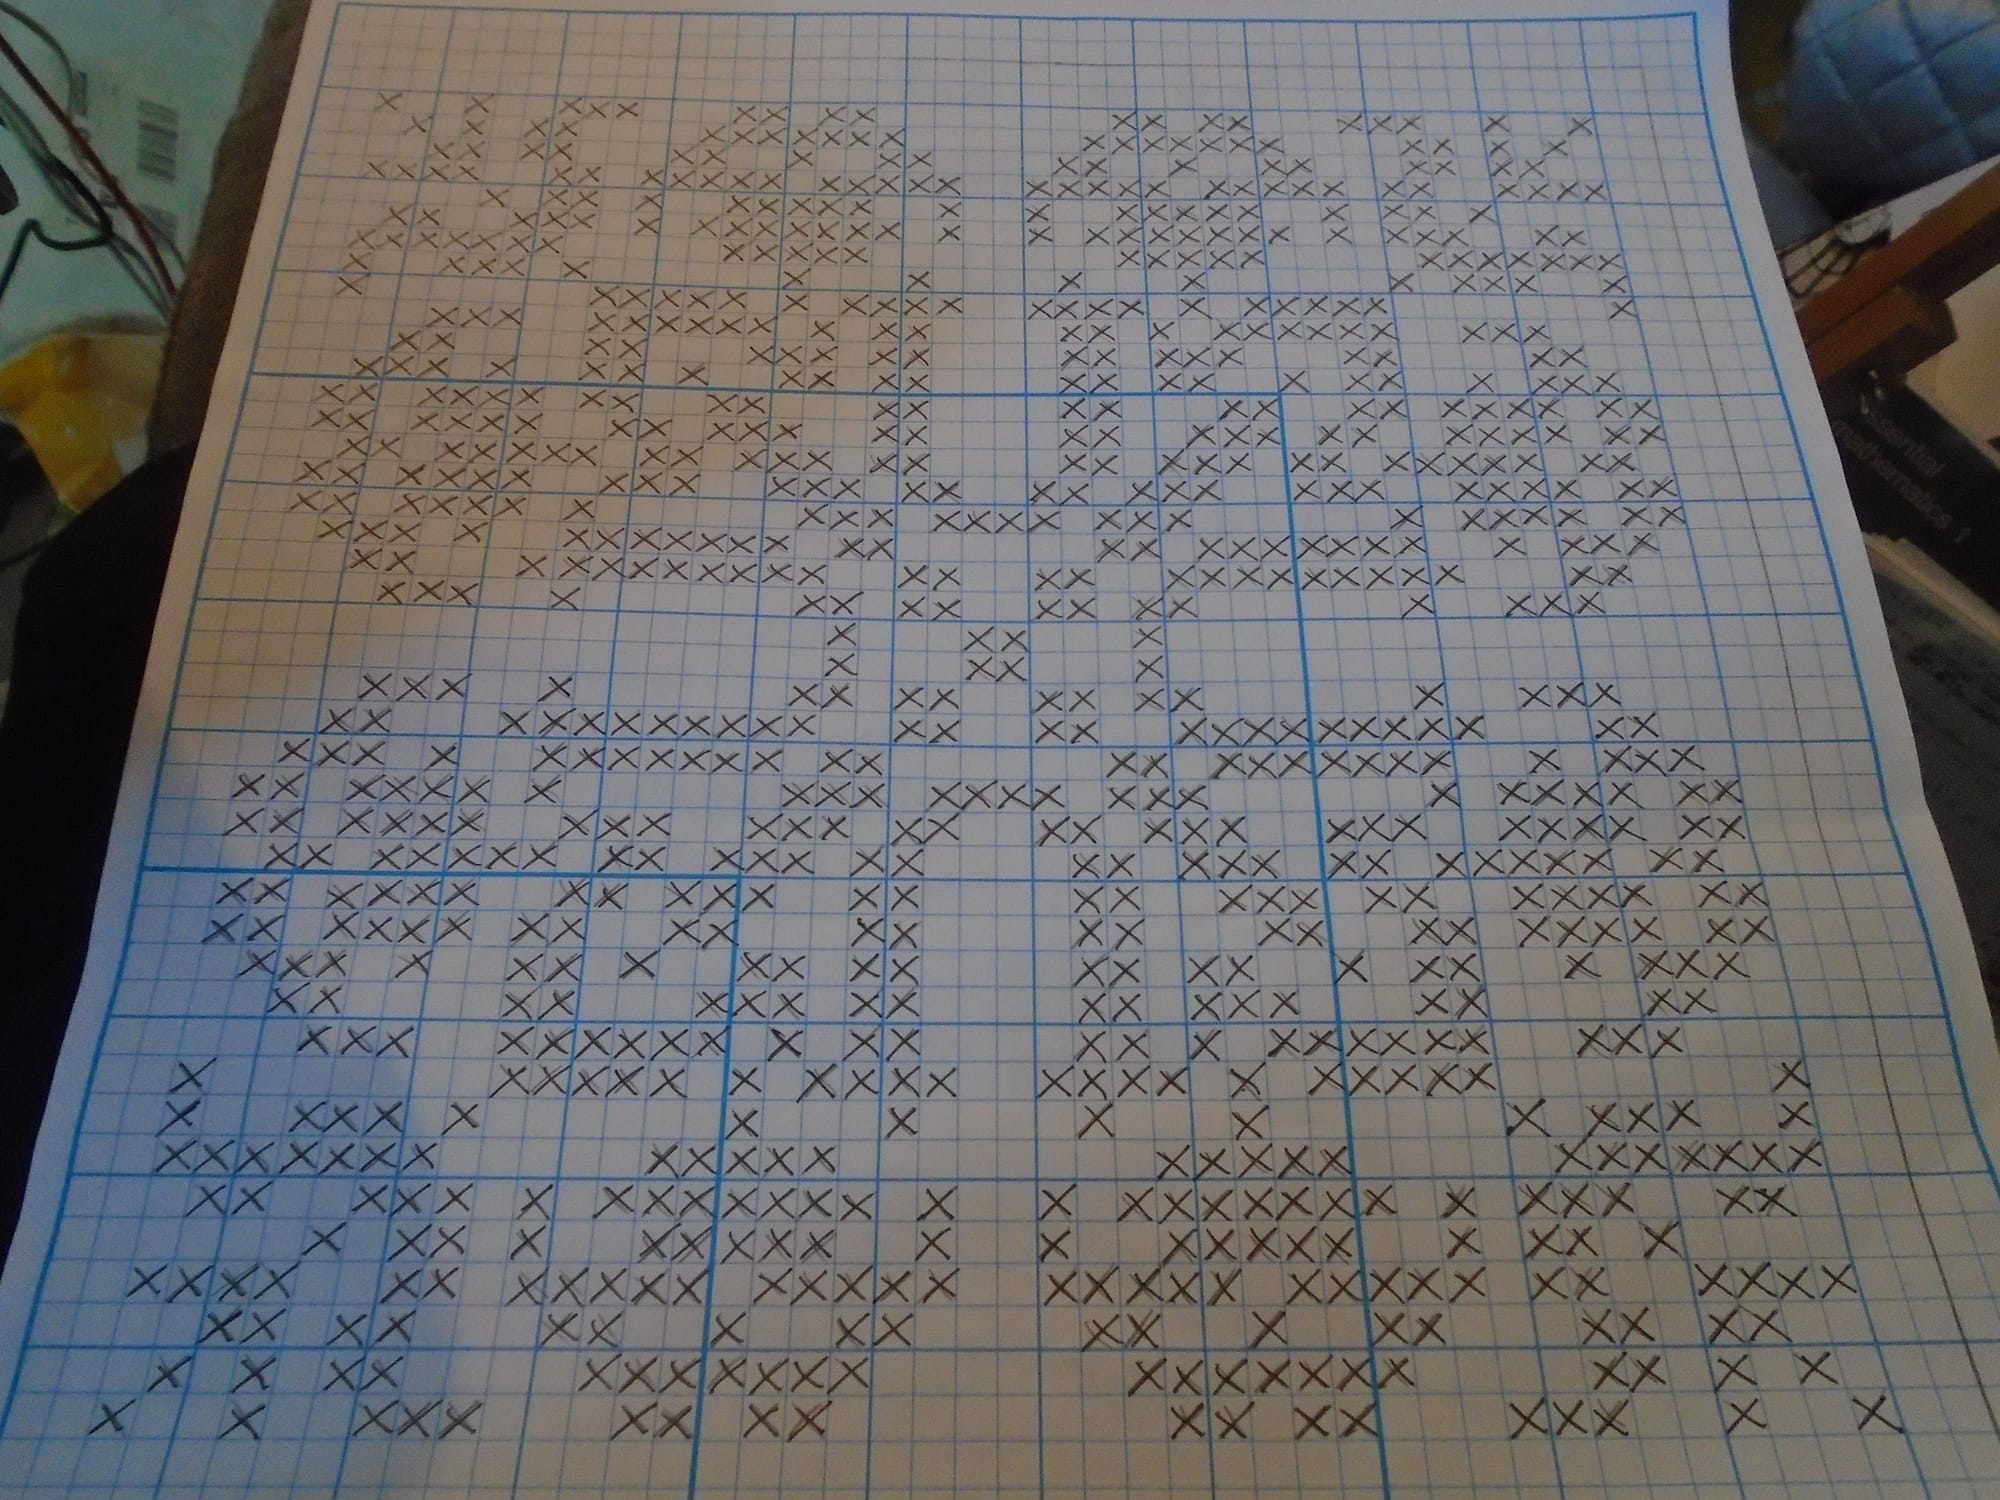
I will admit that I do have serious trouble with this squared paper, to the extent that I just have to ignore the heavier grid lines as best I can (thankfully they're not really needed for this design). Squared paper that divides up in blocks of four rather than five is really weird; however, the size of the squares is ideal for filet patterns. You can see what you're doing. It is American paper, so it's marked up in inches and quarter-inches, and it's actually quite close to the size of my netting, because the meshes on that are about 6 - 7 mm square. (Slightly annoyingly, it's not quite exact, otherwise I could just secure the netting over it and use it as a pattern. What I'm going to have to do is secure the netting over a piece of blank cardboard, ideally black so it shows up clearly, and mark the pattern using the meshes themselves.)
So that's where we are with the class preparation so far, and there will be more photos once the filet is actually in progress. In the meantime, I have finished the baby jumper, so Baby R can rock up as soon as he feels like it; and, inevitably, I've now discovered that there is also going to be a Baby W, who is not due till July so I don't need to knit for that one quite yet. And Porthos has decided that in fact he would quite like a pair of socks for his birthday (which is in June), so that'll be fun. I expect they will be pretty big socks, since he's a big Porthos...
...and I've just realised it's only just over two weeks till Easter. Aargh. Better get a wiggle on, then!