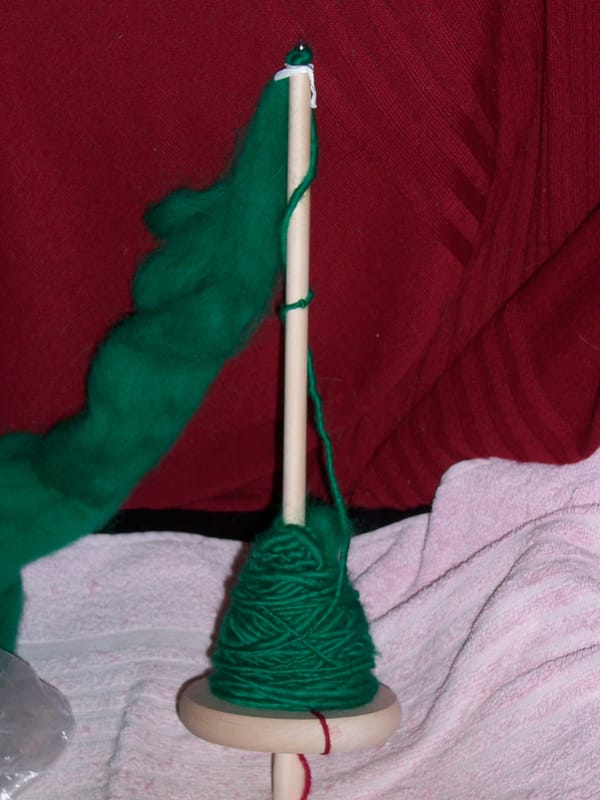
Mind the gap
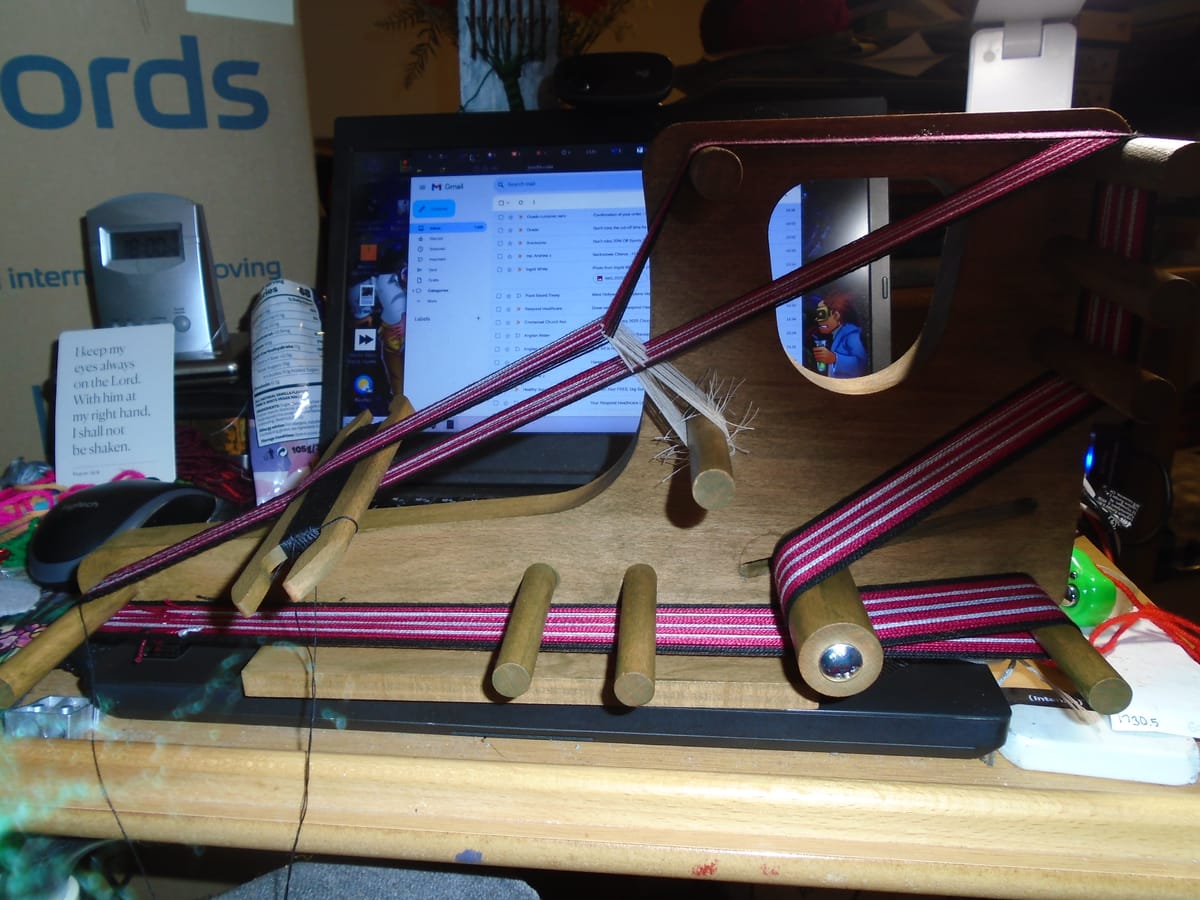
Adelaide takes an age to warp up. Well, she would, I suppose; little Gisele won't take more than 15 warp ends, but Adelaide will take a great deal more warp than that, and you can't really call it ends, either. Adelaide's warp is continuous. You remember that little screw in one of the previous photos, pretty much right underneath the peg on the extreme left, that doesn't hold anything? You start by hooking the end of your warp on that, and then you just keep winding, with alternate threads going over the peg at top left. And when you need to change colour, you cut the warp thread just past the bottom left peg (which is called the start peg) and then tie in your new colour with a reef knot. It doesn't have to be anything fancier than that, as it just has to hold for the duration of your weaving; it won't be there in the finished piece. The final warp thread is then tied to the start of the warp that you wound round the little screw; and so you have an eternal, though not necessarily golden, braid.
So I picked black (because I was planning to use a black weft thread), two shades of crimson red, and two shades of light grey. You can't really see the differences in the photo, except maybe you can just make out that the central light grey stripe is a bit darker than the two light grey stripes on either side of it; the variation in the reds, even in real life, is so subtle you'd easily miss it. Note to self - try a little more contrast next time. Still, it does look nice, even so. I didn't make a chart; I just warped up as I went along. If you have different colours on different rounds (say round 1 is black and round 2 is red) they will alternate; but I just wanted stripes this time, so I warped up in pairs. It went like this: 3 pairs black, 2 dark red, 2 medium red, 2 light grey, 2 medium red, 2 dark red, 2 medium grey, 2 dark red, 2 medium red, 2 light grey, 2 medium red, 2 dark red, 3 black. That's a total of 28 pairs, and, honestly, when it came to making and fitting the leashes, that was quite enough for a first shot.
Ah, yes. The leashes. The photo is quite dark on the right-hand side because the warps on the top of the loom are shading the lower part from the desk lamp above them, but you can still see there's a peg on the right which is sort of vaguely level with the peg the leashes are on. It's the lowest of the set of three at the top right. That peg, apart from holding the warps, is used in conjunction with the peg the leashes are on to make the leashes. You wind a suitable string or thread round them as many times as you have pairs of warps; I used Gutermann thread in ecru, since I happen to have a large spool of it and it doesn't get used as often as the other colours I have on large spools. You then cut close to the peg the leashes are on at the moment, and you end up with, in this case, 28 shortish lengths of thread, each of which you then fold in half and knot about 1 cm from the ends.
It's fiddly. I tied the knot loosely, and then if it didn't look as though it was going to tighten at the right distance from the ends I'd work it along with a needle. So you tie all those, and you think "whew, that was a fiddly job!", but what you don't initially realise is it's about to get even more so. Because once you have all the leashes tied into loops, your next job is to pass the first one over the raised warp thread at the back of the work, keeping both ends of the loop behind the lower layer of warp threads, and then pass both those ends over the peg... which isn't easy because of the tension. I couldn't do them both at once, in the end. I had to pass one of them over the peg and then use that fixed point to enable me to pull hard enough on the other end to get it to go over the peg. And that's the easy one, because it just goes behind all the lower set of warp threads; it doesn't have to pass between them anywhere. When you put your next leash over the next upper warp thread, that has to go through the gap between the first two lower warp threads (counting from the back), because they need to alternate, of course. So you have to be extremely careful that both ends of your leash are going through the same gap, and that it's also the correct gap. Full concentration is needed here; this is really not the moment to listen to d'Artagnan singing seventeenth-century French lute songs.
Once you are finally all warped up and fully leashed, there is just one thing left to do before you can start the actual weaving, and that is to insert a pair of little cardboard spacers at the start of the warps. (They don't appear in this photo because by the time I took it, I'd woven enough length to be able to move the warp round a bit, and once you do that you can take the spacers out.) But then, at last, you wind your shuttle and off you go.
Once again, there's a knack to keeping the tension even, though I will say it's easier than with Gisele (which I think is a feature of Adelaide, but it also may be in part due to the fact that I'm using finer threads here; this is number 8 cotton perle, rather than the DK yarn I have on Gisele). I'm not quite there yet, but I'm improving fast. (Curiously, my problem appears to be pulling the weft thread tighter on one side than the other, because the light grey stripes aren't quite evenly spaced.) There is, as it turns out, also quite the knack to the actual weaving. See that big hole in the back of Adelaide? I thought it was for a carry handle, but no (though you can certainly use it for that purpose); what it's really for is to make it easier to push the lower set of warps up and down. Push them down, and you have Shed 1, which is really the default position, because even at rest the upper set of warps is higher than the lower set. Push them up, and you have Shed 2, reversing the threads... except... it's not as straightforward as it looks in the instruction leaflet. To get Shed 2 wide enough to take the shuttle, you do not want to be pushing the lower warps where the hole is. You have to push them from just above the leash peg. Also, the instructions don't specifically say, but they do kind of imply that while you're weaving, you have the loom stretching out away from you with the start peg right in front of you, so the front (as shown in the photo) is to the right and the back is to the left. This does not work for me. I have to be able to look from the side to ensure the shuttle is going through Shed 2 properly, so I'm doing my weaving with the loom facing me exactly as shown in the photo. This is possibly sub-optimal, but it's the way I can get it to work. (It's still quite fast.)
So that's where we are at the moment; and now you also incidentally know that my computer desk is a) far too small and b) a mess. (What you don't know is that, despite what the clock says, that photo wasn't taken at six o'clock. For reasons best known to itself, that clock, despite being radio-controlled, normally runs an hour fast. I'm completely accustomed to it.) The tl;dr here is that Adelaide is a lot of fun to weave on... once she's finally set up!