I'm just wild about Harry
I have been wearing more drapey things lately - dupattas, pashminas, that kind of thing; and an ordinary coat won't go over those properly, so I needed a cape.
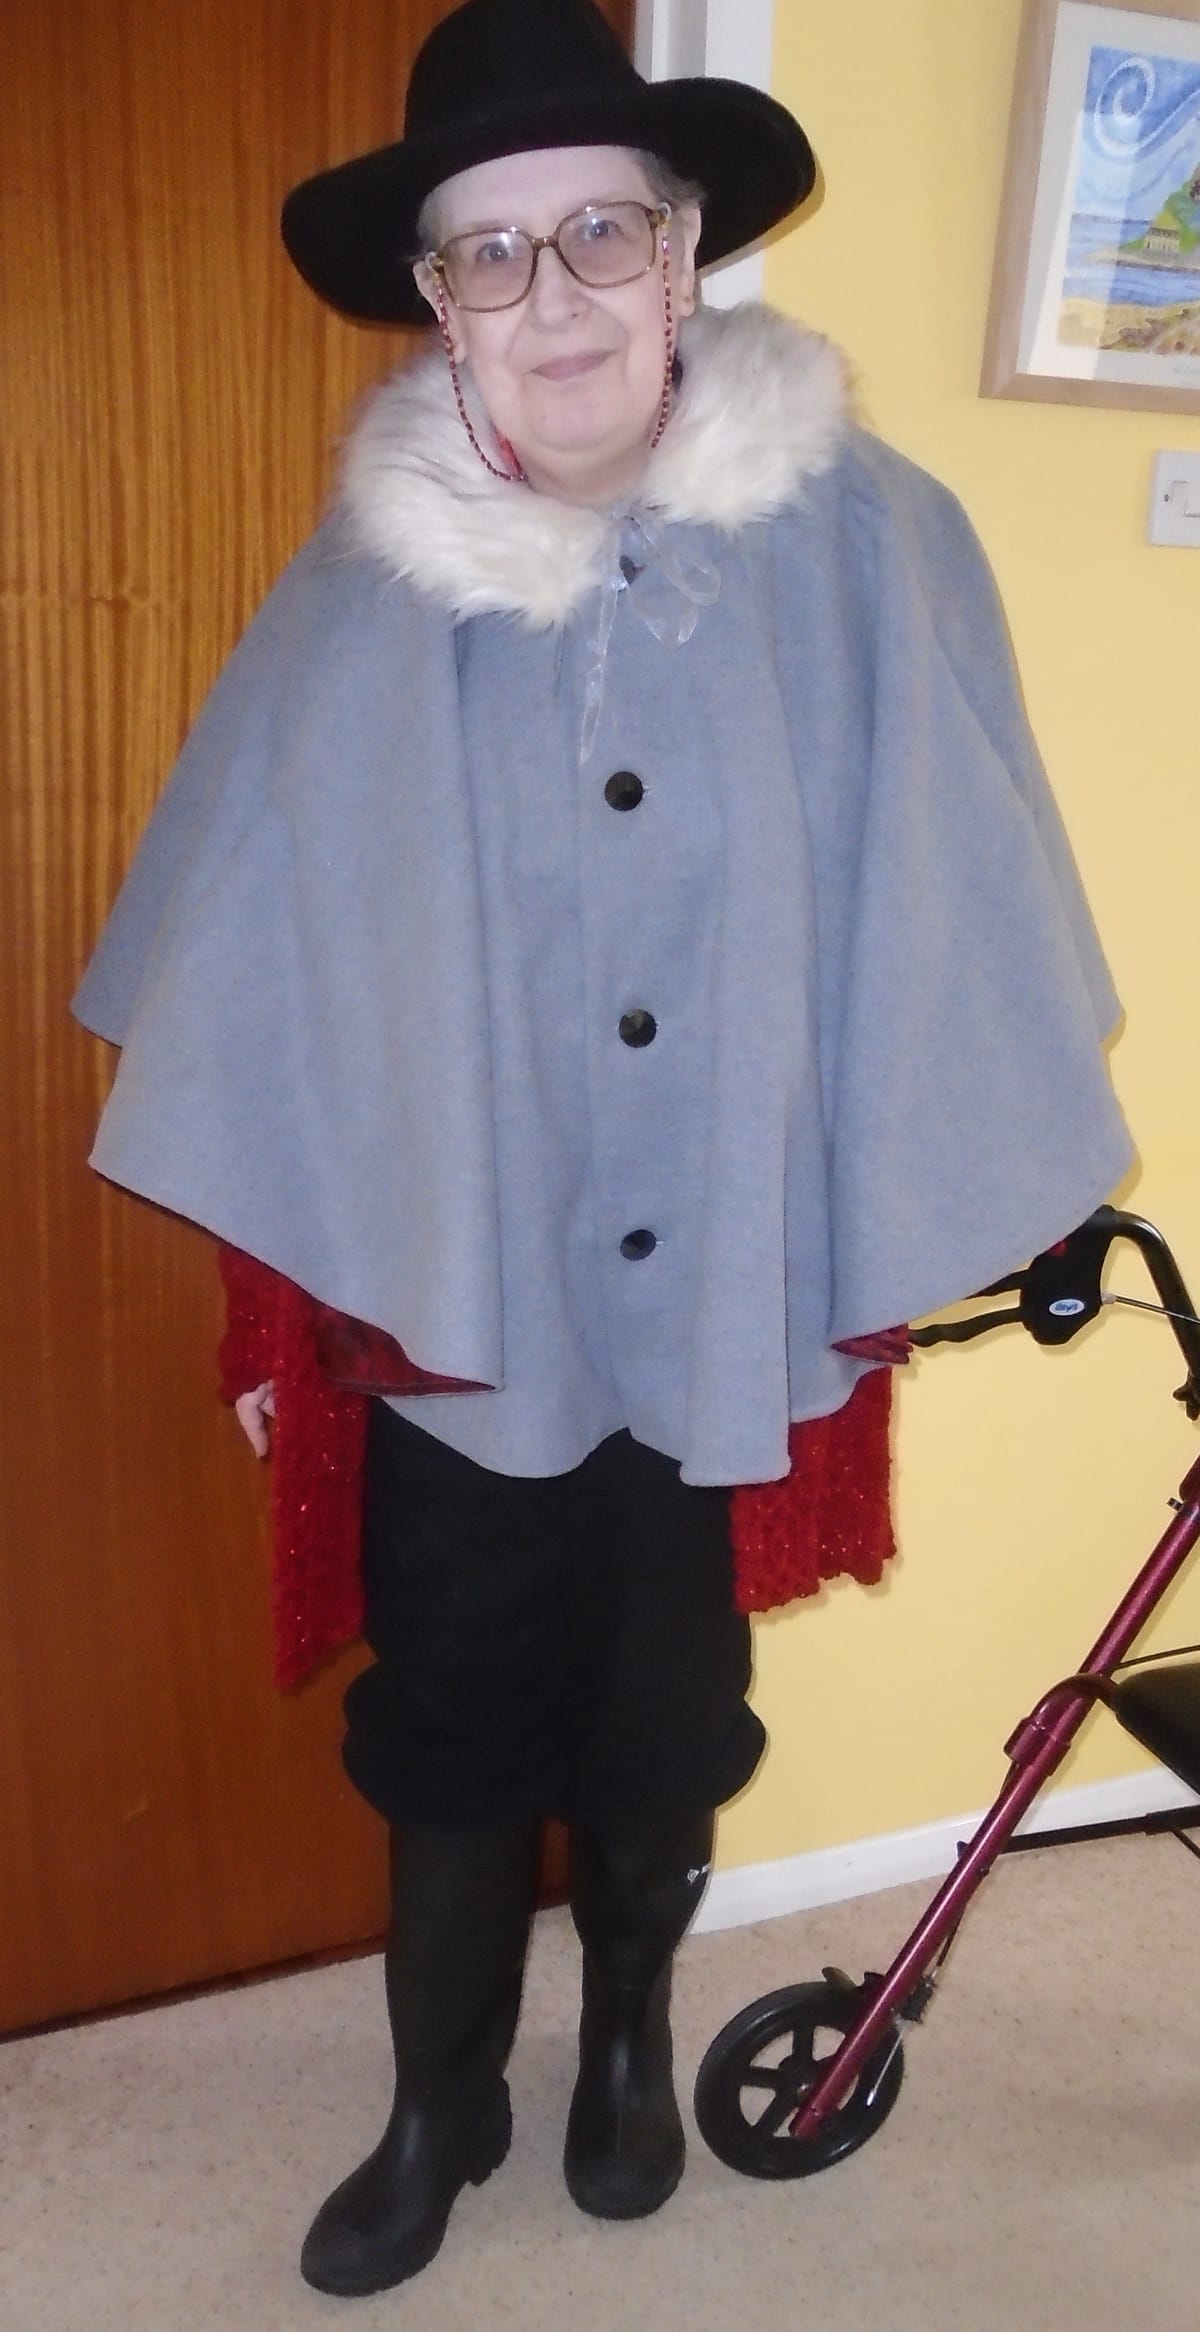
I chose the Harry Cape from I AM Patterns. For a start it was the right length; I normally get about in a mobility scooter or wheelchair, so, much as I love a long dramatic cape, it wasn't practical to make one. And, also, it has pockets. Whoever heard of a cape with pockets? I hadn't, but I thought it was a brilliant idea. (You can't see them in the photo, but they're at side front, hidden by the folds of the cape.) I'm a vegan, so I wanted something that was similar to a good wool coating but wasn't; fortunately there are plenty of great alternatives available these days. For the lining I chose my go-to paisley jacquard satin, which is available in a huge range of colours and is what I use whenever the lining is going to show.
There was, however, a slight hurdle, and that was the sizing information. On the website it tells you that the pattern covers sizes 36-46. This means absolutely nothing to me. Nor, for that matter, does the information that the sizes are 10-22 (normal for the big manufacturers), or A-H, or anything you want to call them... unless you have a size chart. And there is no size chart on the website. However, I thought "it's a cape - how much fitting am I going to need to do, after all?"
So, when the pattern arrived, the first thing I did was to consult the size chart; and it turns out that you are expected to be 165 cm tall (I'm 170 cm, but I have a short back, so I decided I probably wouldn't need to alter the length), and the sizes go from 82-62-88, which is the 36, up to 102-82-108, which is the 46. And I'm 110-86-110, which isn't any standard size from any manufacturer anywhere.
Fortunately, I do also have a rather narrow neck for my size, and really all I needed to fit was the collar. A little measuring suggested that the largest size would actually be fine, and, as you can see from the photo, it is. (A word about the tippet: that is self-drafted, but using the Harry collar as a guide. I removed the overlap at the centre front and widened it a little. The tippet has the same lining as the cape.)
A word of warning: all the pattern pieces are printed on the smallest piece of paper they could comfortably manage. In other words, they overlap and you have to trace them. There isn't a problem with clarity, though you do need to be on the ball; however, it is awkward if, like me, you can't stand up for very long at once. So I had to do the tracing in the same way as the fabric cutting - do a stint, go and sit down for a while and do something else, rinse and repeat. This is why, much as I really do like this pattern, I won't be buying any more from this company; the idea is good and will work for most people, but it's just not very disability-friendly.
This is an easy sew, whichever way you do it; I invariably sew by hand (so I ended up making it in a bit of a rush, because the weather stayed warm a lot longer than I would rather it had, and when it's warm you don't want a lap full of heavy coating fabric), but I can't see anything that would be awkward if you used a machine. The instructions are clear and contain helpful side notes for inexperienced stitchers; for instance, the collar is sandwiched between the body and the lining with the right sides together, and you then sew through all four thicknesses of fabric around the neckline and turn the right way out through a gap left in one of the shoulder seams. There is a helpful note to say that the collar will not lie flat. In fact it is very far from flat, and a beginner could easily worry that they had done something wrong without that note.
In common with a lot of patterns from independent designers, the seam allowance is only 1 cm, not the regular 1.5 cm. This is fine on fabrics that don't fray, but if you are making one of these you might want to do what I did and fray-check the edges of the lining that align (at least more or less) with the weave of the fabric. You don't need to do it very thoroughly, just enough to stop the worst of the fraying, because all the seams are going to end up fully enclosed.
Yes, the buttons are on the right. No, that is not a mistake, and no, the photo is not mirrored. That's how I like them. I spent several years living in Charles Tyrwhitt shirts, so I'm used to the buttons being on the right; and one of the many advantages of making my own clothes is I can put them there.
Now, the thing is, I was going to a concert at the Wigmore Hall on 1 October (a big event, as I am very rarely able to get to concerts these days), and I wanted to get the cape finished in time for this concert. And I... nearly did. The only problem was that, when I turned it all the right way out, the lining was inclined to drop, and it was visible along the lower edge. It clearly needed topstitching, but there was a little problem with that. The lower edge of the largest size is 4.6 metres long. I didn't have time to topstitch all the way round that by hand and make the tippet; and I'd set my heart on that tippet. What to do?
Well, as it turned out I had some thread that was such a close match for the lining that it was quite hard to see it to take it out later. So I just tacked it up on the inside, making sure the tacking didn't go right through the outer fabric. The result was relatively quick and practically invisible, and I wore the cape and the tippet to the concert with complete confidence. Then I did the topstitching after the concert, and by the time I wore it to church on the following Sunday it was fully finished.
And that's not all! This doesn't apply to me, but if you're thinking of making this and you have children, there's also a child-size version available so you can be all matchy-matchy and super cute. You could even make your little ones a matching tippet each - it's so easy to do (just make sure you have a good clothes brush!) and they'll be thrilled.
Harry. Potentially your new best friend. 😃