Hanging in there
Before I start, I have a little announcement to make. I'm starting to find it difficult to keep this blog going on a daily basis, and I'm also aware that something is going to have to give when I re-start my degree course in the autumn. I decided to wait till I'd finished the green jacket (which was a lot of work) before I came to a final decision, because then I'd have a better idea of how much time I normally had. Well, that was finished a week ago, and I'm still feeling I'm trying to balance things all the time; so the blog will carry on as normal until Friday, at which point I'm having the weekend off, and after that it will appear on Mondays, Wednesdays, and Fridays only.
Why those days? Ah, well, it's because I have an instant reminder system. It's called Girl Genius. It's my favourite webcomic, it comes out on those days of the week, and on those days it's the first thing I look at when I open my browser; so I will know that if I've looked at it, I'm doing a blog post. Simple. (And if this blog is still running when it finishes, then by that time I shall have it well ingrained anyway!)
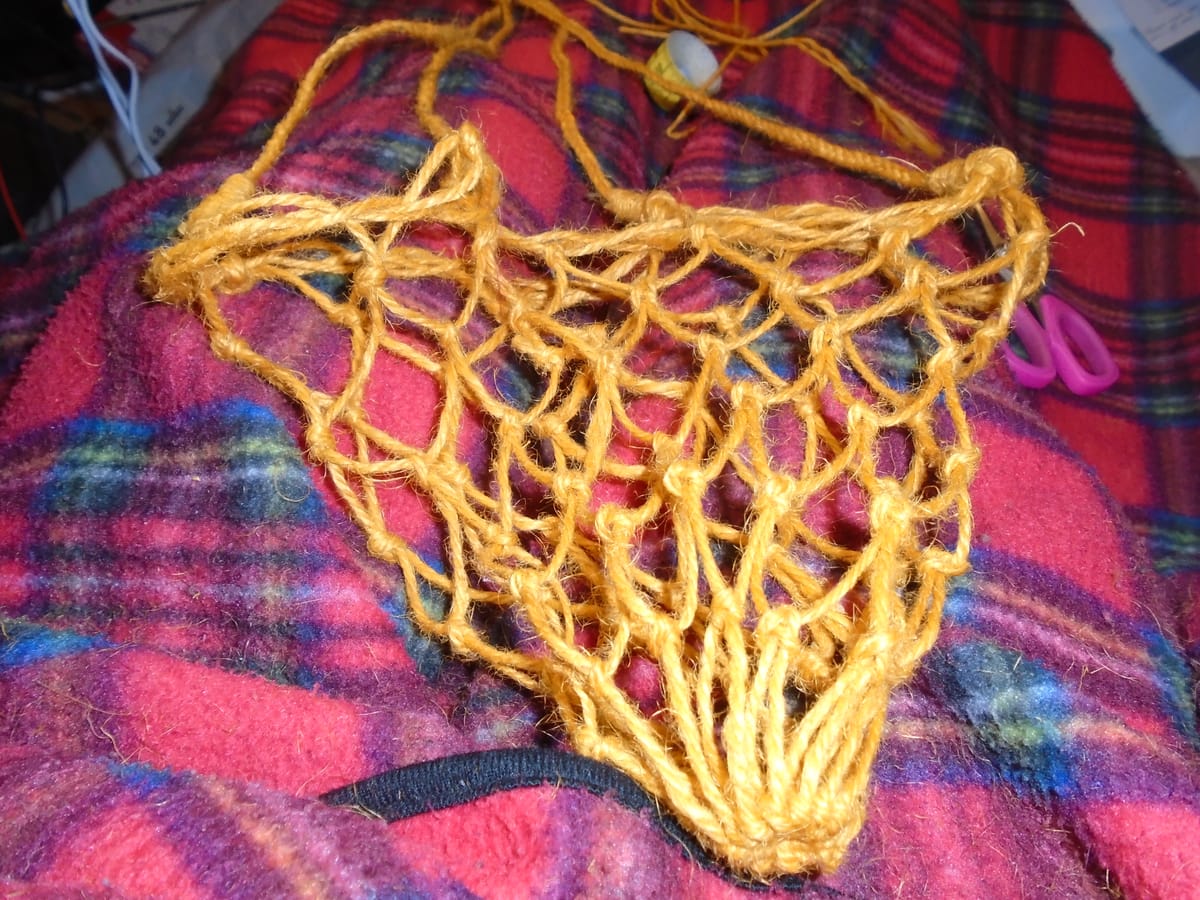
So today you're getting netting. This is the thing that was going to be the football carrier and then morphed into a hanging basket for a couple of unrelated reasons. I did a few more rounds over the weekend and was very pleased I'd already decided to turn it into a hanging basket, because the smaller mesh really wouldn't have worked well for a football carrier, at least not unless I'd put several more knots on my initial grommet. If you recall, the pattern called for a 5 cm mesh stick, and the folding ruler I've been using is about 3 cm; so I could still make a football carrier if I wanted, but I'd have to multiply everything up by 5/3, so instead of starting with 12 half-meshes I'd have had to start with 20. But I probably won't bother doing that unless I hear someone bemoaning the fact that they don't have a bag to carry their football... and, honestly, I've been at that church for five years now and never heard anyone with that particular complaint yet, so I'm in no hurry to make "super-grommet".
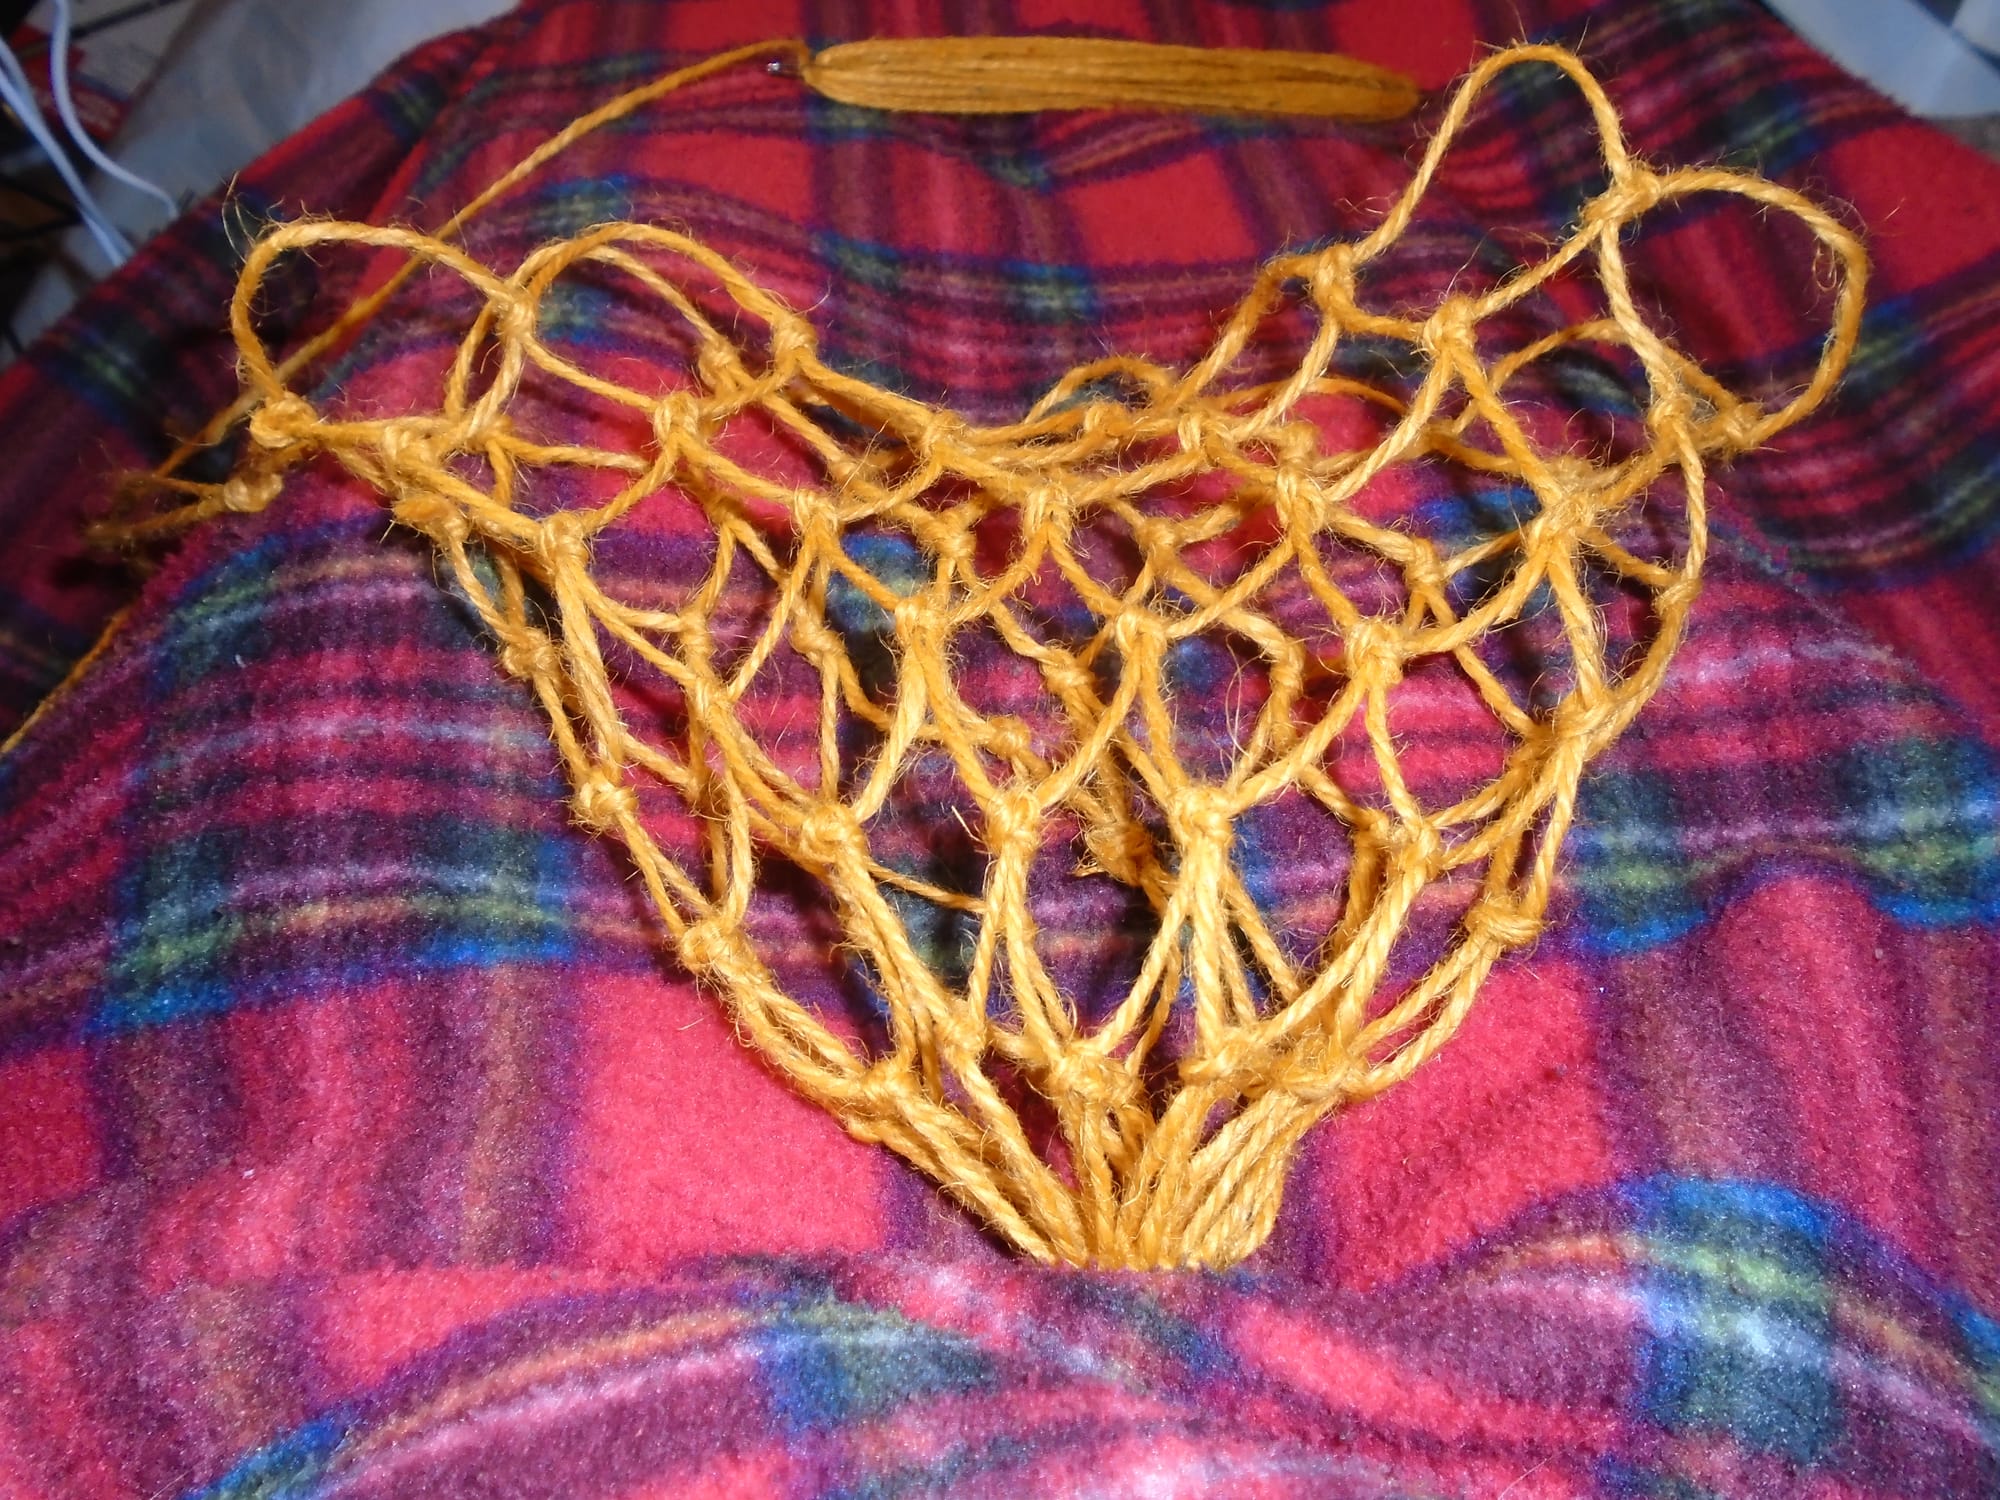
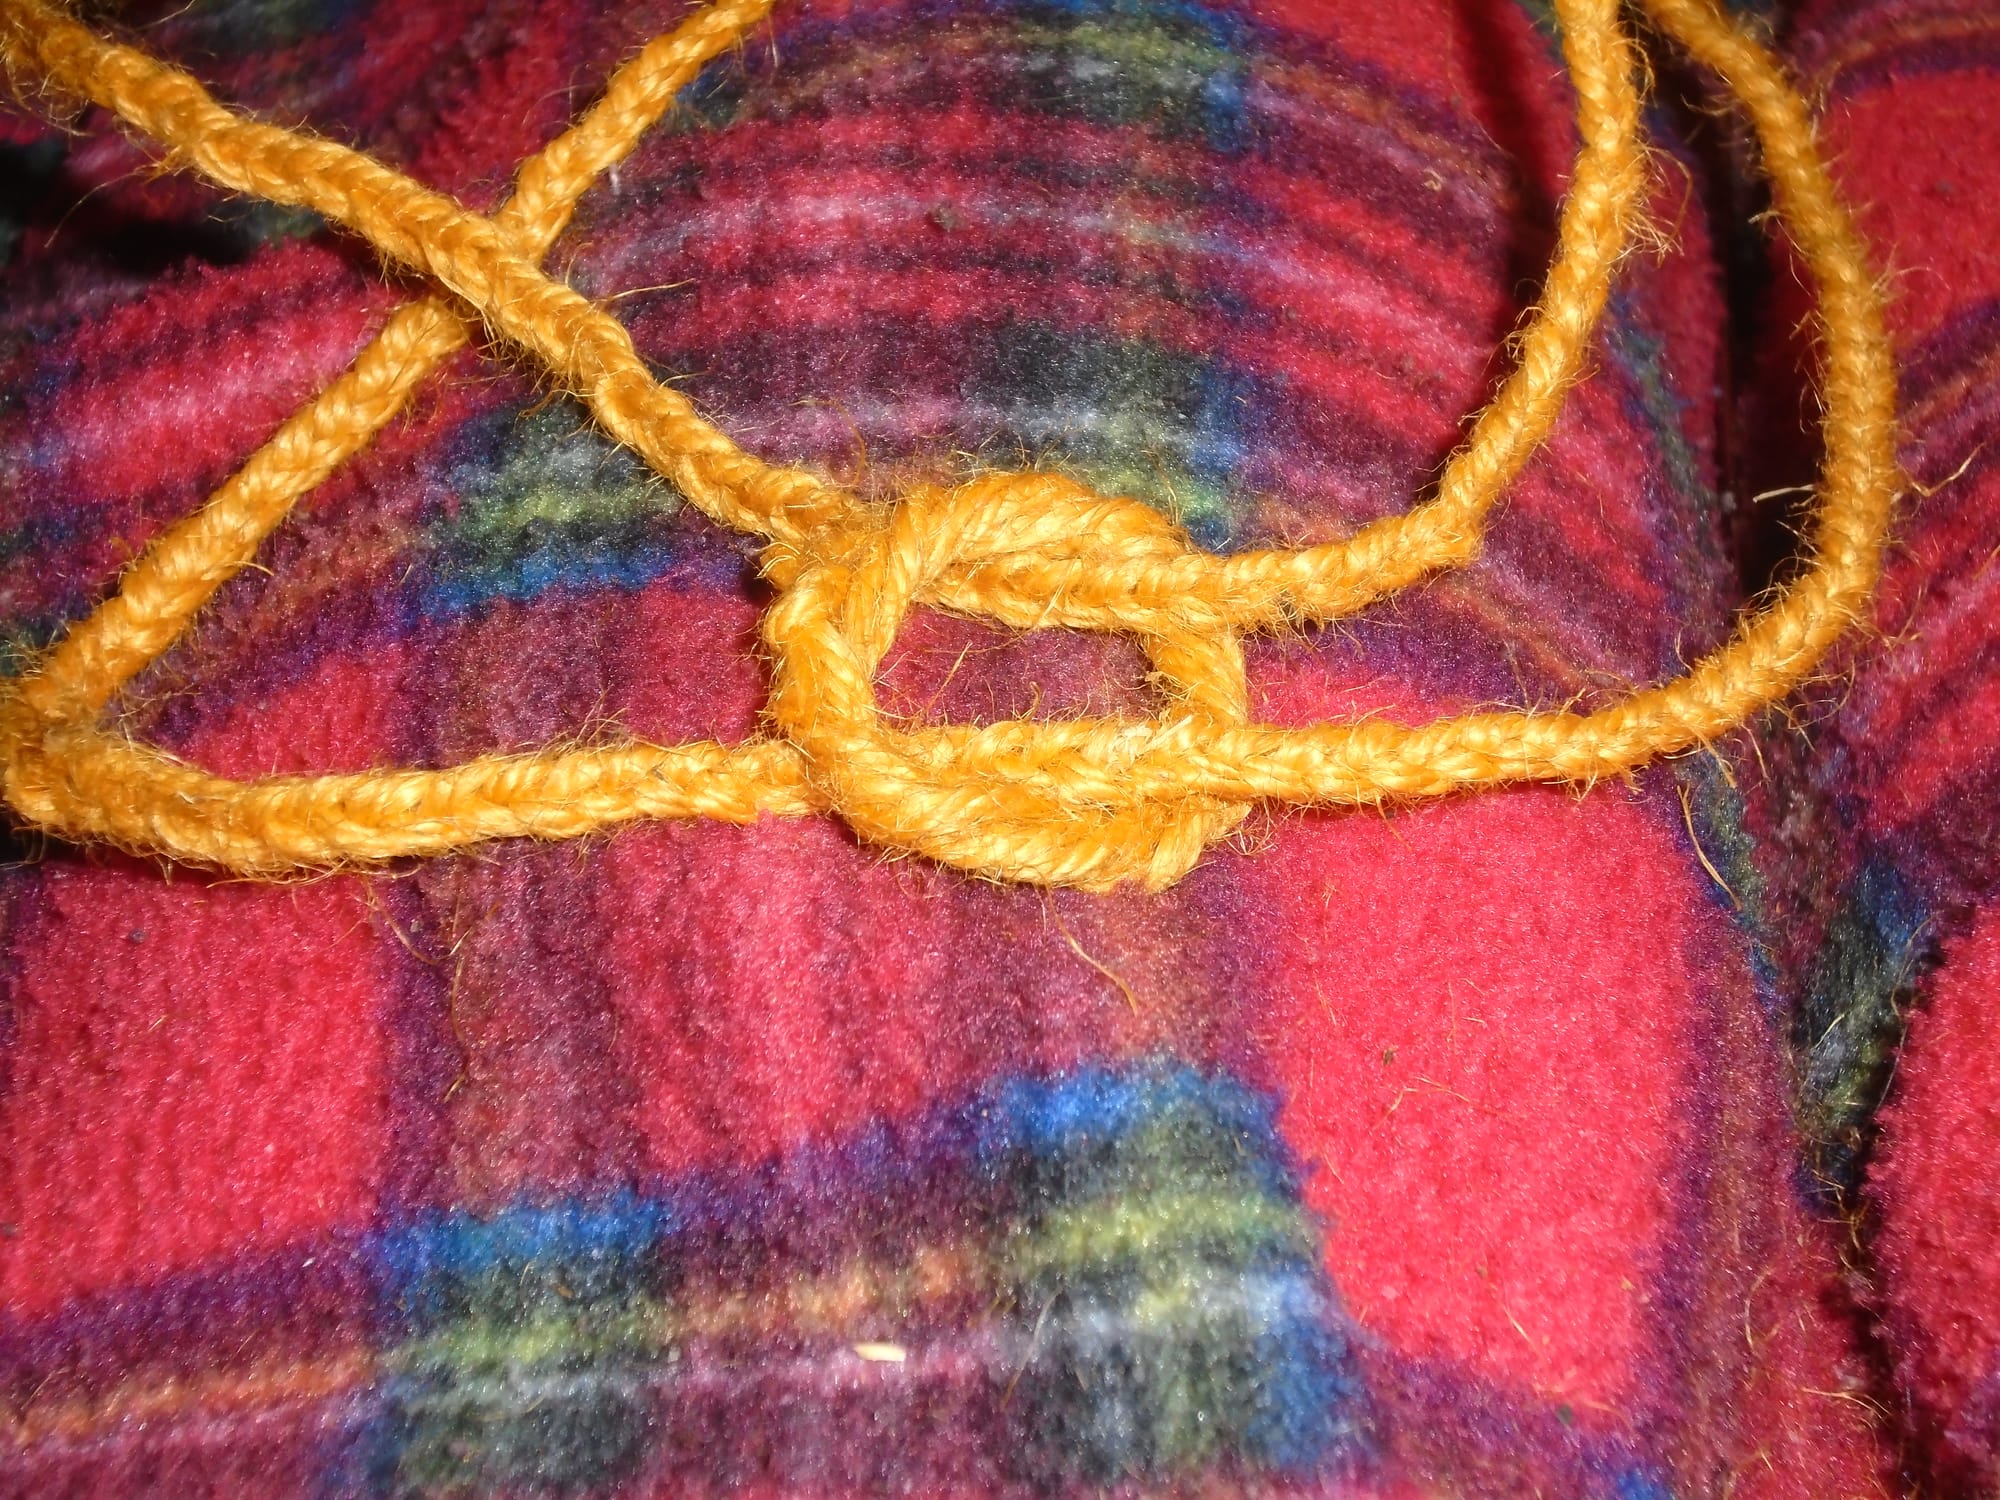
Well, as you can see from the photo, it did need a bit of extra work to turn it into a hanging basket, and that extra work wasn't detailed in the book so I had to think it all up myself. (There is a method for making handles, but for a hanging basket you want quite narrow straps, narrower than would be comfortable to hold as a handle. So I decided I wasn't going to use that method.) And the first thing I needed to do was create a stable finish for the top edge. A wavy edge with corners of meshes sticking up diagonally doesn't look awful, but in my opinion it could look better. Besides, if the top edge is neatly finished, it makes it that much easier to insert your pot or bowl. I already had a pair of ends (one free, one on the netting needle) coming out of the final drop knot, and so the obvious thing to do was to use those; and the simplest way to use them seemed to be to make a rope ring, incorporating the corners of the meshes into the twists.
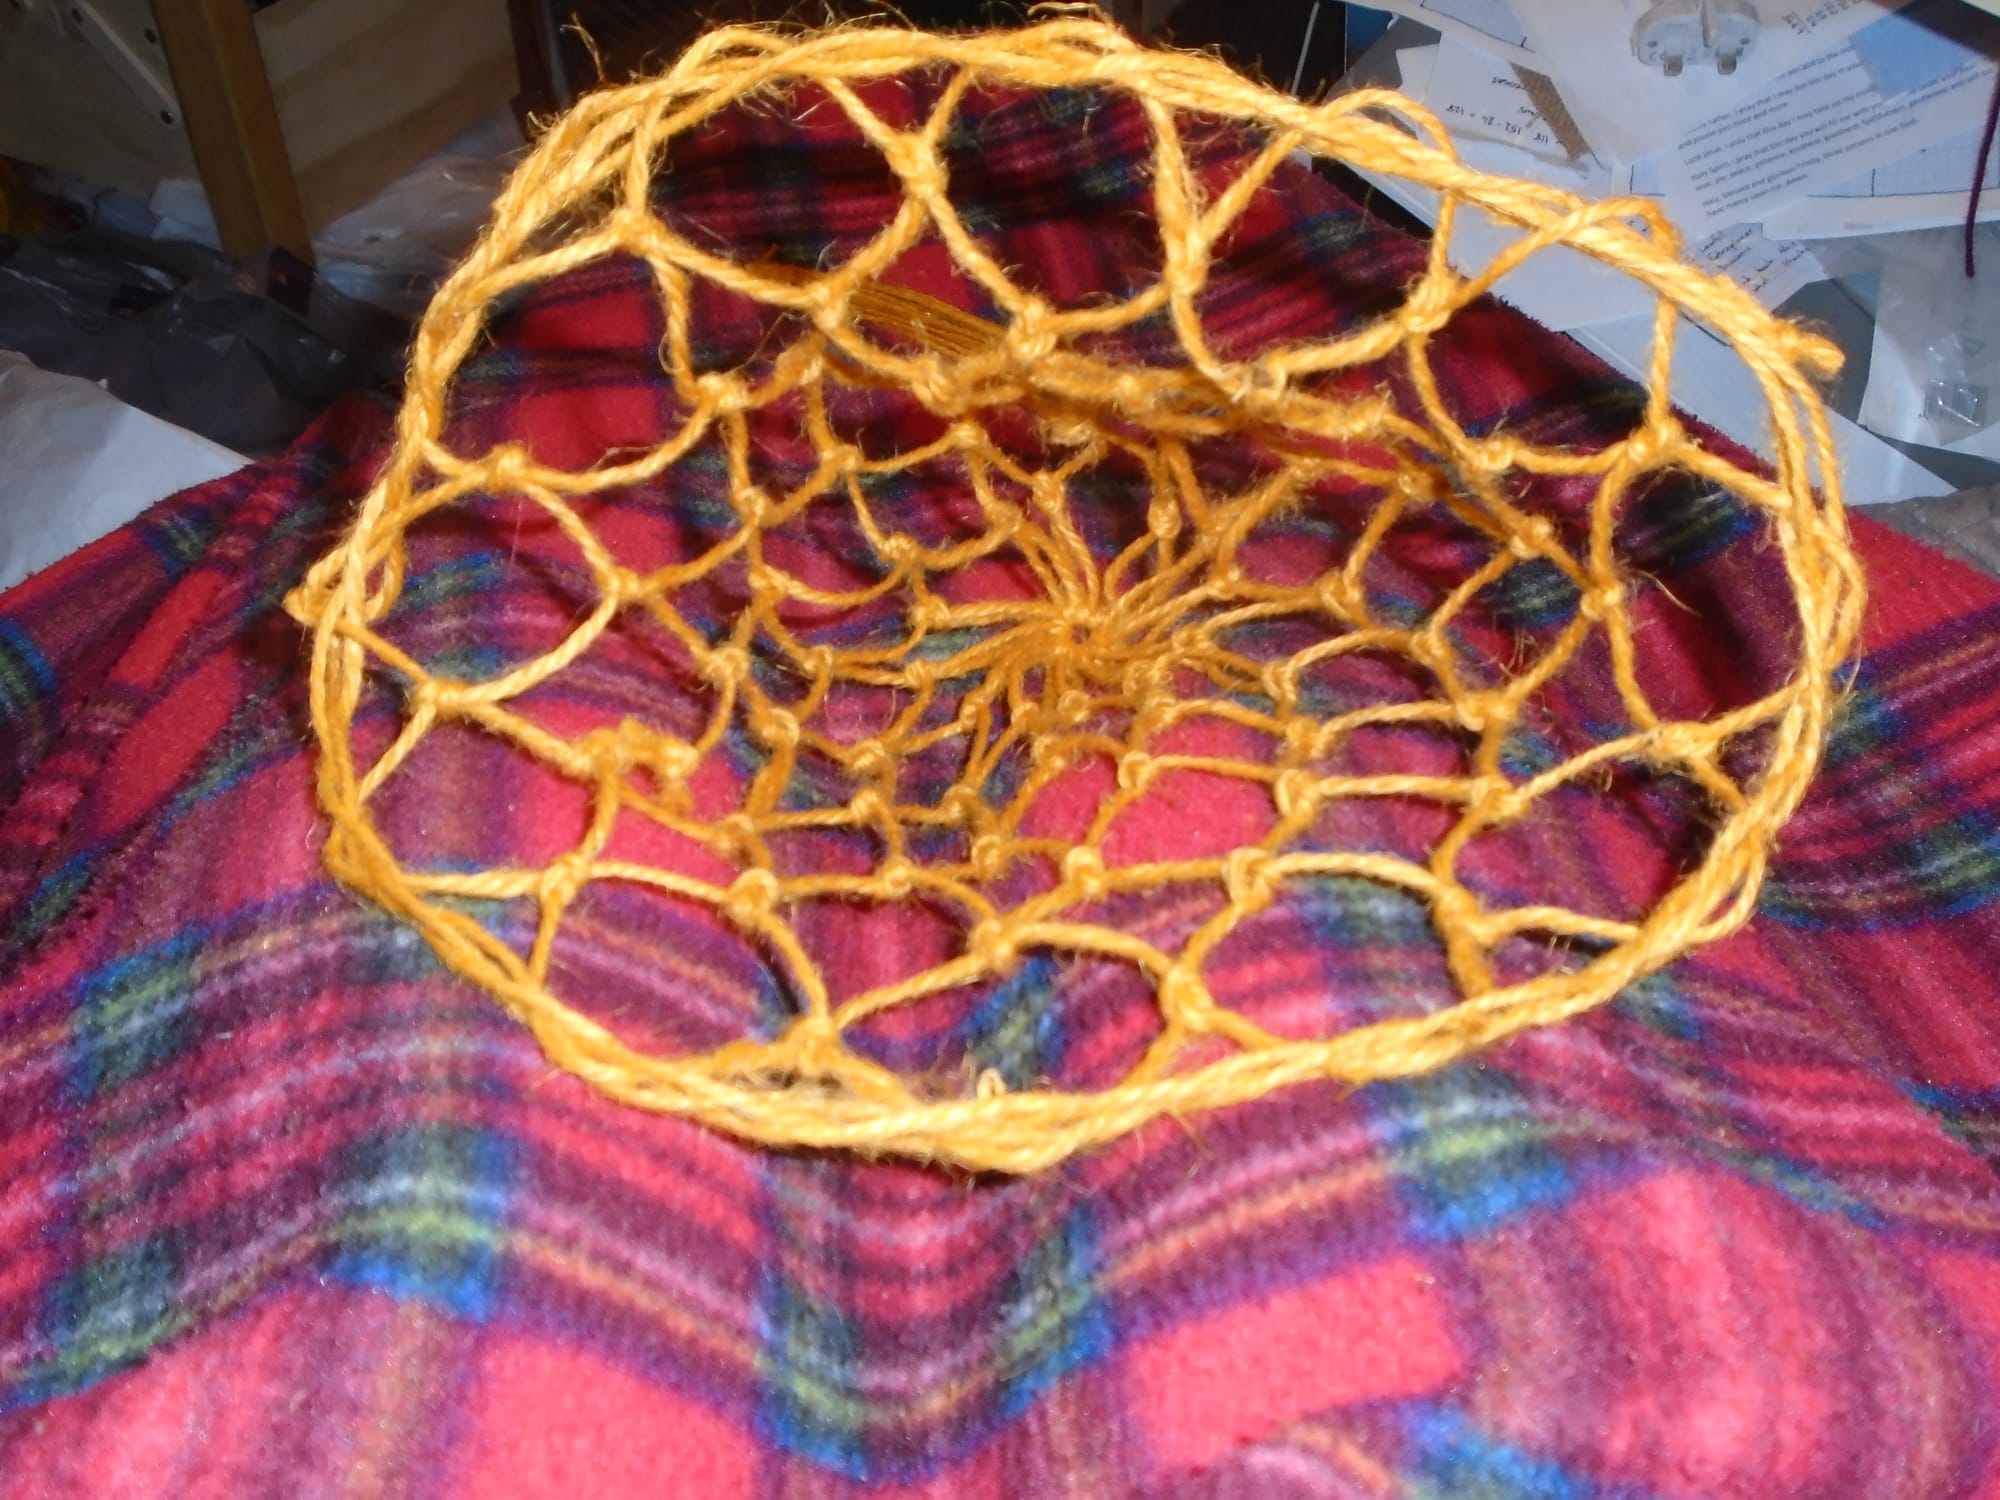
Bingo! I went three times around (like the Irish Rover, but less fatally), and I think you'll agree that that is now very much a proper edge. I finished off with, of course, a sheet bend. I am really getting to love sheet bends in the way that I got to love clove hitches when I was maybe eight or nine; they are just so useful. (I still love clove hitches. There is nothing better in the world for securing a clothes line onto a hook. It will stay put no matter how much washing you hang on it. Indeed, I even cast on my knitting using a glorified clove hitch; a clove hitch is two half hitches on top of each other, and to cast on I just keep making half hitches. The secret is not to pull it too tight, as otherwise you will struggle with the first proper row; but it gives a wonderfully neat edge.)
So now it was just a question of making the hanging straps. The netting book has ideas about bag handles, and they include incorporating all the top row of meshes; so if you have something with twelve meshes in a round, like this thing we're dealing with here, you divide that by four, so you have three meshes to incorporate into each end of each handle. It didn't take very much experimentation at all to convince me that wouldn't work here. For a bag, it's fine. You do want all the meshes to be neatly gathered up. But for a hanging basket, the top edge needs to be fully open, and it won't be if you pull all the meshes into the straps. So I decided first of all that each strap needed to go on only one mesh at each end, leaving the other eight free.
I unwound what was left on my netting needle, eyeballed it, and estimated I had about 4 m of twine left. About half that seemed like a good length to start with, considering I was planning to do three-stranded plaits and there'd be a fair bit of take-up from the plaiting and from folding the ends over. So I cut another two pieces the same length, then folded them all over and cut them in half, leaving me with six pieces of twine each about 2 m long. That done, I fastened three of them through one of the meshes with a double overhand knot, like so:
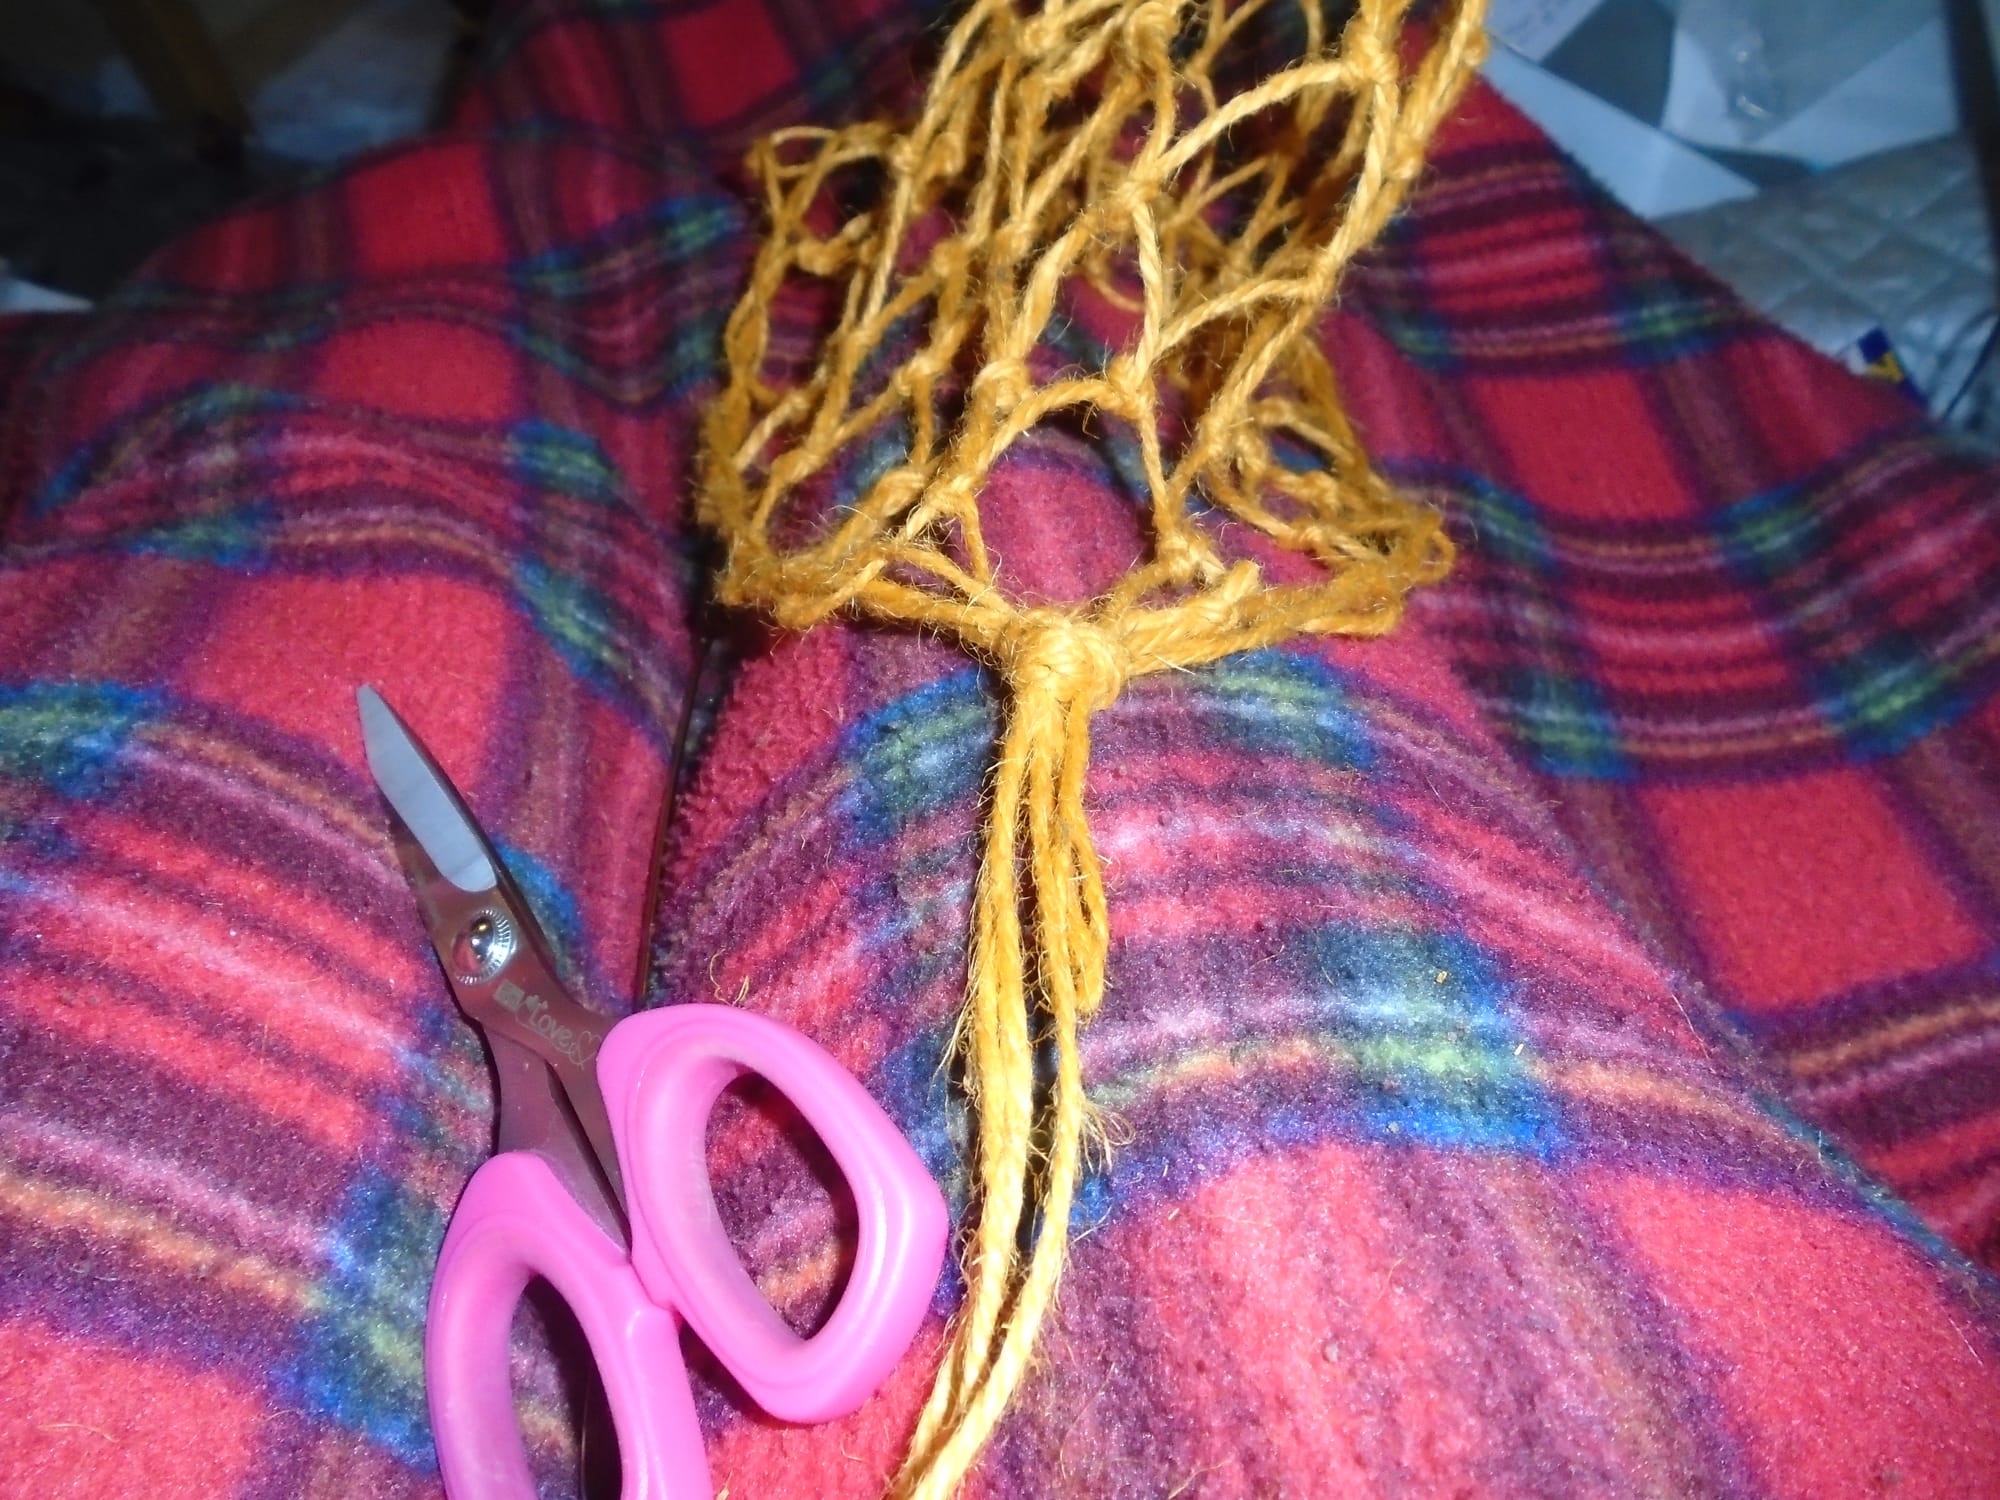
I plaited till it looked about the right length, which was just under 80 cm. But, of course, I couldn't tie a double overhand knot through the mesh opposite, because the topology was all wrong. I wanted a knot with similar bulk, and also with the ends sticking up as on the first side; so what I ended up with was this. It is, oddly enough, a clove hitch. I wasn't expecting to tie a clove hitch, largely because I'm not used to tying them over anything with both ends fixed (my normal approach is to make the knot in the air and then slip it, fully formed, over the peg or whatever it is I'm tying it to); but a clove hitch is undoubtedly what it is. I just had to tie it a different way.
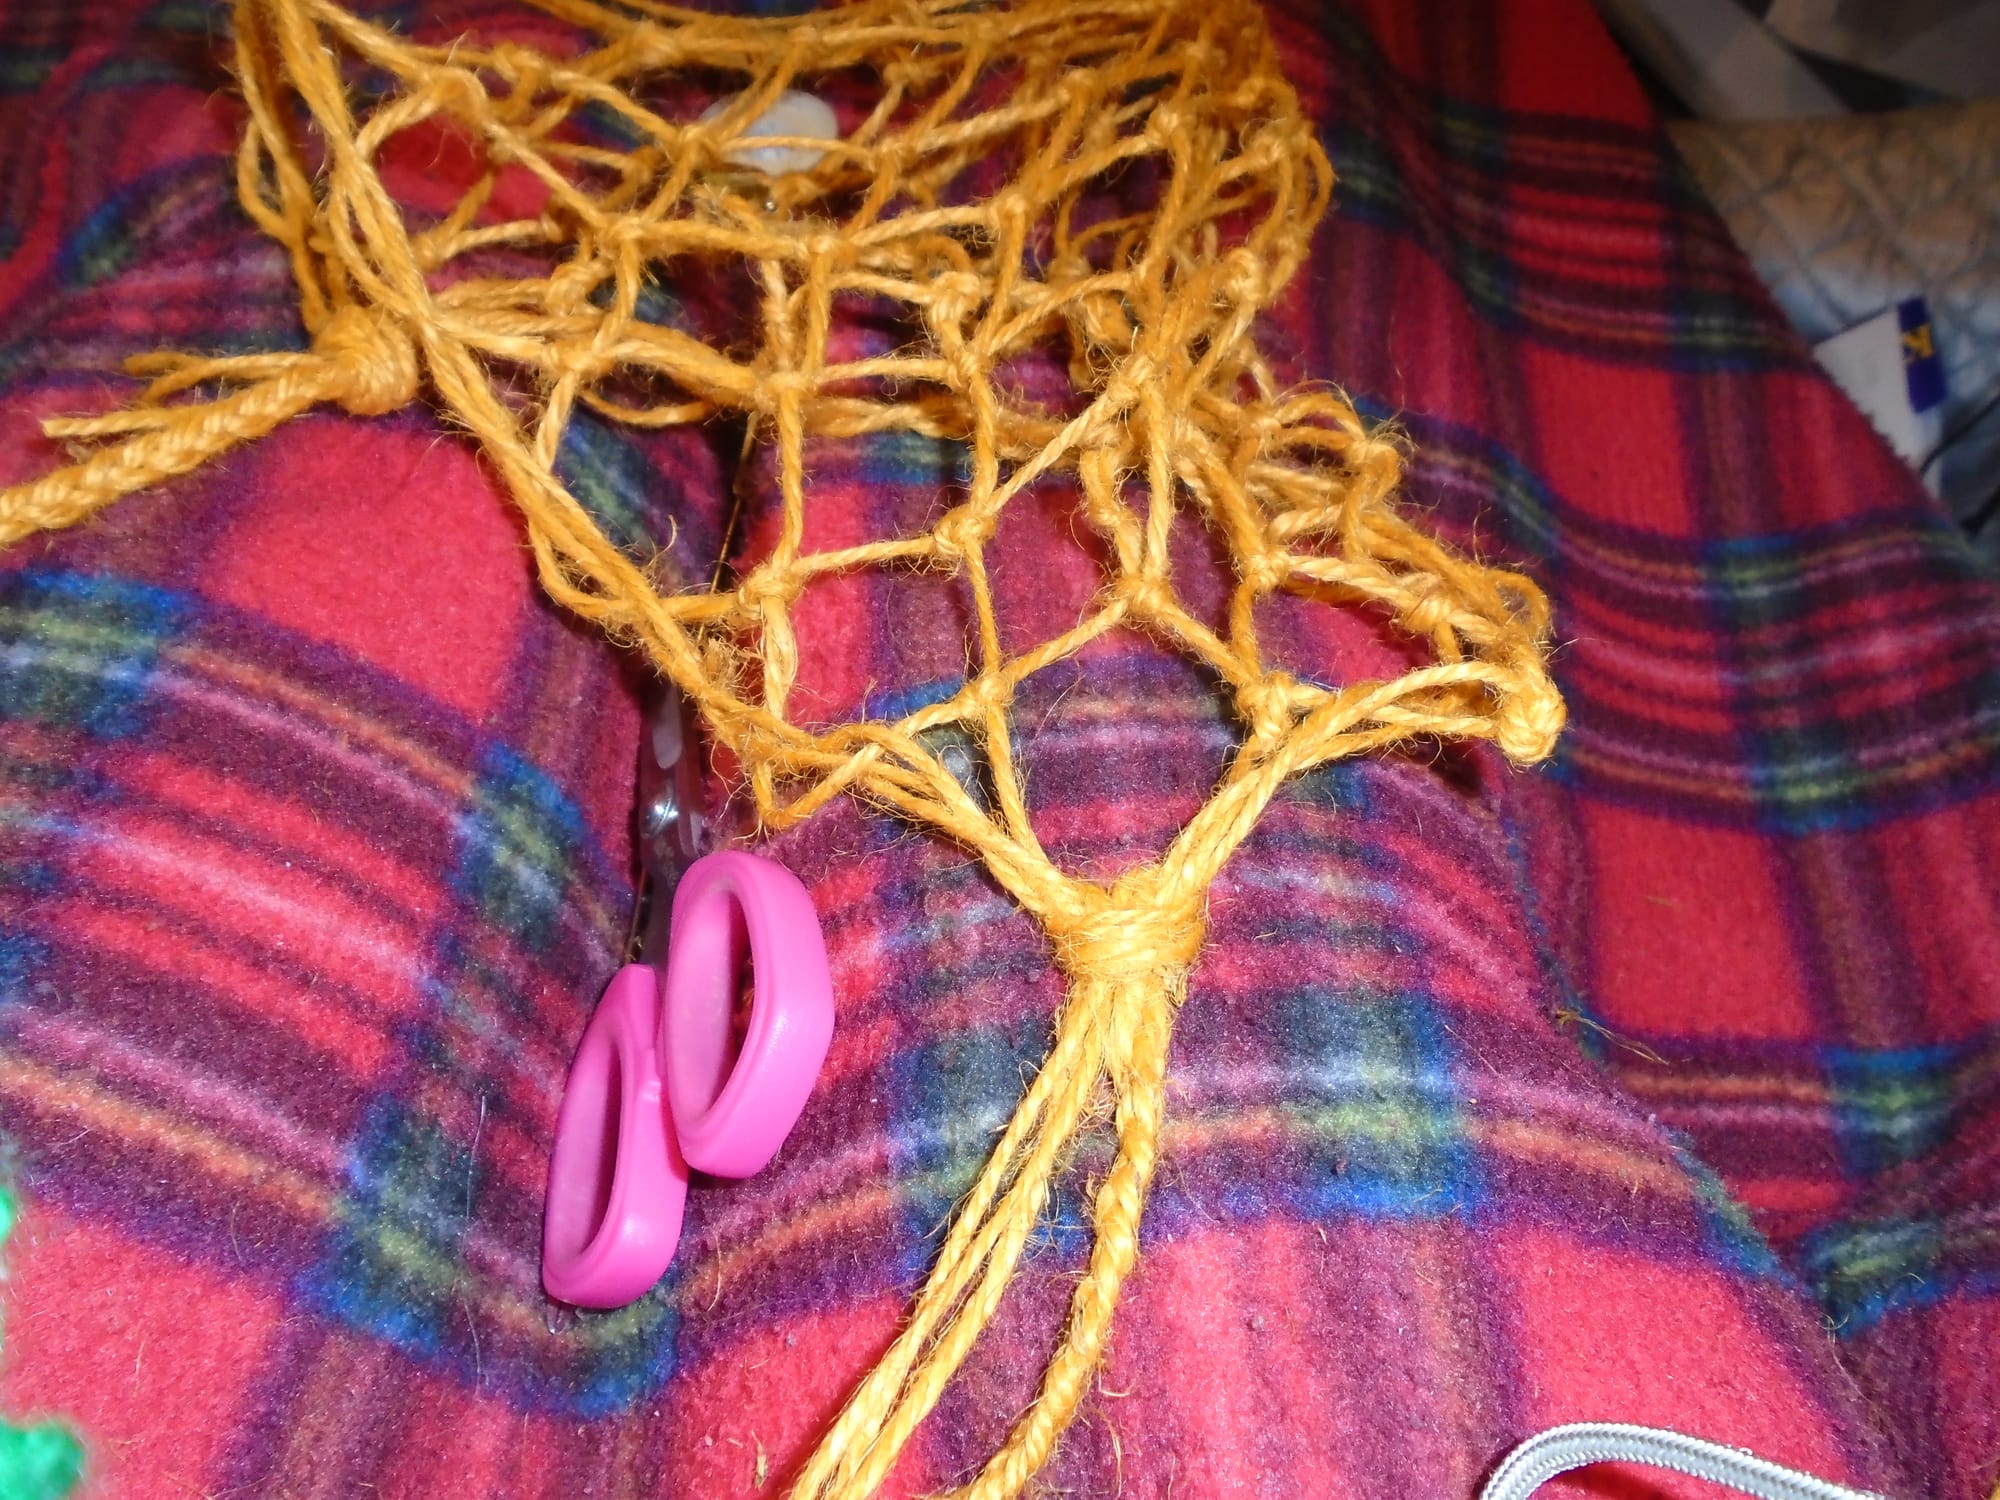
The next job was to neaten the ends on both sides. I did this using simple whipping, which is where you just wind a piece of twine over the area (hence why I was quite content to start with a double overhand knot - I knew it would get whipped so tightly it couldn't move). You start by whipping over the end of the length of twine you're using, and finish using a trick; you whip over a loop of spare twine, then when you finish whipping you pop the end through this loop and then pull it back through the whipping so it's firm. I whipped a bit too tightly the first time and had the dickens of a job pulling the end back through, so I eased up a bit the second time. Practice makes perfect.
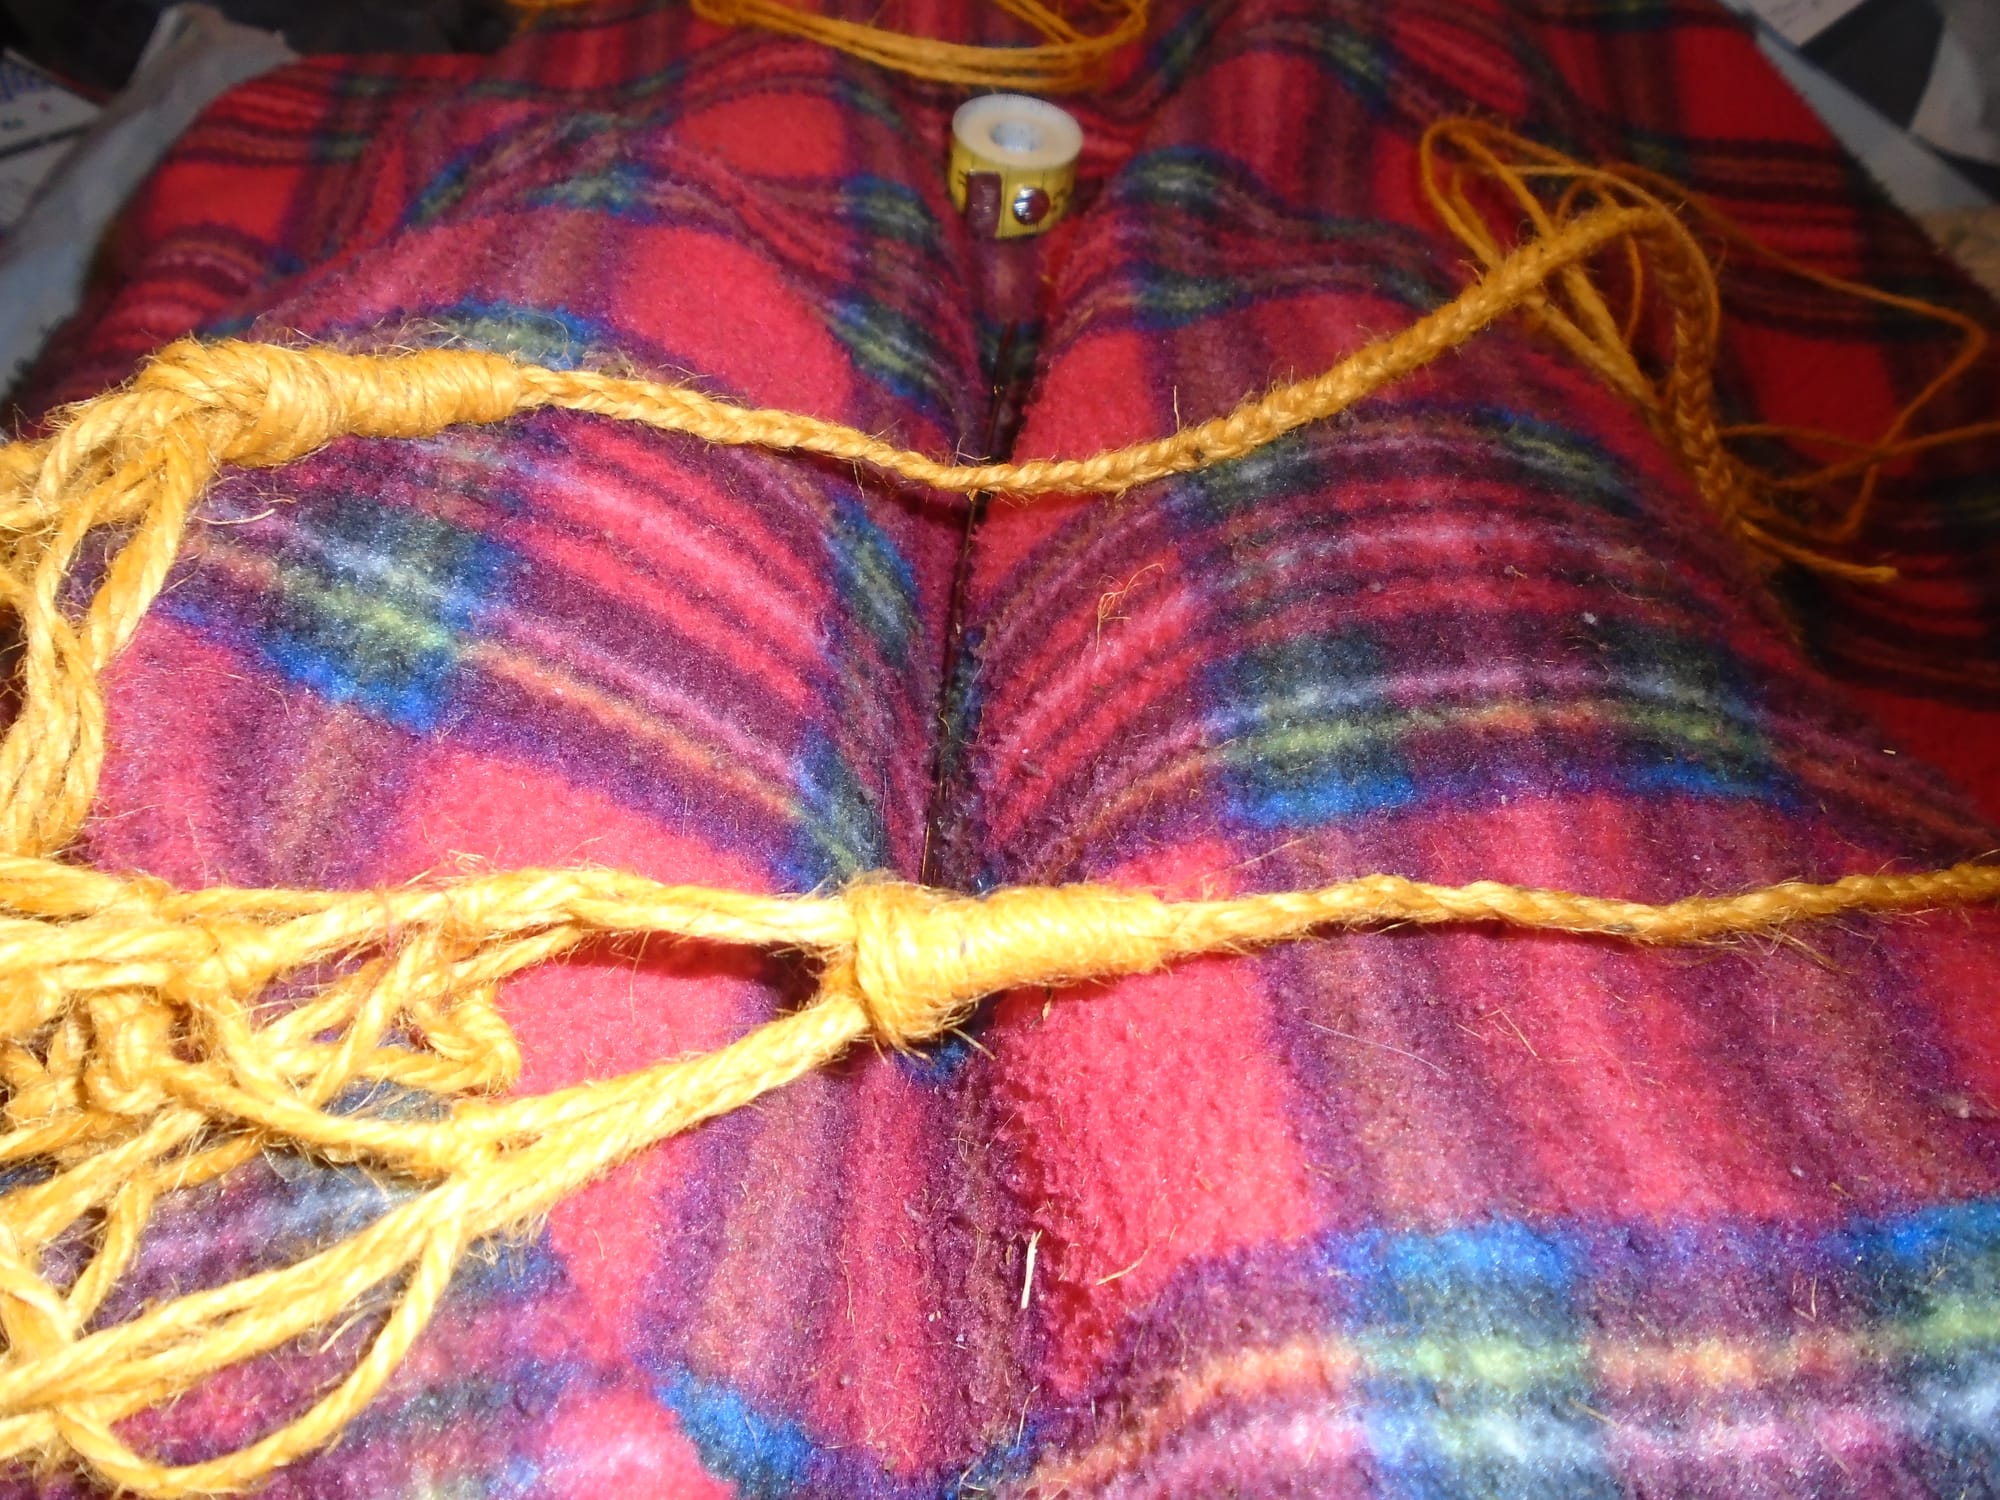
And then I did the whole thing again with the other three 2 m (ish) lengths of twine, at right angles to the first plait. And once that was done, all that was left was to make a tiny rope ring using one of my offcuts to hold the two plaits at the top of the arrangement, so it could be hung easily, like this:
And there you go! Sadly I don't have a convenient place to hang it, or I would have photographed it hanging up, probably with a bowl in it to give you at least some idea (though, admittedly, not a very good idea, because all my crocks are square; I could say they were going cheap at Sainsbury's at the time, which indeed they were, but I do like the shape). But hopefully its new owner will send me a photo once it's full of begonias, or whatever they feel like planting in it.
I'm almost tempted to keep it and put up a nail to hang it outside. But there's that child... and his footballs...