Geometric progression
So I made that accidental olive green skirt, and, given that the hot weather looks like persisting for a while, a few more summer skirts seemed like a good idea. I bought some more fabric (reduced, naturally), and I'm now having at it in odd moments.
Deciding that, in fact, I not only don't need to use the full width of the fabric every single time, but also it's better if I don't in most cases, has been a bit of an eye-opener, and it's completely revolutionised how I think of making skirts. I used to buy at least two and a half metres, no matter how wide the fabric was (and it was nearly always 150 cm, there or thereabouts; I have to like a fabric very much indeed before I'll buy it in a narrower width), and I would think in terms of cutting everything across the width. But not now.
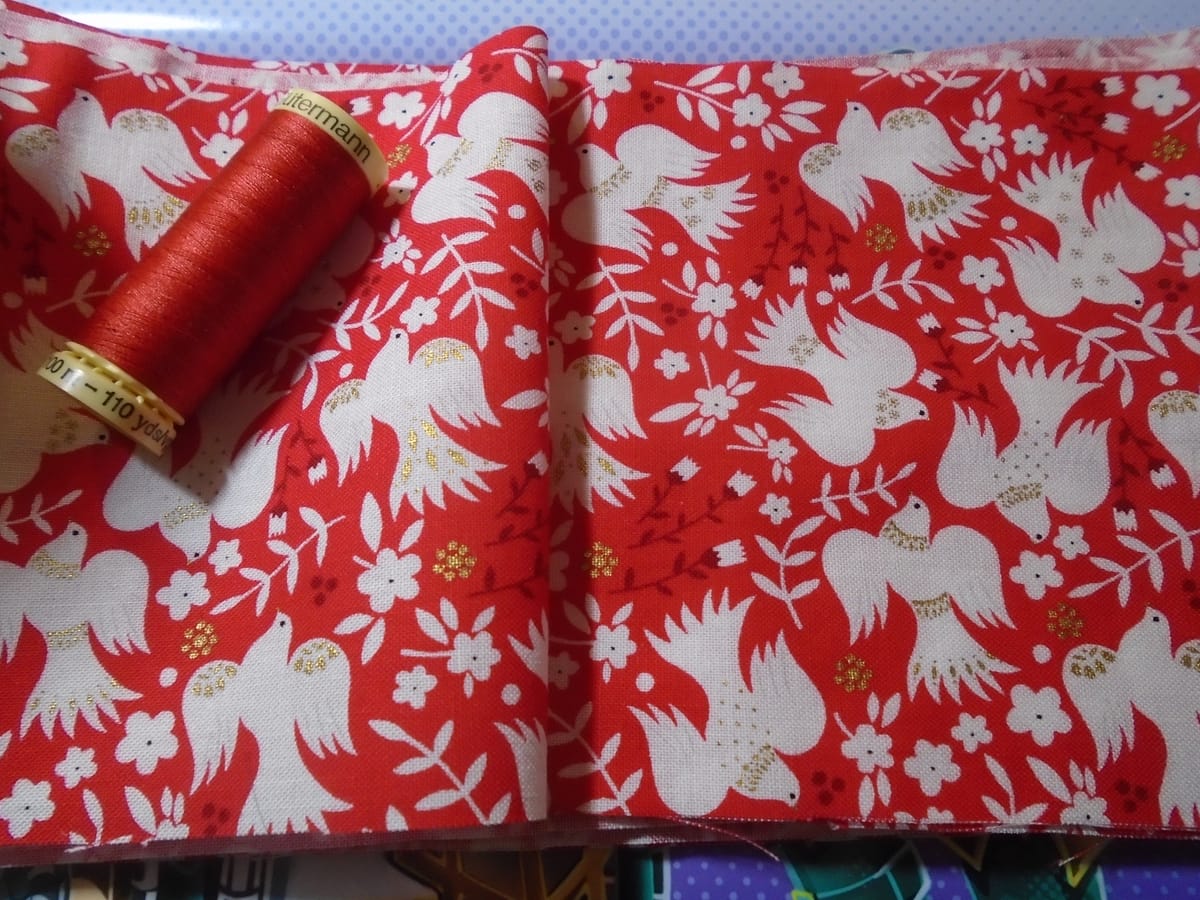
The fabric you see above, having said that, is only 110 cm wide, which tells you exactly how much I like it. My kind of print mostly means "floral on a black background, with a preponderance of red in the flowers", but not invariably. Musical notes are generally a winner. So are subtle paisleys (I have a lovely one which is black on a grey background). This one? It doesn't fit into any of my regular categories, but it nonetheless works for me.
The olive green skirt looks fine and does its job well (I'm wearing it right now, in fact), but I still felt it was a little bit of a squeeze at two metres. That was also a narrower fabric, because of course I originally bought it for a bag. (When I was growing up, it was quite common to be able to get fabric in approximately 90 cm widths; I'm not surprised you can't do that any more, because even then it was awkward for some patterns.) So I bought two and a half metres of the bird print, and this is how I cut it.
The first thing I did was to cut a 40 cm piece across the width. That was destined to become the pockets. They'll be a bit deeper than the pockets on the olive green skirt, but that's a good thing because they'll also be narrower. I cut down the centre fold, trimmed off the annoying border which ran along one side (yes, I do get that it's a convenient way for the manufacturer to give the title of the design and the name of the designer - "Starlit Hollow" by Sian Summerhayes, if anyone's interested - but it's wider than a normal seam allowance, so it's a bit of a blighter if you're working with rectangles), and then folded each pocket piece in half and laid one on top of the other in order to cut them to shape. I routinely cut in from 23 cm down (thus giving a 20 cm pocket opening once seam allowances are taken into account) and then curve round the base of the pocket; in this case, because of the way the pockets were cut, I was able to keep the fold so that I didn't have to sew them up all the way round.
Once I'd cut the pockets, that left me with just over two metres of fabric, which I then opened out and refolded the other way (across the width rather than along the centre of the length). Then I cut a 36 cm strip from the side from which I'd removed the border, and cut that down in turn to three strips each 12 cm wide. This is because I'm using 4 cm elastic, and 4 cm + 0.5 cm ease + 1.5 cm seam allowance = 6 cm, and the strips are all folded in half, so that's doubled.
You will immediately notice that I couldn't get away with doing this using striped fabric, or anything with a similarly obvious directional design, because the grain of the waistband and tie belt (which is what these strips are for) is going to run perpendicular to that of the rest of the skirt. If I did have a design like that, I'd be doing it differently; but I took some care to ensure I could get away with it in this case! The birds design is directional, which is obvious if you look at it vertically, but not sideways. So it'll all be fine. In any case, if at all possible I'd rather cut things like waistbands with the grainline running around the body, because that's where any tension is going to happen. Anyway, I cut the waistband to 124 cm (I'd normally say 123, which gives me exactly 120 cm when it's finished, but it was folded double so I thought I might as well just cut to the nearest full cm) and left the other two strips full length. That means I get a very long tie belt (both strips being joined in the middle), which allows me to tie a large and extravagant bow... not centre front, but just to the left of it. I'm not normally a fancy-bow person, but when I put one on the concert skirt I vowed I'd do that again. And again. Because it hides Sibyl!
Once I'd done that, I was then left with a piece 74 cm wide, from which I cut two metre lengths for the front and back of the skirt; once again, there was very little waste. The other two fabrics I've bought are both my usual standard 150 cm wide, so I have bought two metres of each of those and will be tackling them as follows. First, cut the 36 cm strip and divide into three 12 cm strips, leaving a width of 114 cm. Then cut a strip 30 cm wide to make the pockets (this time there won't be a convenient fold, but the depth can be anything up to 50 cm for each pocket; I doubt I'll go above 40). This leaves 84 cm to make a somewhat fuller, but still not inconveniently full, skirt. And I need to get some more elastic... and possibly even treat myself to a pair of pinking shears, because blanket-stitching all the seams on cotton poplin is slow, and pinking shears do actually work for that.
As for the theatrical costuming... I am writing the next play. To order. And they want to be pirates. Which is fine by me, but they're all going to need those ruffly shirts.
I may have to teach a few of them to sew. 😀