Football crazy
I didn't feel very well yesterday, which was most probably due to Sibyl getting herself slightly blocked. (If she gets seriously blocked I really do know about it; it is quite astonishing how ill one feels with a blocked stoma. This, however, was just a minor obstruction and I simply felt a bit off colour.) So, when the wood stain and finishing wax arrived for the looms, I put them to one side. It's a water-based wood stain with very low VOC content, but, even so, I'm not going to risk inhaling anything questionable when I'm already not feeling quite right. I went and finished the latest baby hat instead.
I was still not feeling too well when my friendly Evri courier showed up with this little lot.
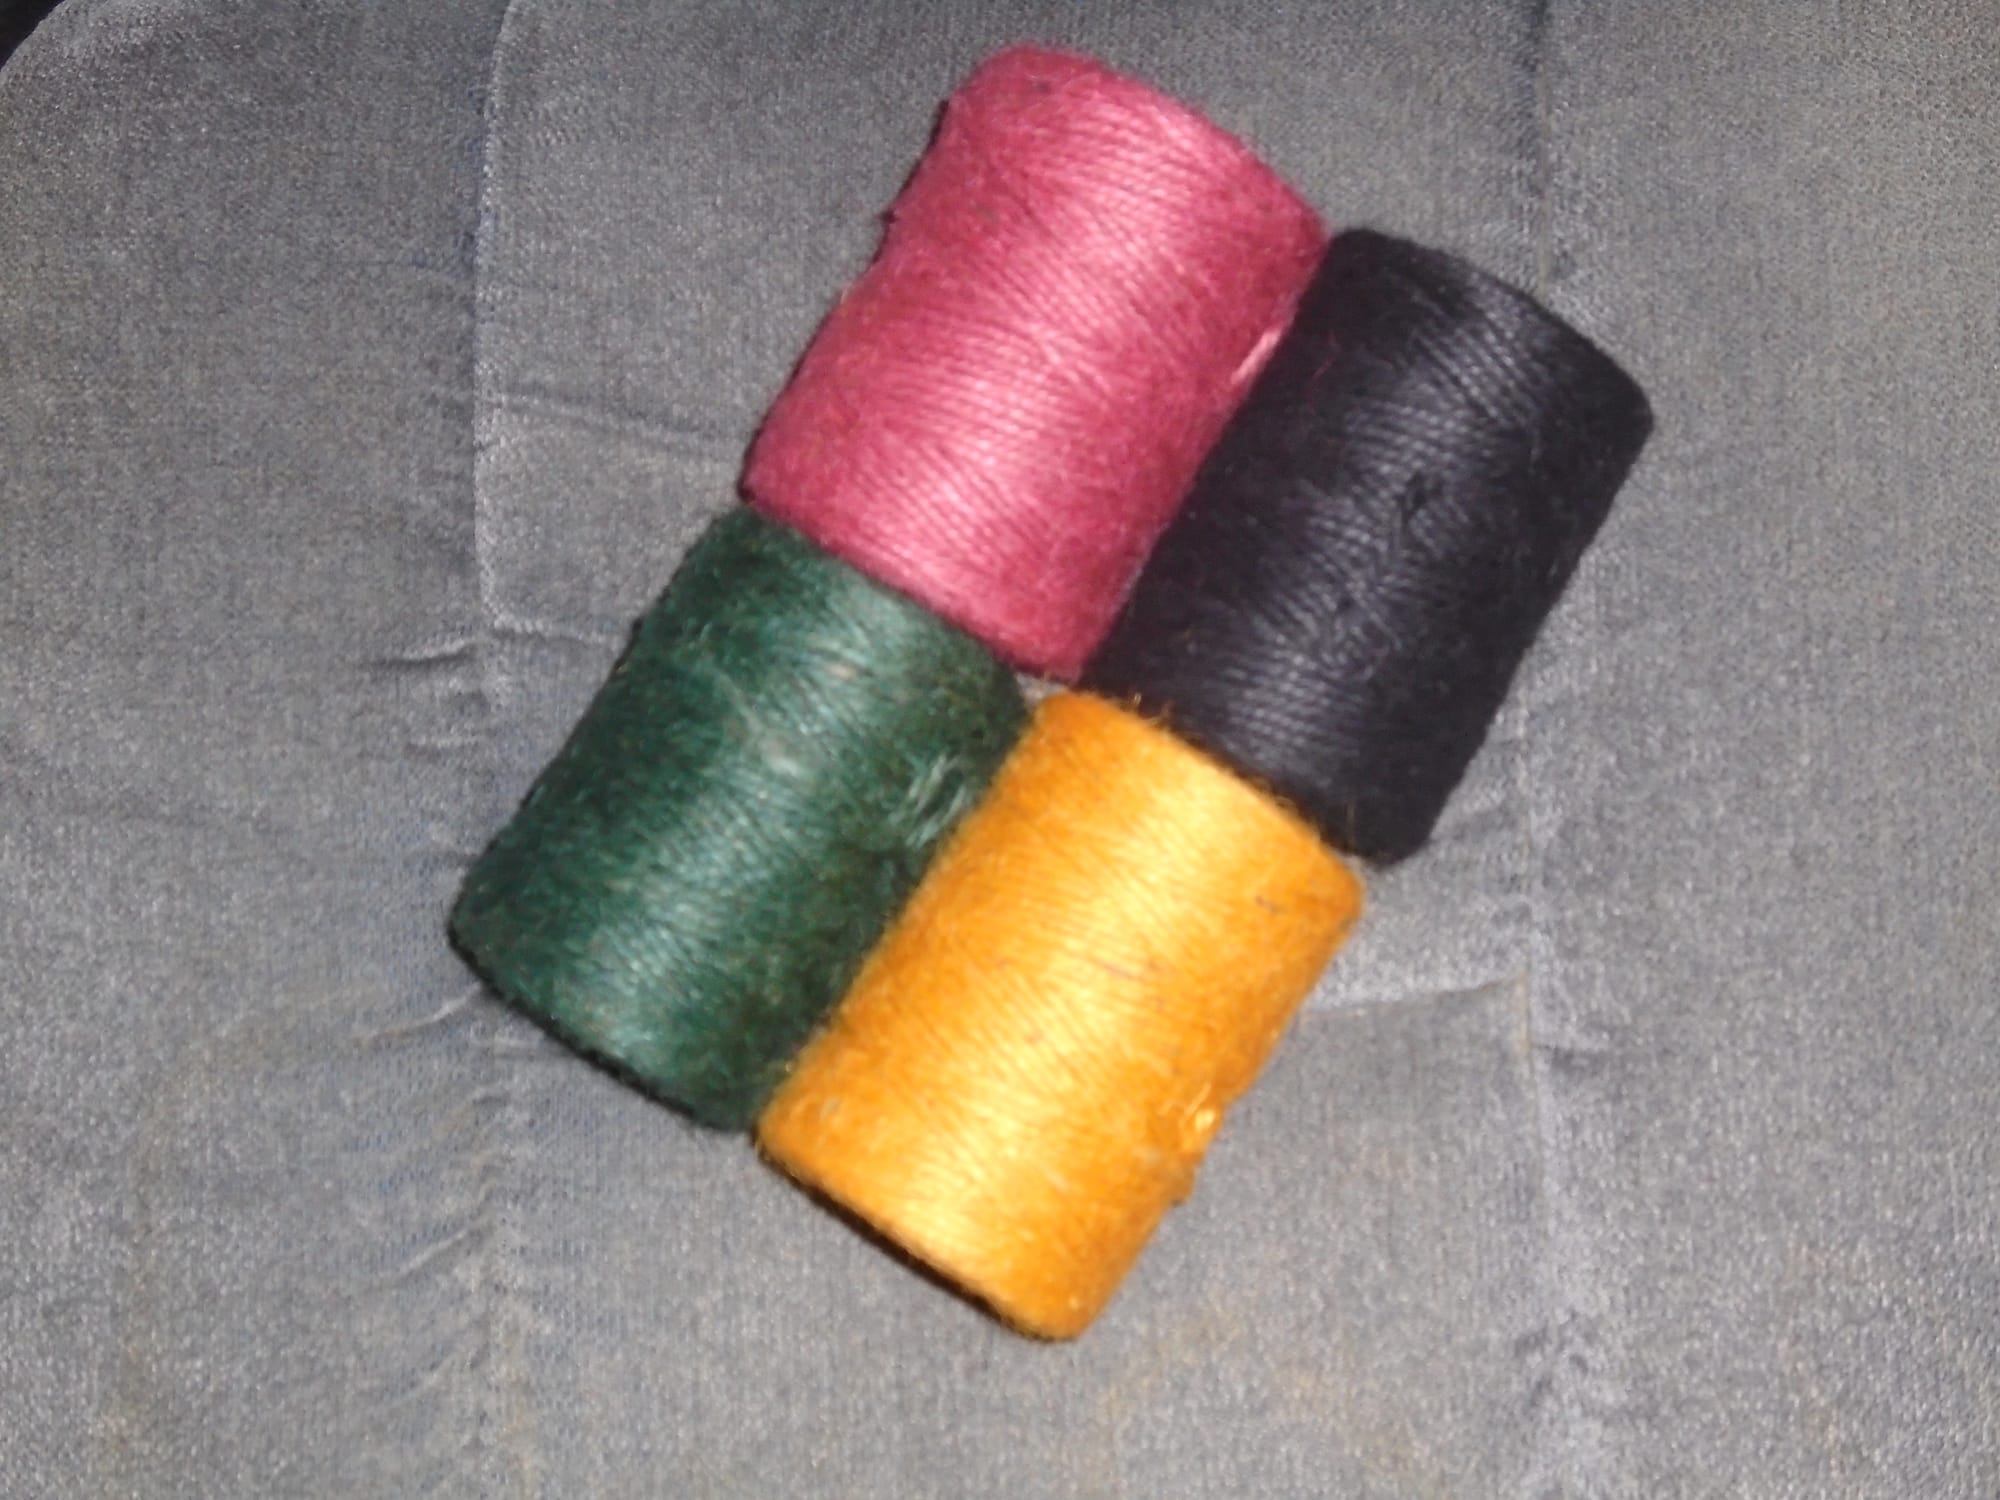
It really is amazing what you can get from eBay. I thought "oh, there's a pattern for a two-colour string bag in this netting book - I wonder if you can get coloured twine?" And the answer is, of course you can. The green and the black are both really good; the red is not quite as red as I was expecting (it's more of a deep rose madder - still nice, though). The gold looks amazing in the photo, but in reality it's a bit more of a light orangey brown. I don't have a problem with it, though. I wanted four contrasting colours and that's what I got.
Anyway, I decided that the gold was my least favourite, and I don't actually have a use for the next pattern in the netting course, which is a football/basketball carrier; however, I know plenty of people who do, so it seemed a sensible idea to use the gold for that. Someone's going to love it. (The plate in the book illustrating the design is rather interesting. Remember, it's an American book, so you would expect the person in the photo to be carrying either a basketball or an American football. In fact, no. The photo shows a George Best lookalike nonchalantly shouldering a British-style football in his purpose-made net bag.) And by the time I'd had tea, Sibyl was behaving herself again and I felt quite a bit better, so I took up my large netting needle and set about it.
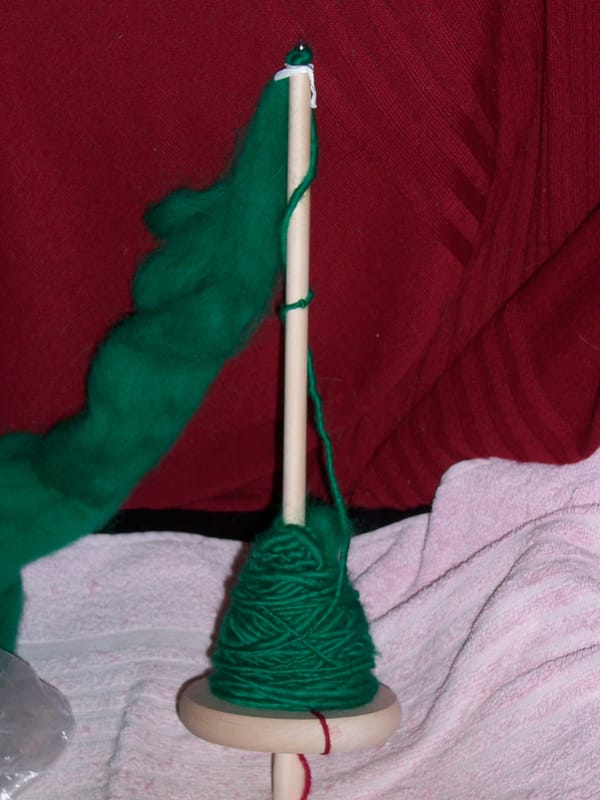
The construction is nothing if not ingenious, although it's also very simple. You start by unwinding a length of twine from your needle (as well as teaching me to do more advanced netting, Mr Holdgate is also giving me excellent practice at rough and ready metric conversions! - you want a bit more than a metre), and then you make a slip knot, ensuring that it slides along the tail rather than the working thread. Hook this over your peg (for which read trolley riser, as before) and cast on eleven loops over it; these loops go round the entire foundation loop rather than through it, which is important. Then you take your tail end and stick it through what's left of the foundation loop, and gently pull, thus reducing the foundation loop to nothing. You're left with a circle of netting knots sitting on a very small loop of double twine. Finally, you make the twelfth loop by tying the tail and the working thread together in a double overhand knot, ensuring it's the same size as all the others. And, bingo, you have this (actually taken just before I tied the twelfth loop):
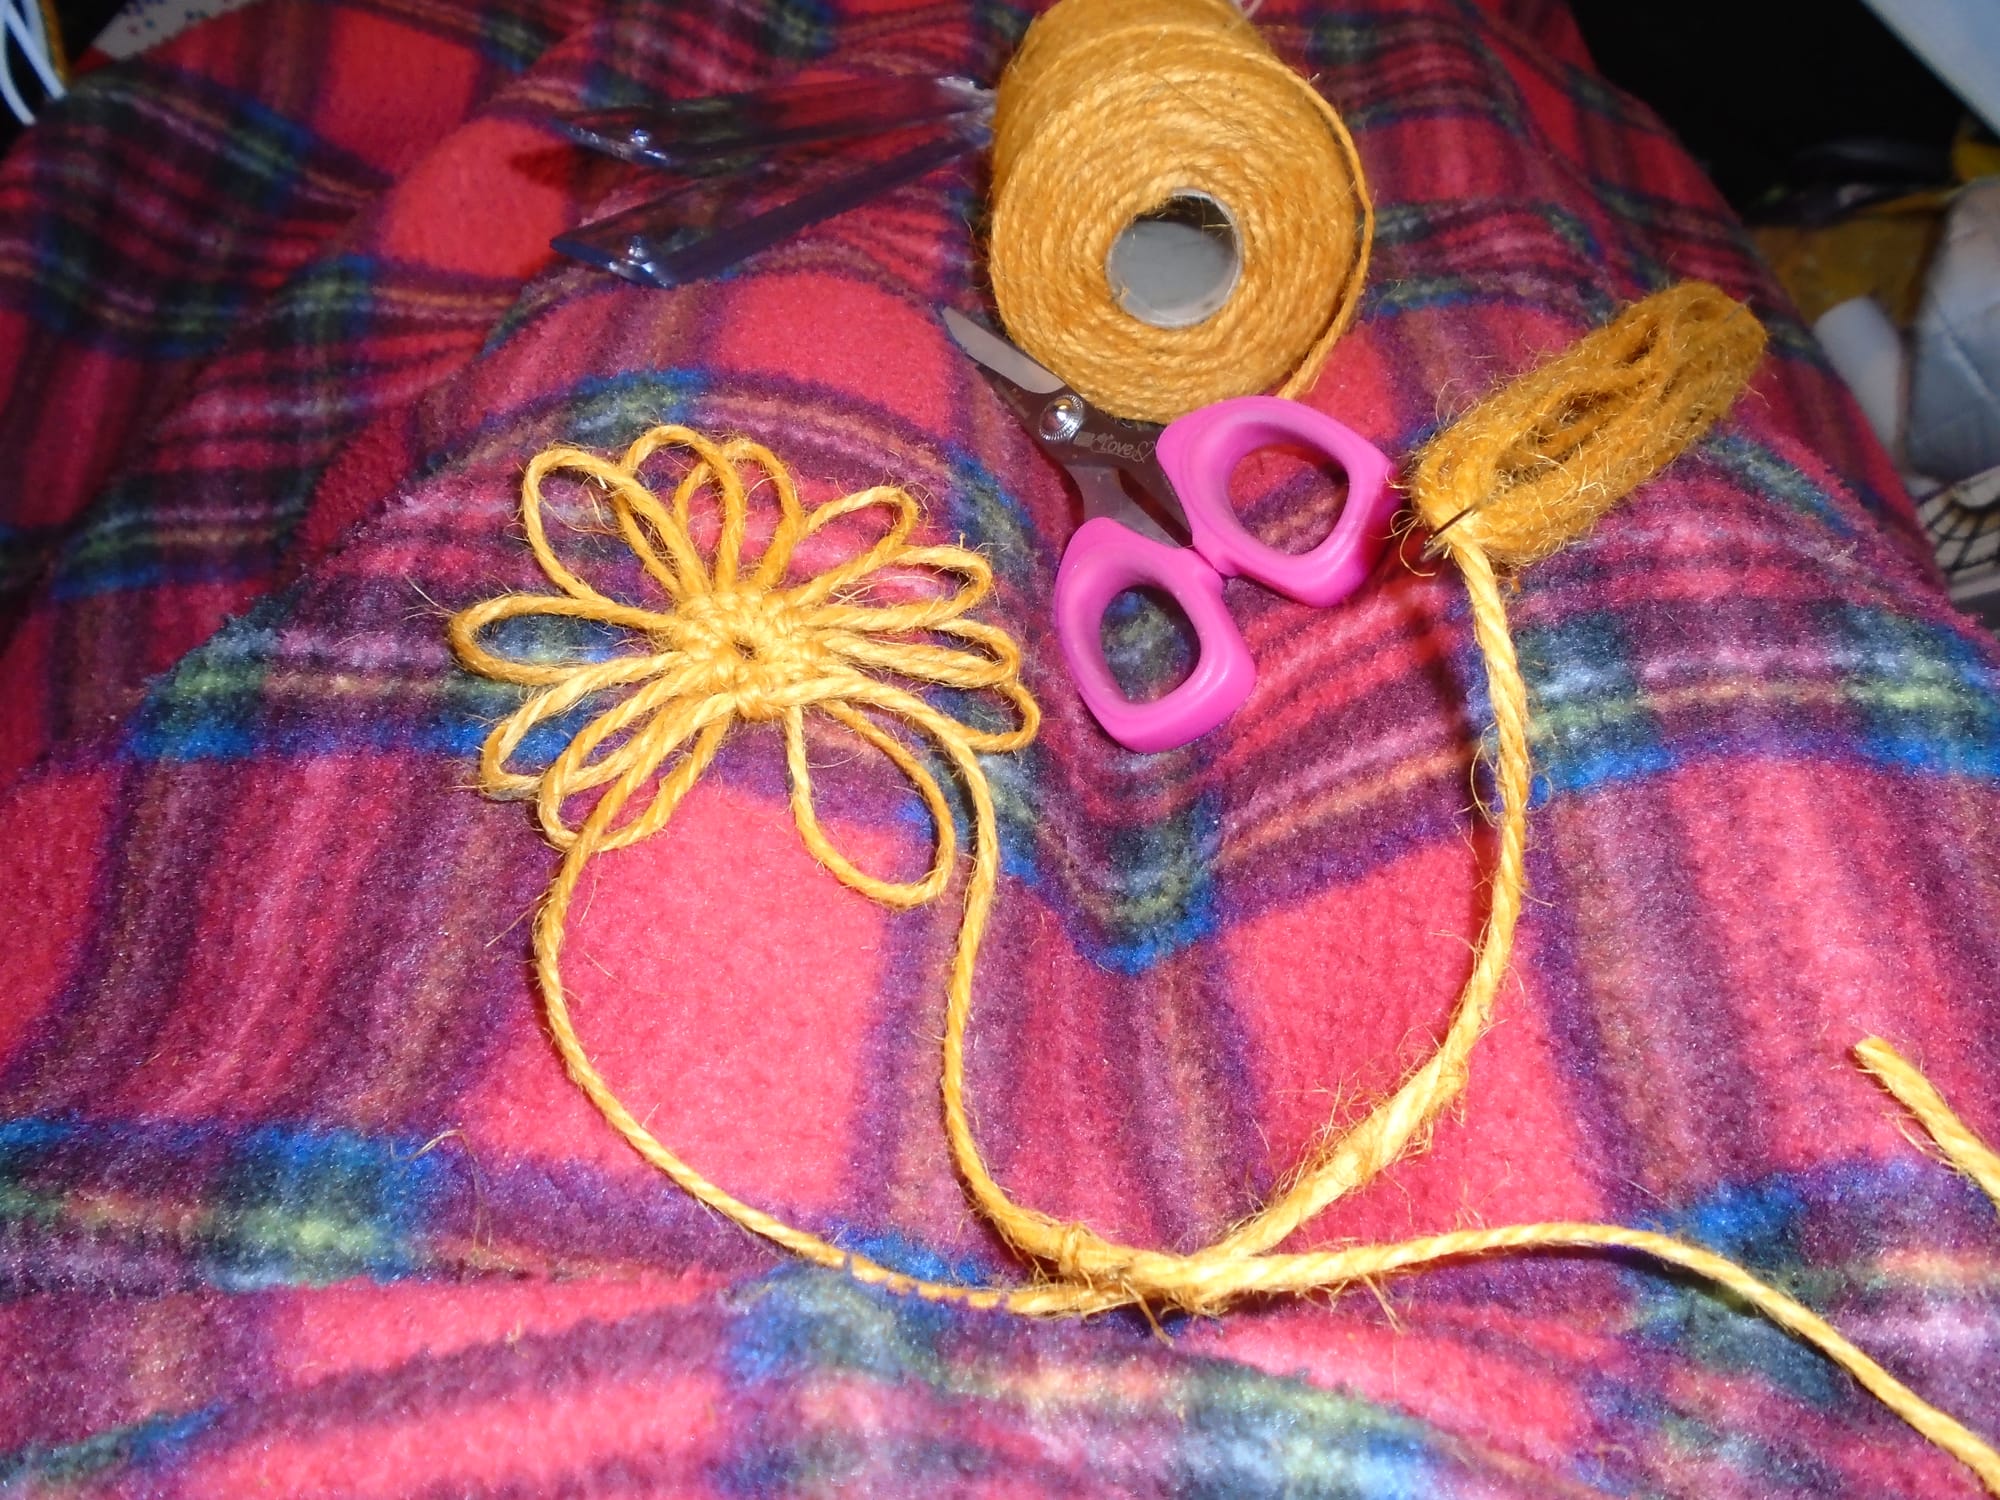
Now you make your toggle. The purpose of this is to allow the work to rotate while you're making the meshes, without any strings getting twisted. The book suggests using a button, but I looked at my grommet and decided that the hole was so small I could get away without. I simply cut a length of the plain cotton string I'd been using for my practice piece, folded it in half, tied several double overhand knots on top of one another near the ends, and threaded the looped end through the grommet. You can see it in the feature photo. The loop goes over your peg, and the work can spin around it as you go.
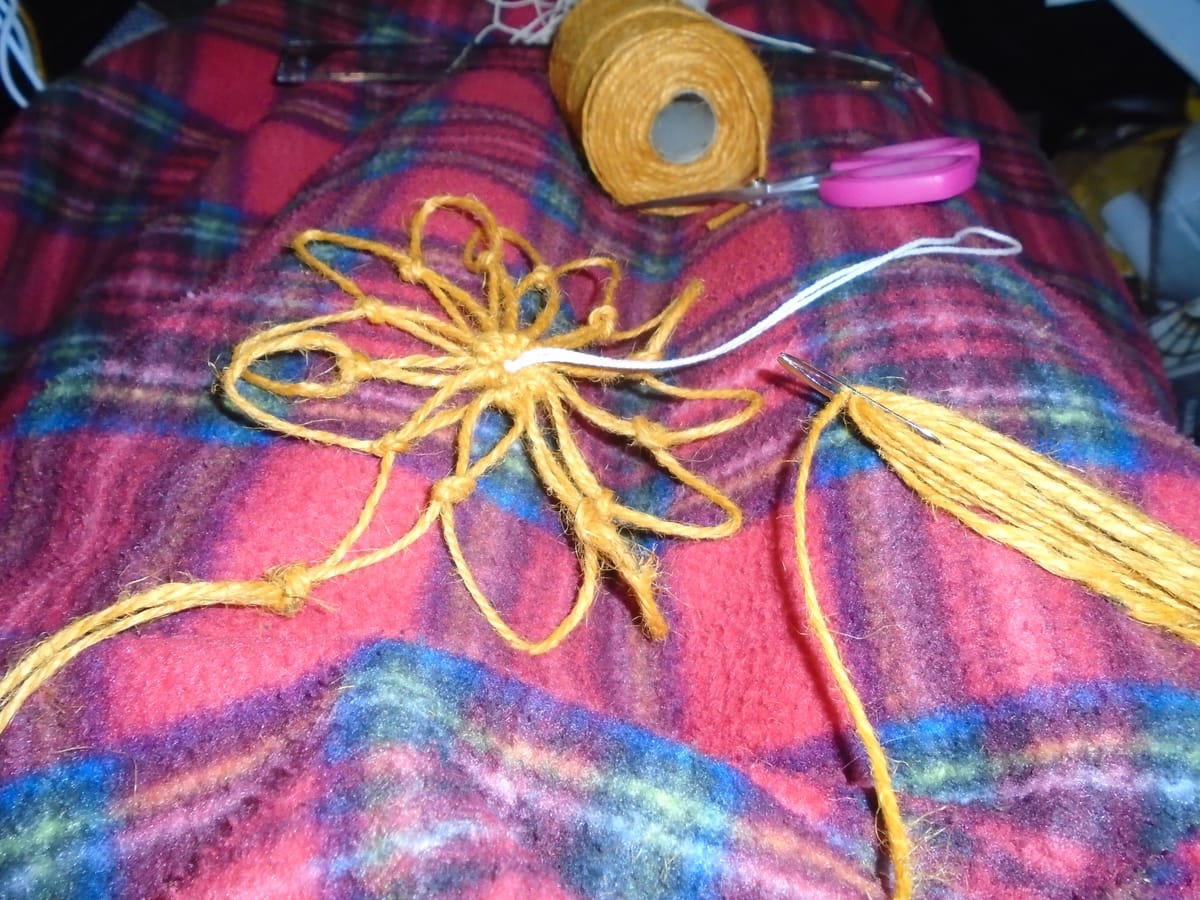
Rinse and repeat! You now mesh into all eleven of the loops, and then, once again, knot the working thread and the tail together for the twelfth loop (this is clearly visible in the feature photo). Now you know why you have to leave such a long tail at the beginning. This knot is called a drop knot, since its purpose is to drop the working thread to a position where it can start the next round. From here, it's all plain sailing; you just work another six rounds of netting, cut both the working thread and the tail after the final drop knot, and then thread a drawstring through the final round of netting. This twine is too thick for kumihimo, but a simple plait would work perfectly well. (I'd use the lucet, which would be much quicker, but I suspect I no longer have it.)
Well... I say another six rounds. The pattern calls for a 2-inch mesh stick, which is about 5 cm. I'm using that folding ruler, which is basically what I've got in that kind of size range, and it's appreciably smaller - only about 3 cm wide. A little investigation online informs me that the diameter of a standard sized match football is about 22 cm; the bag will take this as it stands without any need for increases, although the central meshes will be quite stretched horizontally - it won't look like the plate in the book. (Not uncomfortably so, though. The ball won't need to be forced in.) But I might need a few extra rounds to compensate for that. On the other hand, there is always that child across the hallway who is in the habit of leaving his - presumably child-sized - footballs lying about all over the place; it would be a kindness to the whole block of flats if I gave him somewhere to put them tidily, and I assume they'll fit the bag better than a standard match ball would. (He has about half a dozen of them. I'm sure he can't play with them all at once!) I may make another version with more loops for one or more of my friends at church who are fond of the beautiful game.
I used to play myself, y'know. A little. Kindasorta. I was always in goal, because I am not built for running (can't run at all now, but even when I could, I couldn't, if you follow me; I used to run like a kind of animated deckchair). But the players I most admired were generally speedy wingers, which probably says something psychological. I could no more do that than I could fly.
These days? Well, I can't keep goal, but at least I can mend it if it breaks!