Cord progression

I'm sure I can't be the only person in the world who hates knitting i-cords, as otherwise the French knitting dollies that are frequently given to children (and probably used by more adults than you'd think, as well) would never have been invented. But I'm not going to talk about either i-cords or French knitting dollies here. I want to look at what you do when neither of them is going to suit your purposes.
I used to be a yo-yo enthusiast. Not so much these days because I can't stand up for long enough to do hundreds (and I do literally mean hundreds) of consecutive loop-the-loops; that was my favourite yo-yo trick, and I was very good at it. I had a copy of the Guinness Book of Records as a child, and it contained a world record for consecutive loop-the-loops, which, I kid you not, I broke. Sadly this astonishing feat was accomplished in the privacy of my bedroom, where I had, as usual, gone so as not to be in the way; and so I did not get into the next edition. I didn't even bother telling my parents. They would not, after all, have been interested.
Unfortunately for me, the loop-the-loop trick went out of fashion. This would not have been a problem except for one thing: to do loop-the-loops well, you need a yo-yo with a braided cord, not a twisted one. Try doing them with a twisted cord and you won't manage more than about a dozen, no matter how good you are, because the cord will just twist itself up. And I'm fairly sure it's cheaper to make twisted cord than braided cord, so if people aren't doing loop-the-loops any more there's not much point in yo-yo manufacturers using the latter.
You also need a bit of weight on your yo-yo; modern ones tend to be too light to do the trick effectively. So when I saw the yellow wooden one pictured above, I bought it straight away, because it was certainly going to be heavy enough. However, of course it had a twisted cord, so if I wanted to do my little trick I needed to restring it.
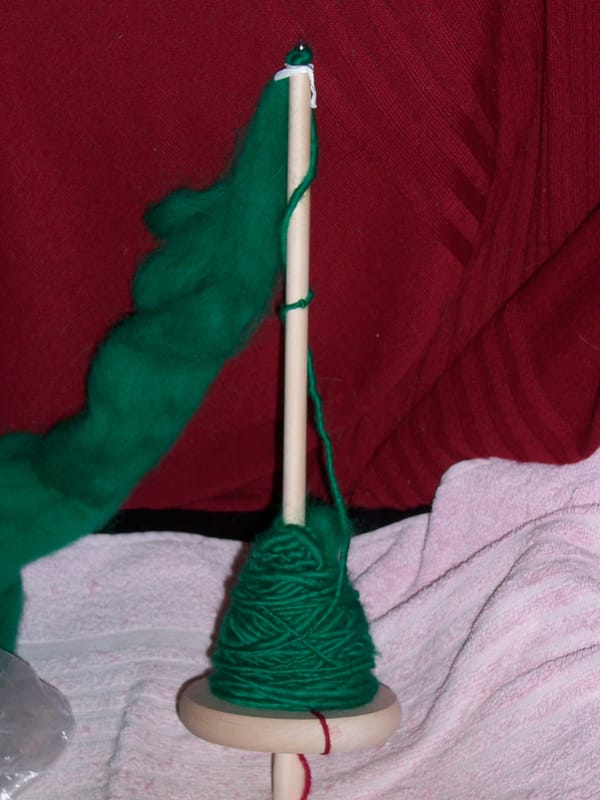
Enter the lucet.
The lucet is that thing in the middle of the picture that looks like a tuning fork made out of plastic by someone who wasn't quite sure what a tuning fork is for. The little dumb-bell-shaped thing next to it is a stay to go over the tines to prevent the thread from coming off in transit, so it is a very portable craft. There's also a fine crochet hook, which is neither part of the lucet nor strictly necessary, but it does help in hooking the thread over the tines. In effect, it's a two-pronged French knitting dolly, but unlike a regular French knitting dolly it gives a very tight cord. If you want to make a thin but strong cord that doesn't twist, a lucet is your friend.
Ah, but what if you want an even stronger cord? Maybe even in different colours? In that case, put the lucet away; what you need is kumihimo.
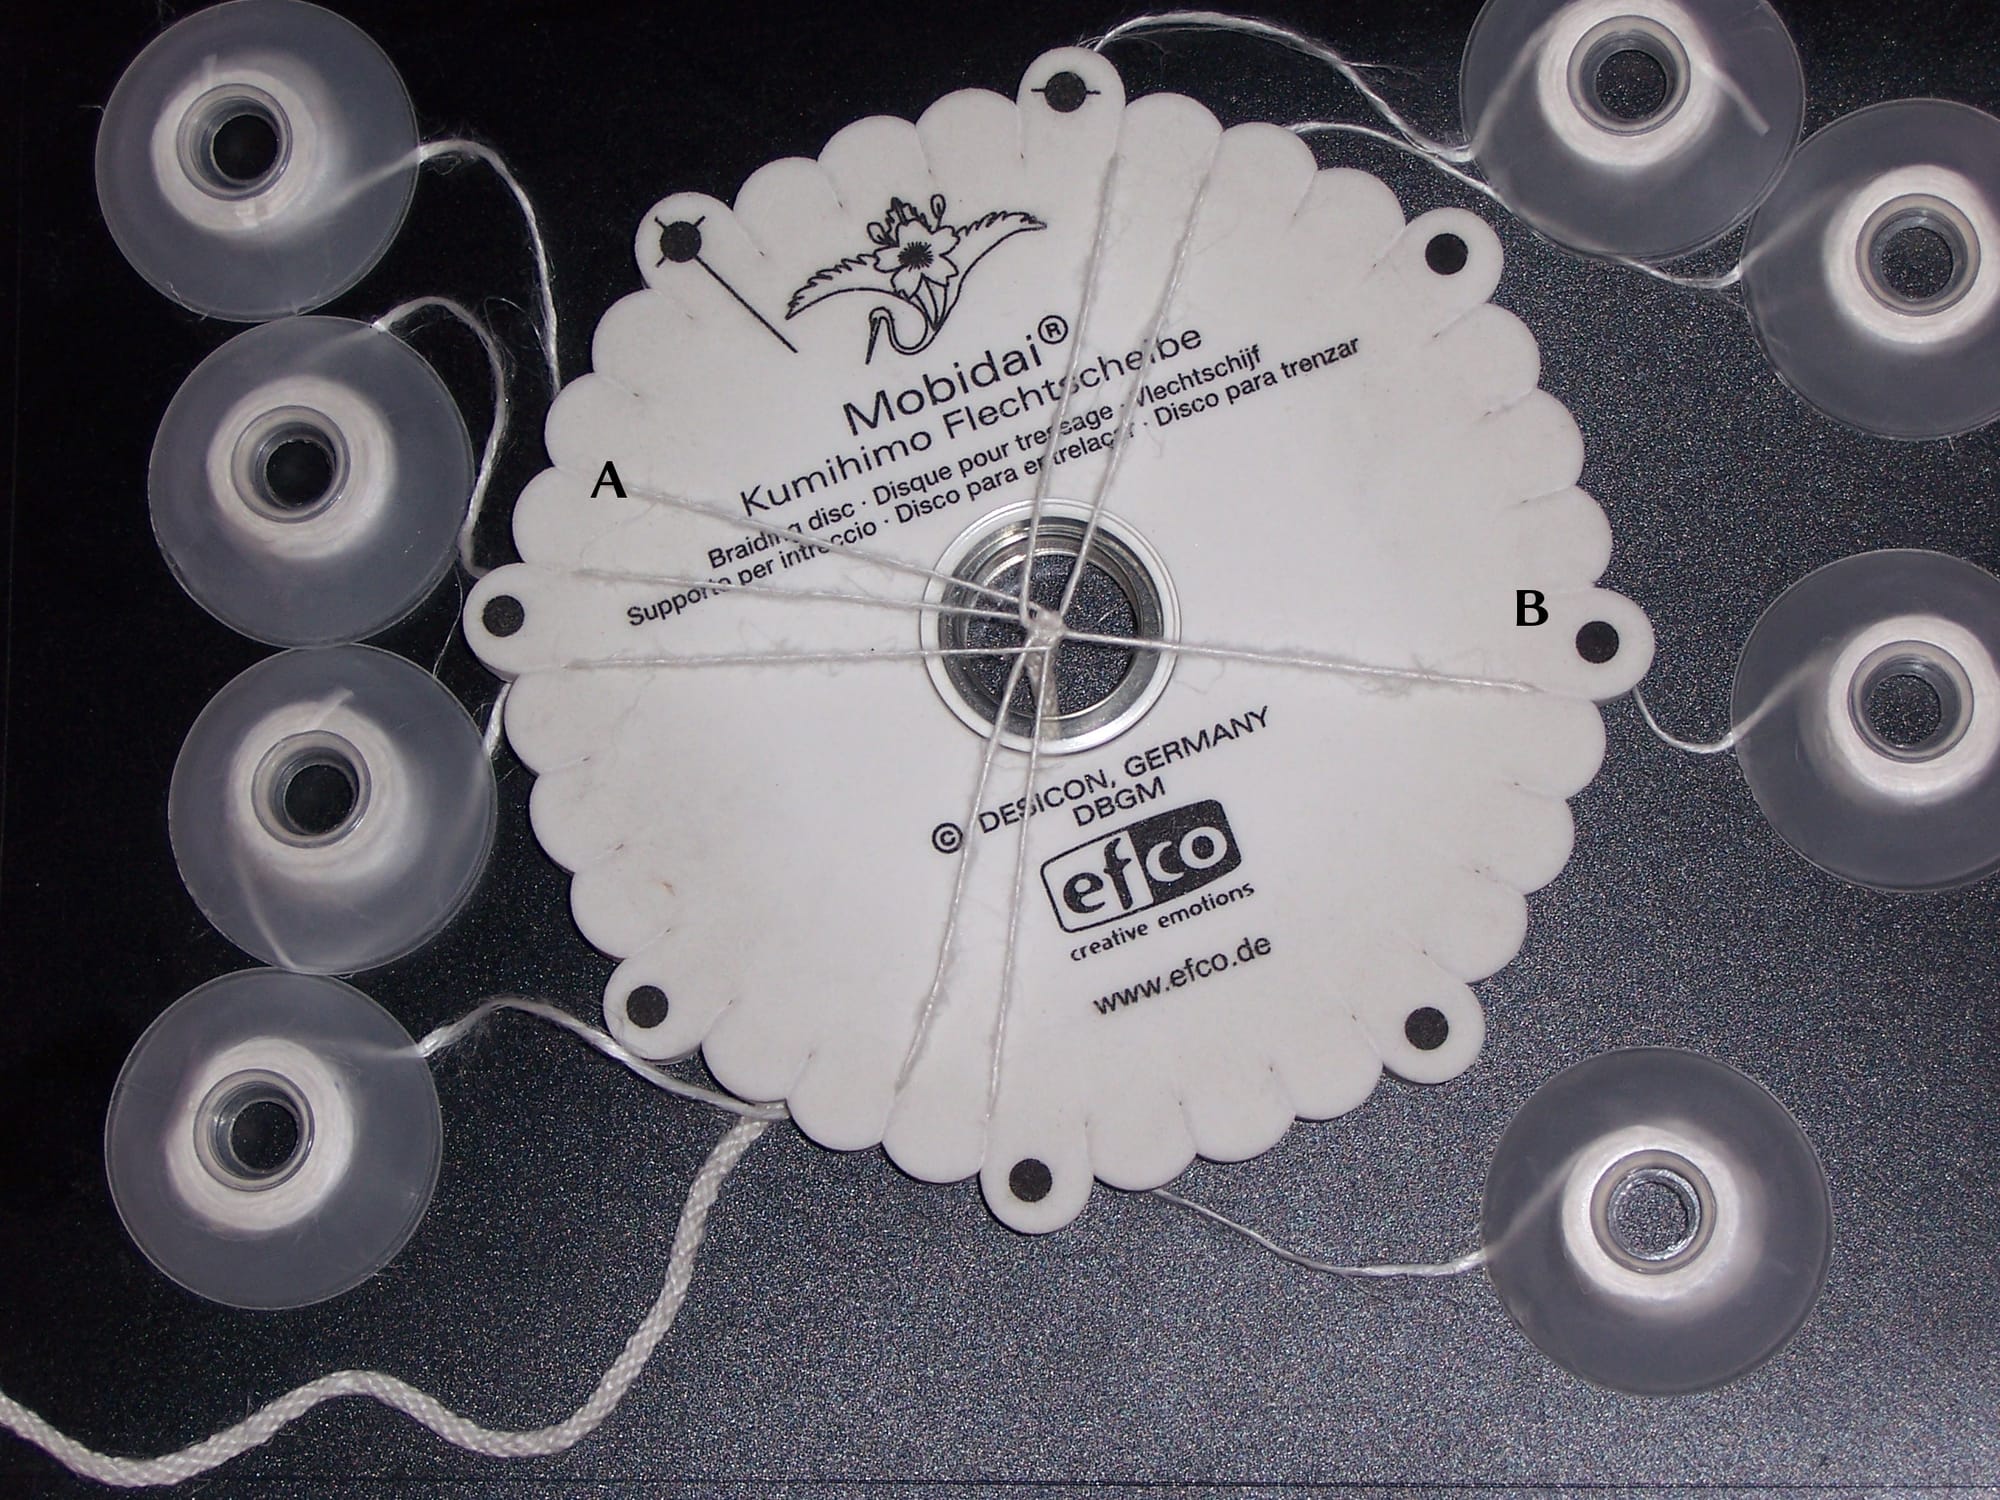
Kumihimo is a little fiddly to set up, because for a piece like the one shown above you are not winding eight separate threads onto eight separate bobbins, much as it looks like it. What you actually do is take four very long threads, find the middle, and then wind each end onto a bobbin till you reach the middle of the thread, so you have four sets of paired bobbins. Each pair is then stretched across the disc with its midpoint at the centre of the disc, and each group of two threads is evenly spaced. So, if you're using eight bobbins as shown here, the pairs of threads are at right angles. The braiding technique itself, however, is immensely simple: each thread passes in turn across the middle of the disc, just to one side. It is the turn of the thread currently at A to move, and it goes to the point marked B. The disc is then turned to the next pair of threads (a quarter turn in this case); I can't work out from the photo which direction the disc turns, but in fact it doesn't matter as long as you consistently turn the same way. The new pair of threads then crosses over the disc in exactly the same manner as before; you can find detailed and very clear instructions here if you are interested, but if you prefer video instructions it is very easy to find them on YouTube.
Another thing you can do with kumihimo is to add beads to it, thus creating interesting jewellery like this.
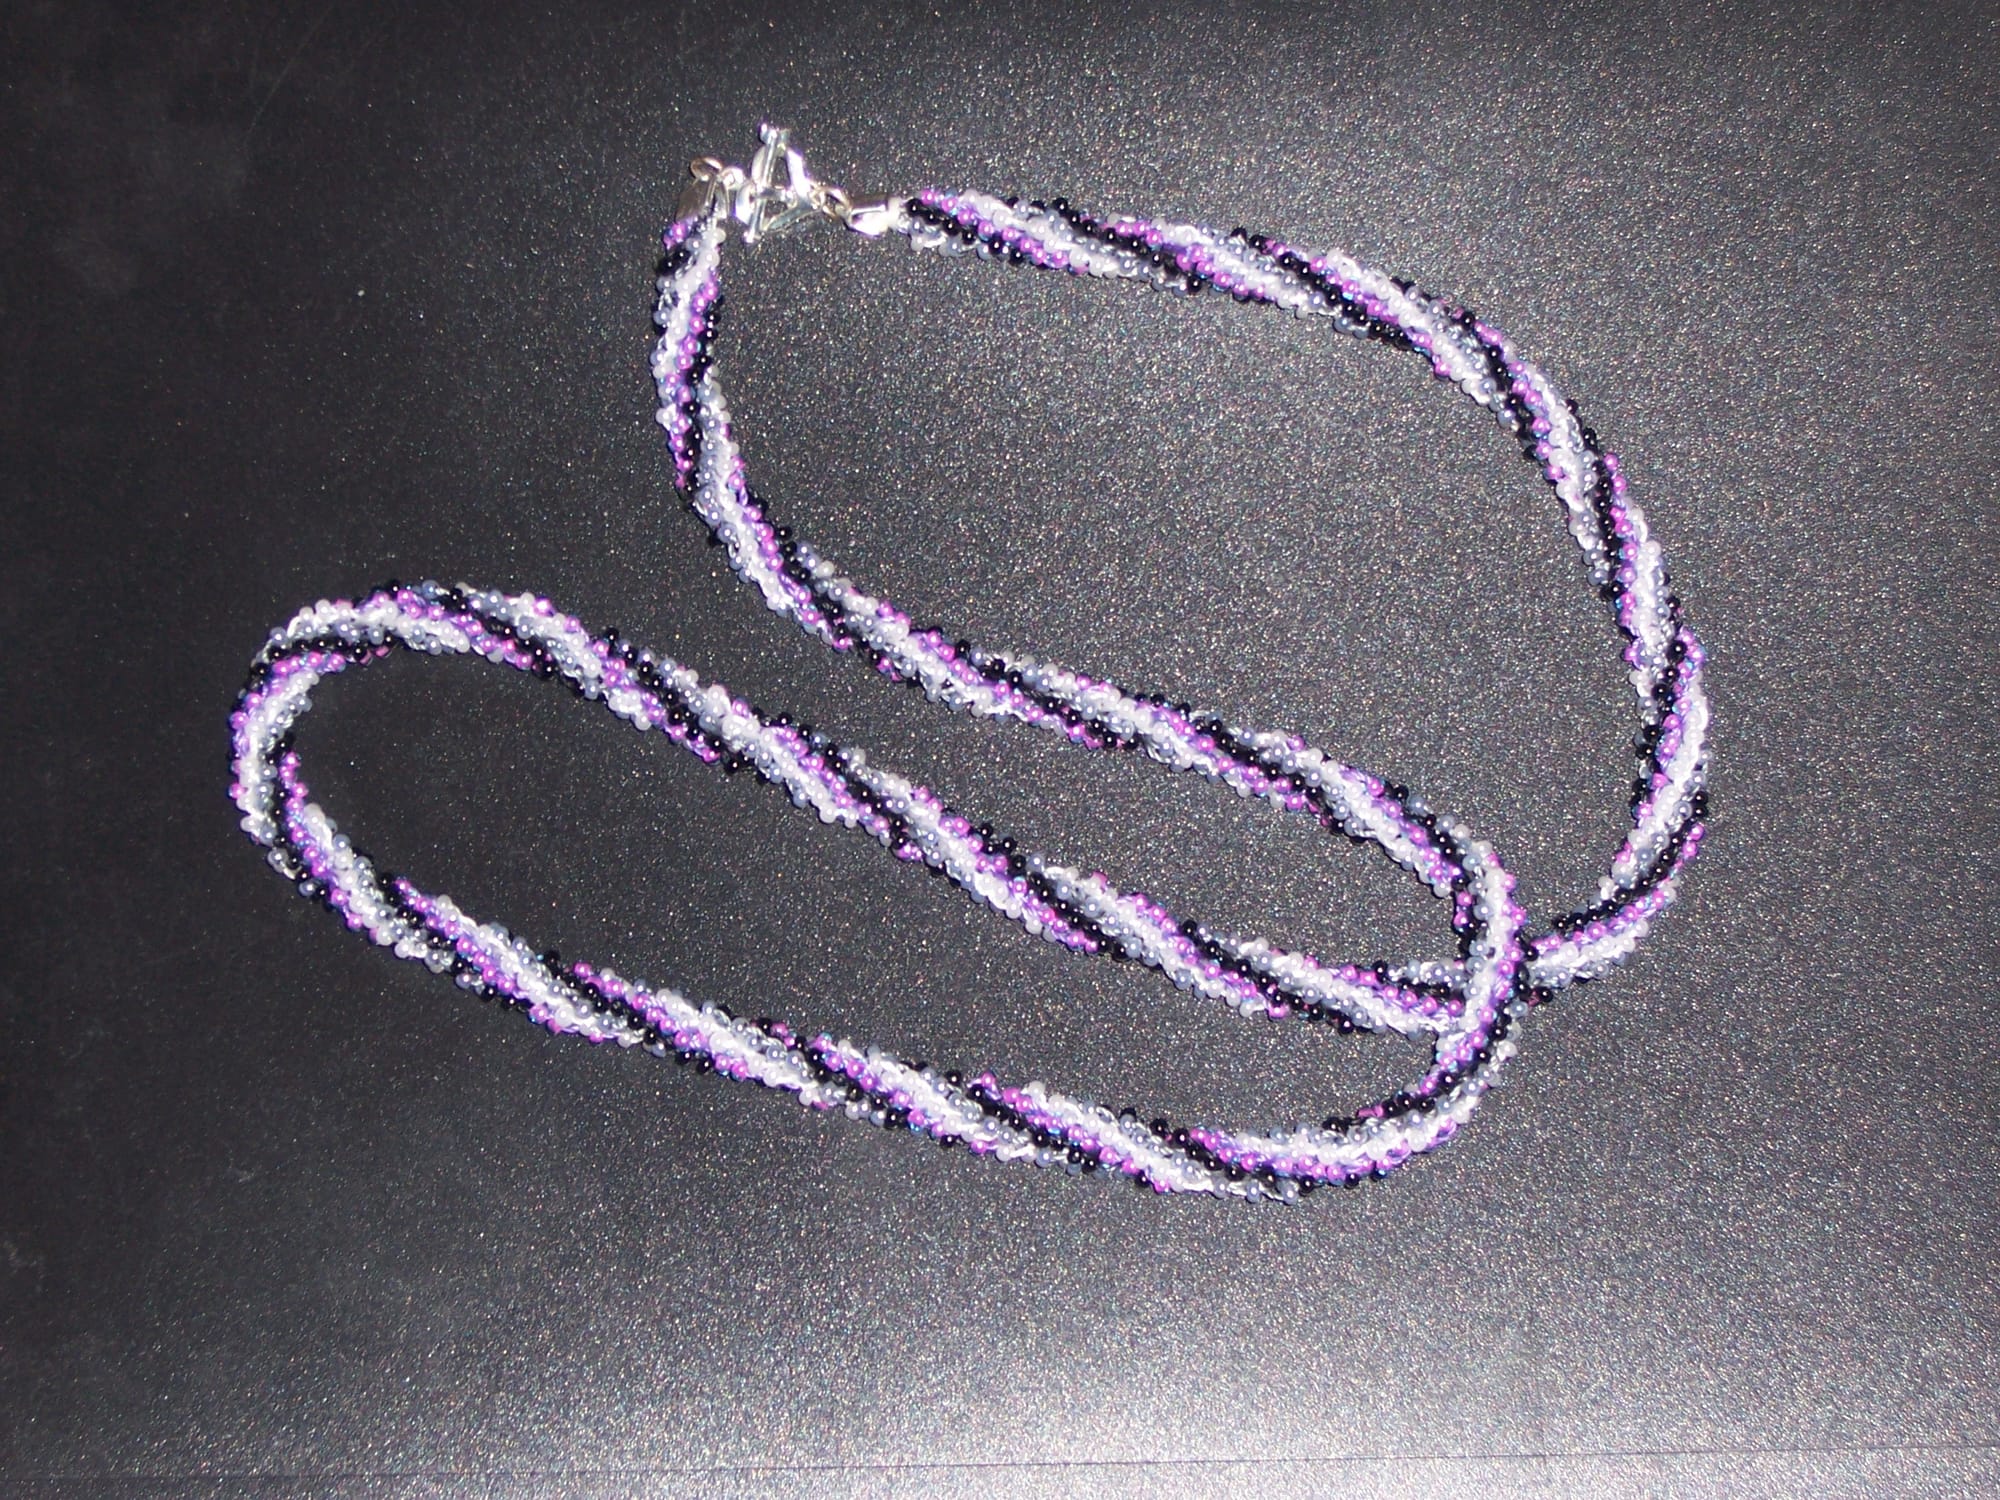
This was my asexual necklace. (I've since realised that, although I am indeed on the asexual spectrum, I'm not full-on asexual; I am in fact what is known as demisexual, but the colours are the same, so I could still wear the necklace if I had it.) It is made in exactly the same way as the plain white cord shown earlier, except that each pair of bobbins is strung with a different colour of beads.
It is worth noting that disc kumihimo, while undoubtedly the best-known style of kumihimo outside Japan, is not the only type; you can read more about the other types here, but I'm not personally qualified to comment on any of them as I have never tried any of them other than the disc version. (Sadly, there are no instructions given for working the flat braids, as otherwise I would very much like to try; I'm fond of working with beads.)
So there you have it. I will never knit another i-cord!